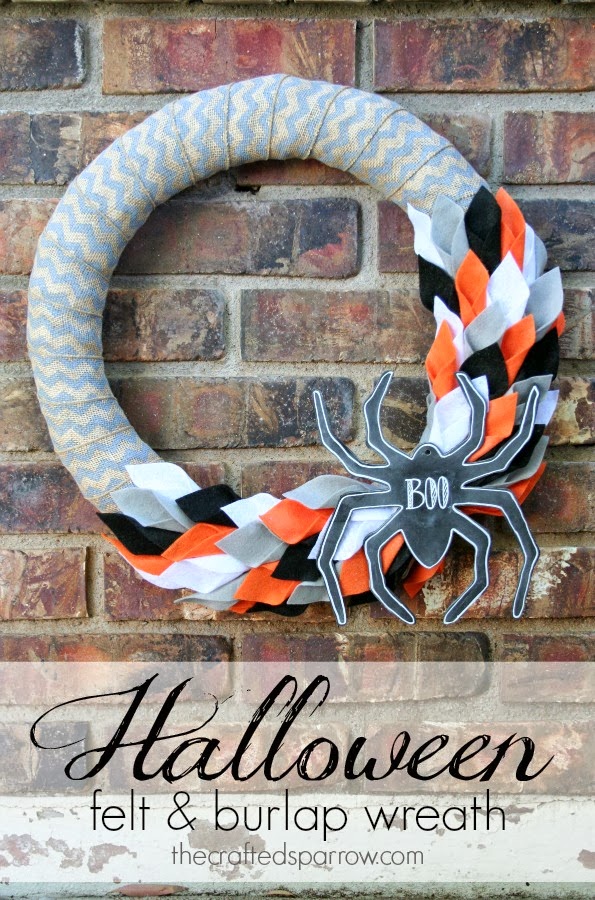
Today I am sharing the Halloween Felt & Burlap Wreath I made last week. I love how it turned out, it’s simple and fun. Plus it is super easy to make, you only need a few supplies and about an hours worth of time.
Supplies:
– Scissors
– Straw Wreath Form or any round wreath form
– Chevron Burlap Ribbon from Hobby Lobby
– Felt in your choice of colors
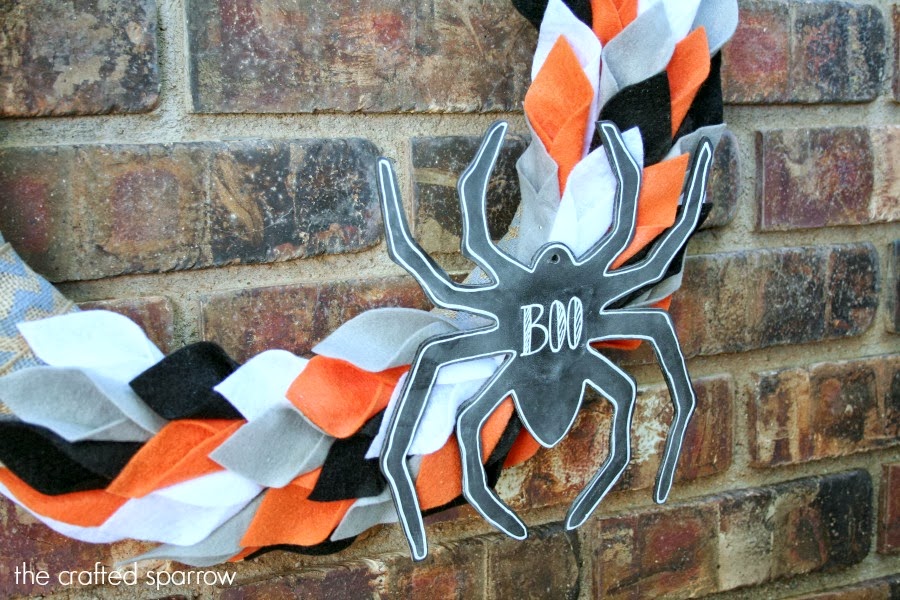
– Wood Spider, I found mine at Hobby Lobby
– Silver Sewing Pins
– Chalkboard Paint & Chalkboard Marker/Chalk
– Glue Gun

1. You will need to create a large leaf shaped template about 4″ long on a piece of cardstock or paper. I used this to cut all my felt leaves. Cut as many as you’d like, I just cut a ton not knowing how many I’d actually use.
2. Wrap your entire wreath with your burlap ribbon. I pinned my ribbon to the straw wreath. Almost everything is pinned on the wreath so I can reuse it easily in the future.
3. Individually take each felt leaf and fold both sides of one end in over each other to create the tubular petal look. While holding it use a silver pin and pin it to the wreath where you want it. Just continue this in the pattern you like, I mixed mine up so there wasn’t always two colors touching. Stop when you feel like it’s enough.
4. Take your wood shape {whatever shape you choose} and coat it in chalkboard paint, I like DecoArts brush on paint. Prep your chalkboard surface per the bottles instructions. I used a chalkboard marker to trace a white outline around the edges and write my message. If you want to seal the message so it won’t get ruined with weather conditions outside just give it a quick spray of aerosol hairspray or a clean spray sealer.
5. Glue your wood shape on to your wreath and hang it!


This is so beautiful! I love it! The little spider is the perfect Halloween-y touch. I popped over from Link Party Palooza– thanks for sharing!
~Abby =)
Absolutely beautiful colors! I love the little spider too. Great job.
So pretty! And you can’t go wrong with burlap. 😉
I just had to let you know that your wreath is so pretty. I love it. Great job.
Thank you so much Stephanie!