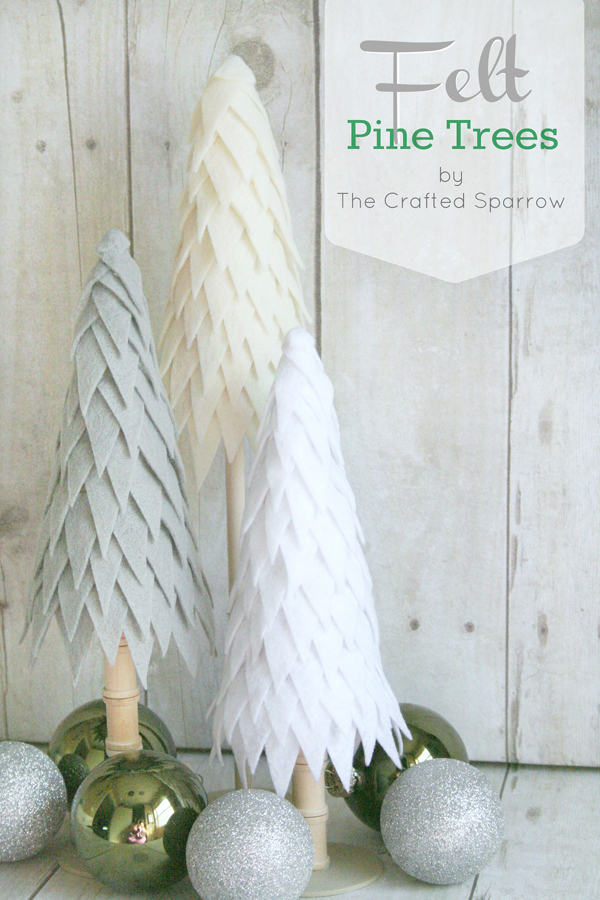
I thought it would be fun to use one of my favorite crafting materials to create these Felt Pine Trees for my holiday decor this year. I originally saw something similar online for sale for {GET THIS} $65 – $95 per tree! WHAT!!! Nope, no way, not gonna happen. So I made my own and they turned out pretty darn similar.
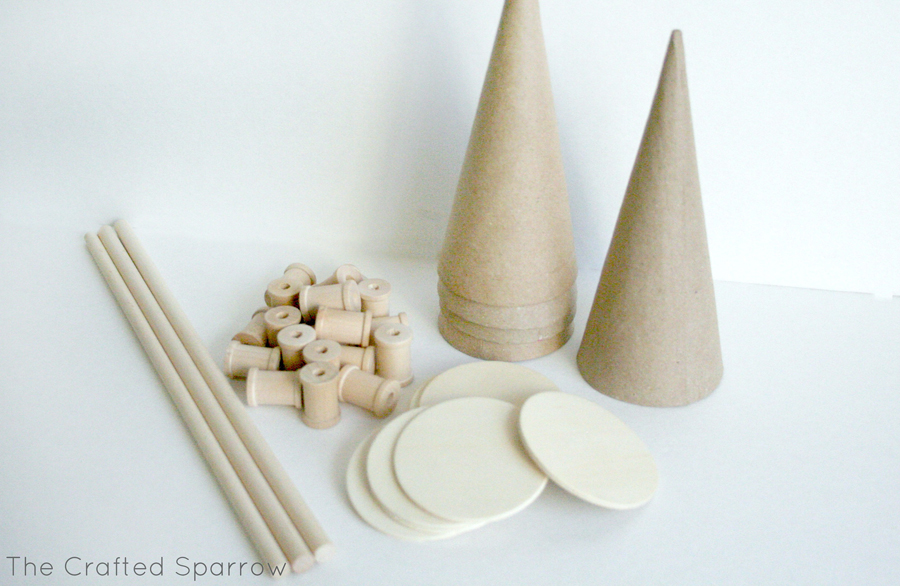
Supply List:
– Felt {2 sheets per tree to be safe}
– Wood Discs to fit inside cones {Michaels}
– Paper Mache Cones {Michaels}
– Wooden Spools or Dowel Rods
– Hot Glue Gun
 You will need to start by cutting a bazillion little felt triangles. Cut your felt in to 1 1/2″ long strips, then cut those strips in to triangles. I used about 2 sheets of felt per tree.
  Now take your small wood disk and place it on the bottom of the paper mache cone, some of mine fit snuggly inside the cone and others I had to hot glue on to create the base for the trunk to be glued to. Now I created my trunks for the trees by either gluing wooden spools together or cutting small dowel rods to the size I wanted. I then glued the trunks to another wood disc to create the stand {which I painted a light taupe color}.
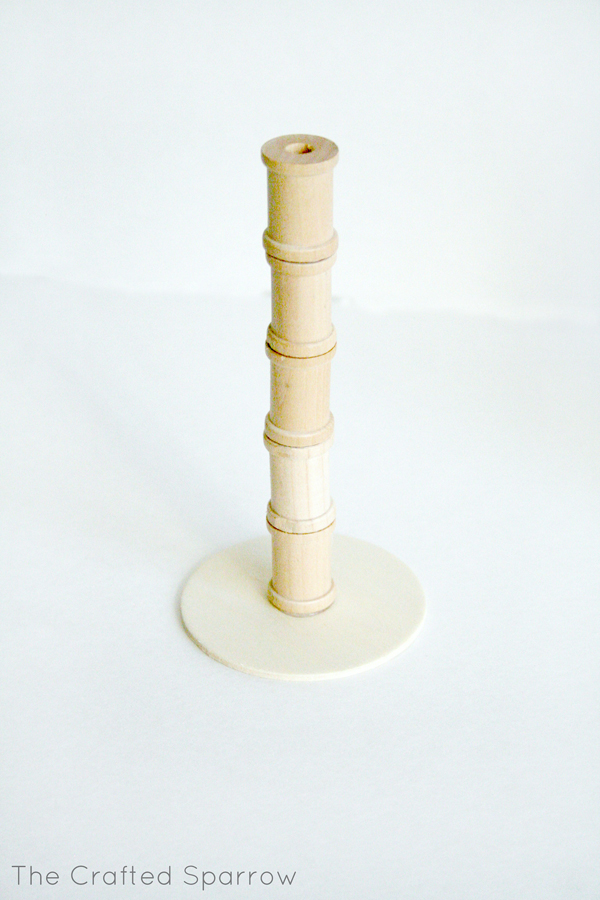
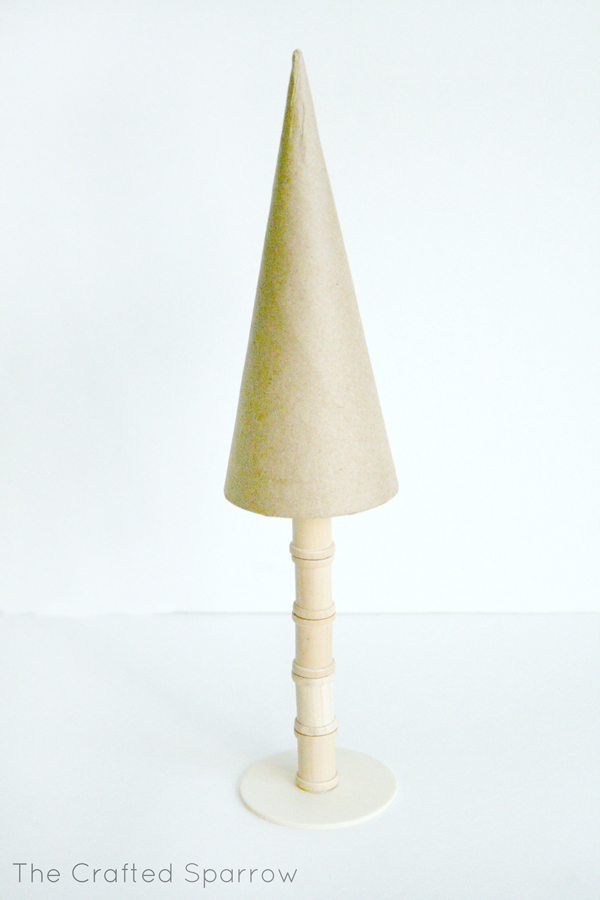 Then glue to the other end of the trunk to the underneath side of the cone. Now you can begin placing your felt on the cones. Starting at the bottom and going row by row add your felt triangles. Overlapping each row like shown in the picture.
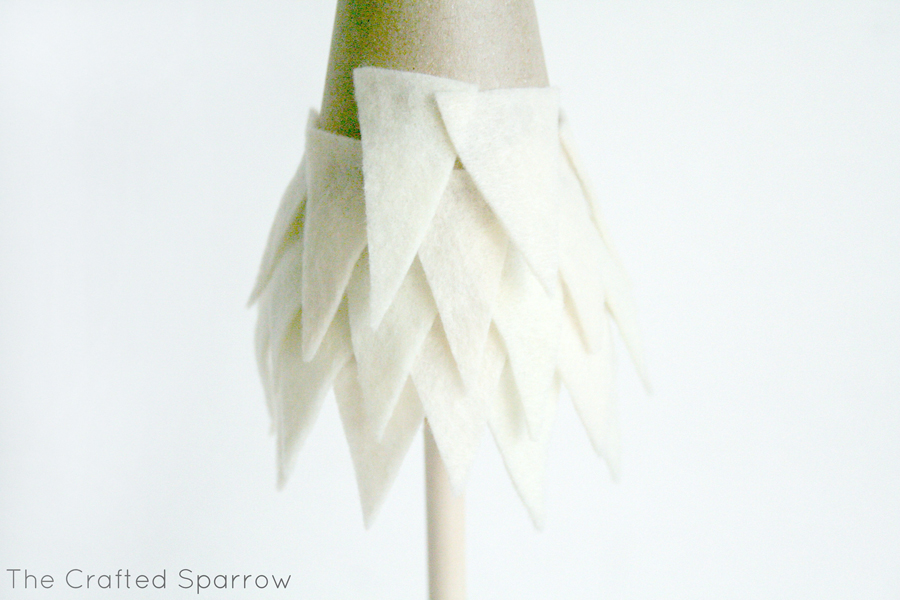 Once you get to the top you will need a small 1/2″ circle of felt in the matching color to glue on top to finish it off. Then you should have some pretty fancy little Felt Pine Trees to adorn your Christmas mantle or displays. I am loving these little trees and can’t wait to find a spot for them when my decor is up.
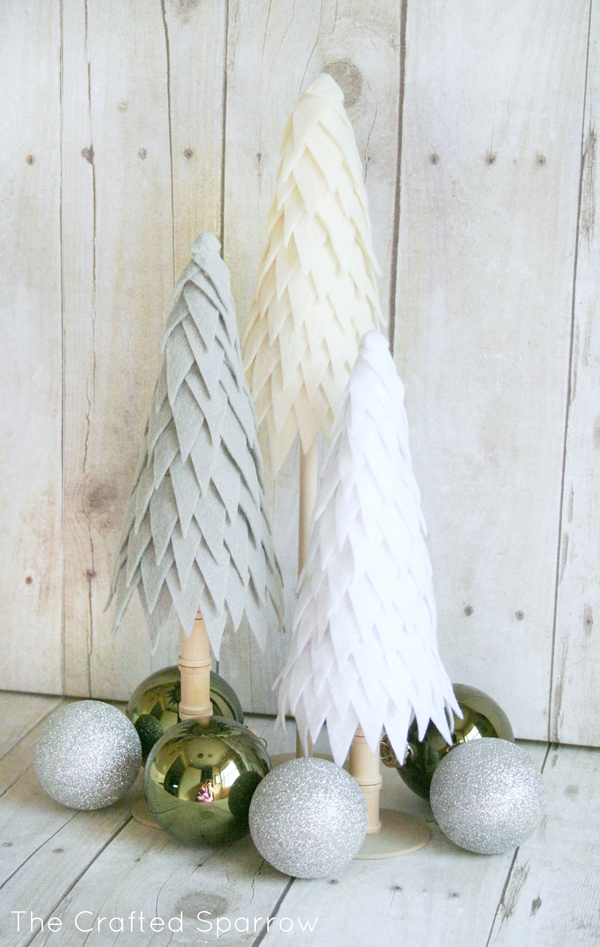
P.S. HERE is the link to the original inspiration that cost $65 – $95 per tree in case you were wondering.


I like yours better! The spool trunks are brilliant!
These are fantastic and beautiful!
So, so beautiful!! Love the colors you choose for Christmas! Can’t wait to see what’s next! Pinning!
thanks for linking up to Make it monday! these have a great martha stewart quality about them 🙂
just gave them a shout out on my FB page!
Simply gorgeous and I love the calming colors you chose.
Love these!
Adding on my to-do list!
and love the colors you chose!
Seriously… I am coveting these..there I admit it!! hehe!! these are just FAB!!!!! 😉 Bonnie
Wow they are so beautiful, thank you for the wonderful tutorial! Have lovely week
These are adorable! 🙂
I love this! So simple and so CUTE! 🙂
You are so so clever!
Super cute!! I love the colors you used! Visiting from Home Stories A to Z party : )
Love Always,
Liz
Love these! I love felt and the neutral colors are just my style!
Pretty! I love how you made the stands 🙂
Adorable. We are going to make cone trees for a craft night and after seeing yours, I think we will make your cute version. Well done!!
These are just beautiful! Thanks so much for sharing the tutorial! 🙂
Really pretty and classy looking. Easy to make. They are for me. Thank you for sharing. Partying from Sumo’s Sweet Stuff.
We may have met by chance…but we become friends by choice.
http://simpleesue.com/try-one-new-recipe-a-week-best-pa-dutch-apple-dumplings
I wanted to let you know that I was trying to grab your button to put on the blogs that I love and it says that you moved or have deleted it. Just wanted you to know.I really am enjoying your blog.
I was hoping that we could trade buttons. I’m starting out for a couple of months now and want to start getting more exposure.
Thank you. Sue
Very Very Pretty.
these are adorable!! 🙂
Ok, those are so cute! I love this; I think I might have to actually do this one. Thank you for sharing. Would love it if you would share this at my Make it Pretty Monday party at The Dedicated House. http://thededicatedhouse.blogspot.com/2012/11/make-it-pretty-monday-week-22.html Hope to see you at the bash! Toodles, Kathryn @TheDedicatedHouse
These are so adorable…I sure miss having a Michael’s close by! Thanks for the great idea!
Sarah
Oh my gosh, I love these!!! Pinning this!!!
They are adorable!!! Just perfect for a winter table! 🙂 Or…imagine putting tiny Christmas ornaments on them…! 🙂
These are too cute for words!! I’d like to invite you to share them at my party, Twirl & Take a Bow at http://www.houseontheway.com. I hope you can join in the fun!
Leslie
Very nice!
I saw you on the Mad in Crafts feature, and I love these! I pinned them. =) Thanks for such an easy and cute idea!
Angie from http://www.marigoldmom.com
so so pretty! I am totally gonna try this, but probably coat em in glitter! 🙂 pinning now.
We just got our link party up and running and would love if you came and joined in on the fun. Each week we are giving away free ad space for one week to one random party goer. Our main site gets thousands of hits per day and The Better Half gets thousands per week. Hope to see you there! http://www.oneprojectcloser.com/the-humble-brag-link-party-6/
These are so cute! You should come share these at my link party
http://www.shecookscraftsruns.net
Great job. But $65 to buy it seems like a bargain by the time you put all that work and material costs into it. You’re more patient than I am. I’ll buy mine (BTW link doesn’t work, so don’t know where to buy it – just goez to an empty cart)
These trees are wonderful. I love the neutrals. Can’t wait to try these.
Ruth
GORGEOUS!! I had bought most of these materials intending to make something like this! I might just have to borrow your idea :o) They turned out beautifully! Pinning!!
Hi there! Just saw this gorgeous little trees featured at Uncommon Designs link party – I just love them so much I had to come over and tell you! Have a great week 🙂
These are just gorgeous! Found you at Uncommon Designs. Pinning!
Such an awesome craft! I am your newest follower.
CONGRATS!!! You have been featured at The DIY Dreamer… From Dream To Reality! Come on over and grab your featured button… you deserve it!
http://thediydreamer.com/2012/11/from-dream-to-reality-linky-party-42/
These are really cool. Great job!
Very cute! I love these!
I’ve pinned and shared on FB!
What a wonderful craft idea! Thanks for the inspiration.
Oh My!! These are wonderful. I am a little confused at the directions. Are the felt strips 1 1/2 inches wide, by how long?? Thanks in advance, and I will be back!!
Love this!! These are so adorable!
I made these too, except I used a large empty ribbon spool as the base and put “ornaments” on it since mine looked like a five year old who found the scissors made it originally.
These are just lovely! Thanks for sharing 🙂
http://cafecraftea.blogspot.com/
Bellissimo!