
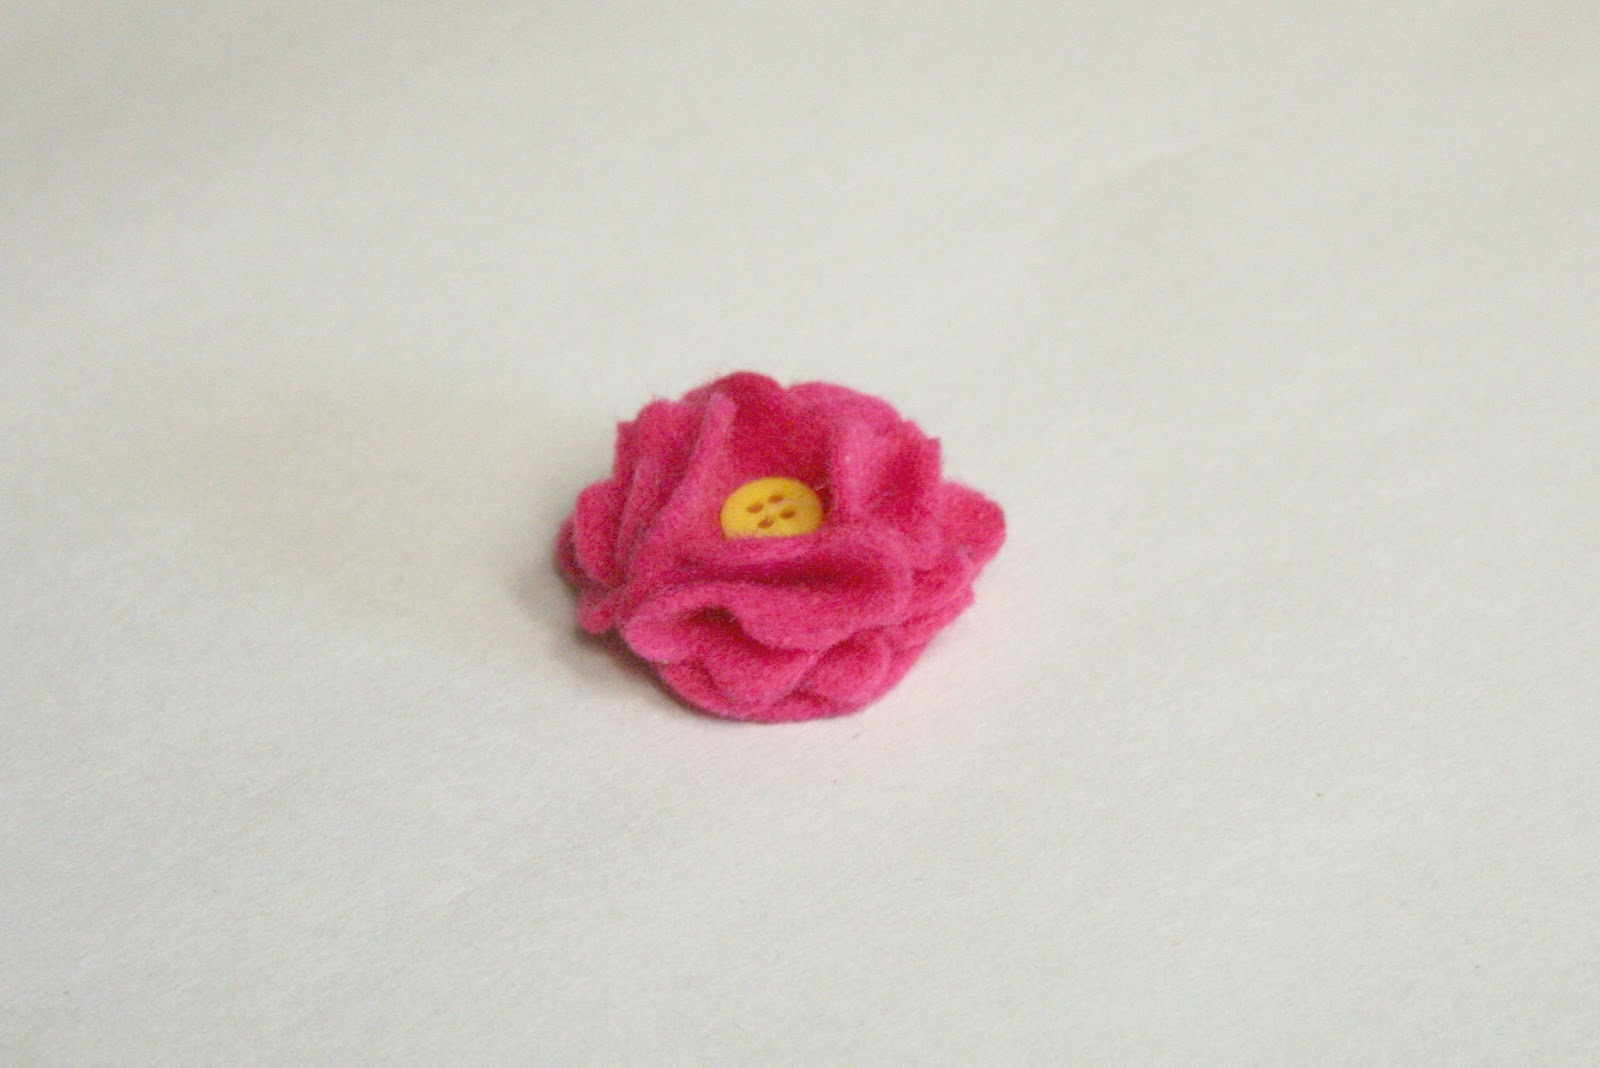
I have done a lot of projects projects using felt flowers like my Fall wreath HERE, Felt Flower Ring HERE, and my Valentines Day wreath HERE. I love felt, it is no secret! It is super inexpensive, comes in great colors {even if it’s just from the local craft store and not the fancy stuff}, and there is so much you can make with it. I thought today I’d give you a refresher course in how to make the {5} different felt flowers featured above. They are all easy and simple.
Supplies:
– Felt, whatever colors you want to use
– Scissors
– Glue gun and/or thread
– Buttons or Rhinestones, optional
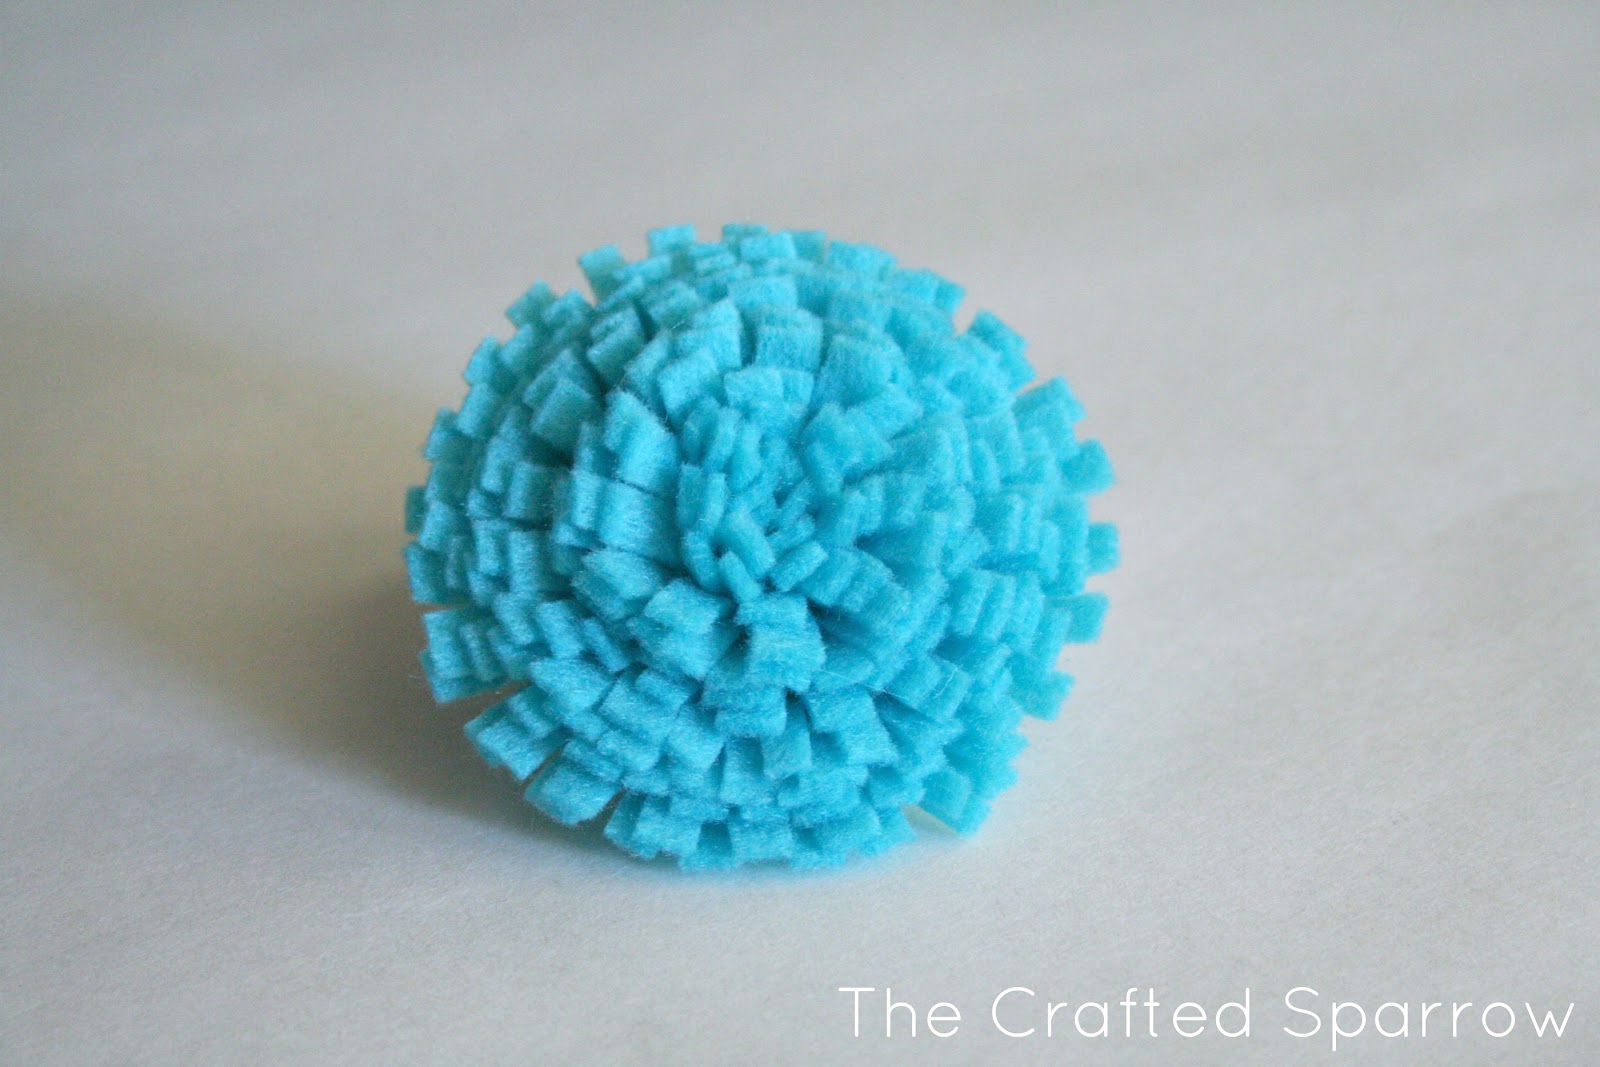
Flower #1 – Looped Mum Felt Flower

Start with a long strip of fabric. For these big ones I typically use felt by the yard, if your making smaller MuM style flowers like in my previous ring post you can use the 8.5 x 11″ felt sheets from the craft store. This particular flower is about 4″ in diameter and I used a 26-28″ long x 1.5″ wide piece of felt.

Using a glue gun, glue the edges together all the way across.
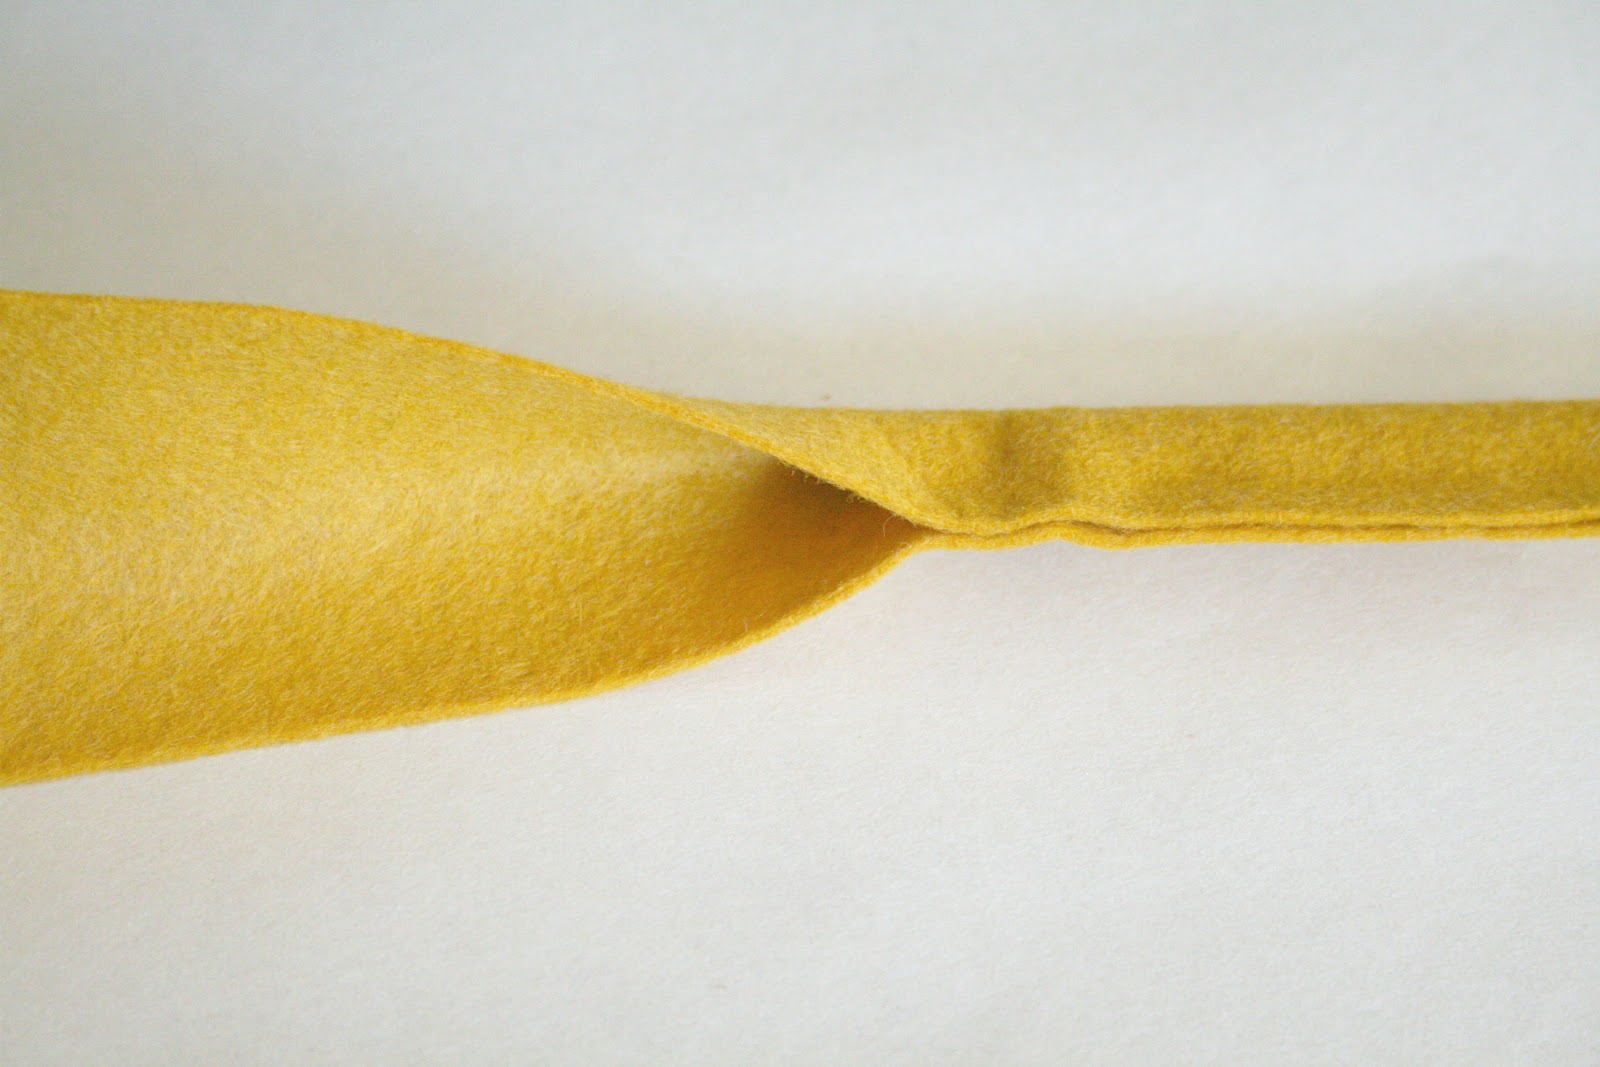
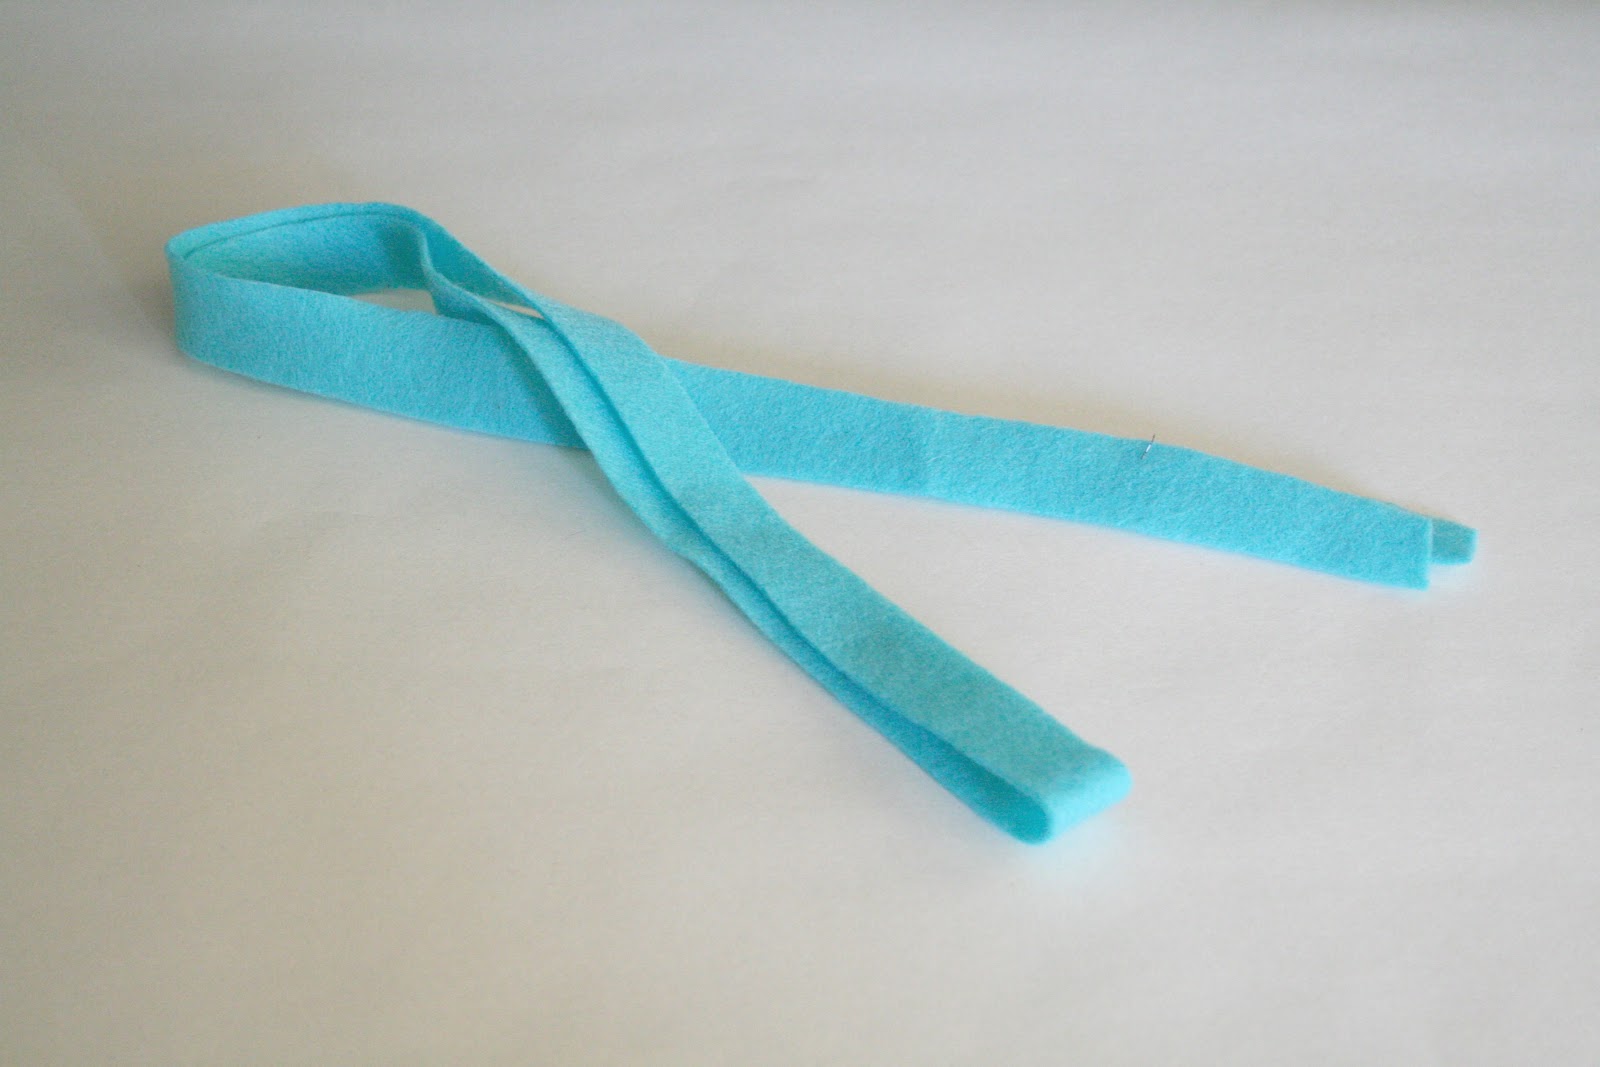
Once it’s glue along the edges take your scissors and snip every 1/8″ – 1/4″ depending on how big you want your loops to be. You can have bigger loops if you want, I prefer them closer together. Snip the entire length of your felt.
It should look like this when your done.
Starting at the end place a small dab of glue from your glue gun and begin to roll your felt like this. And continue to glue as you go until you reach the end.

When your done it should look like this. You can place a rhinestone or button in the middle if you’d like, but they are pretty plain too!

Flower #2 – Straight Mum Flower
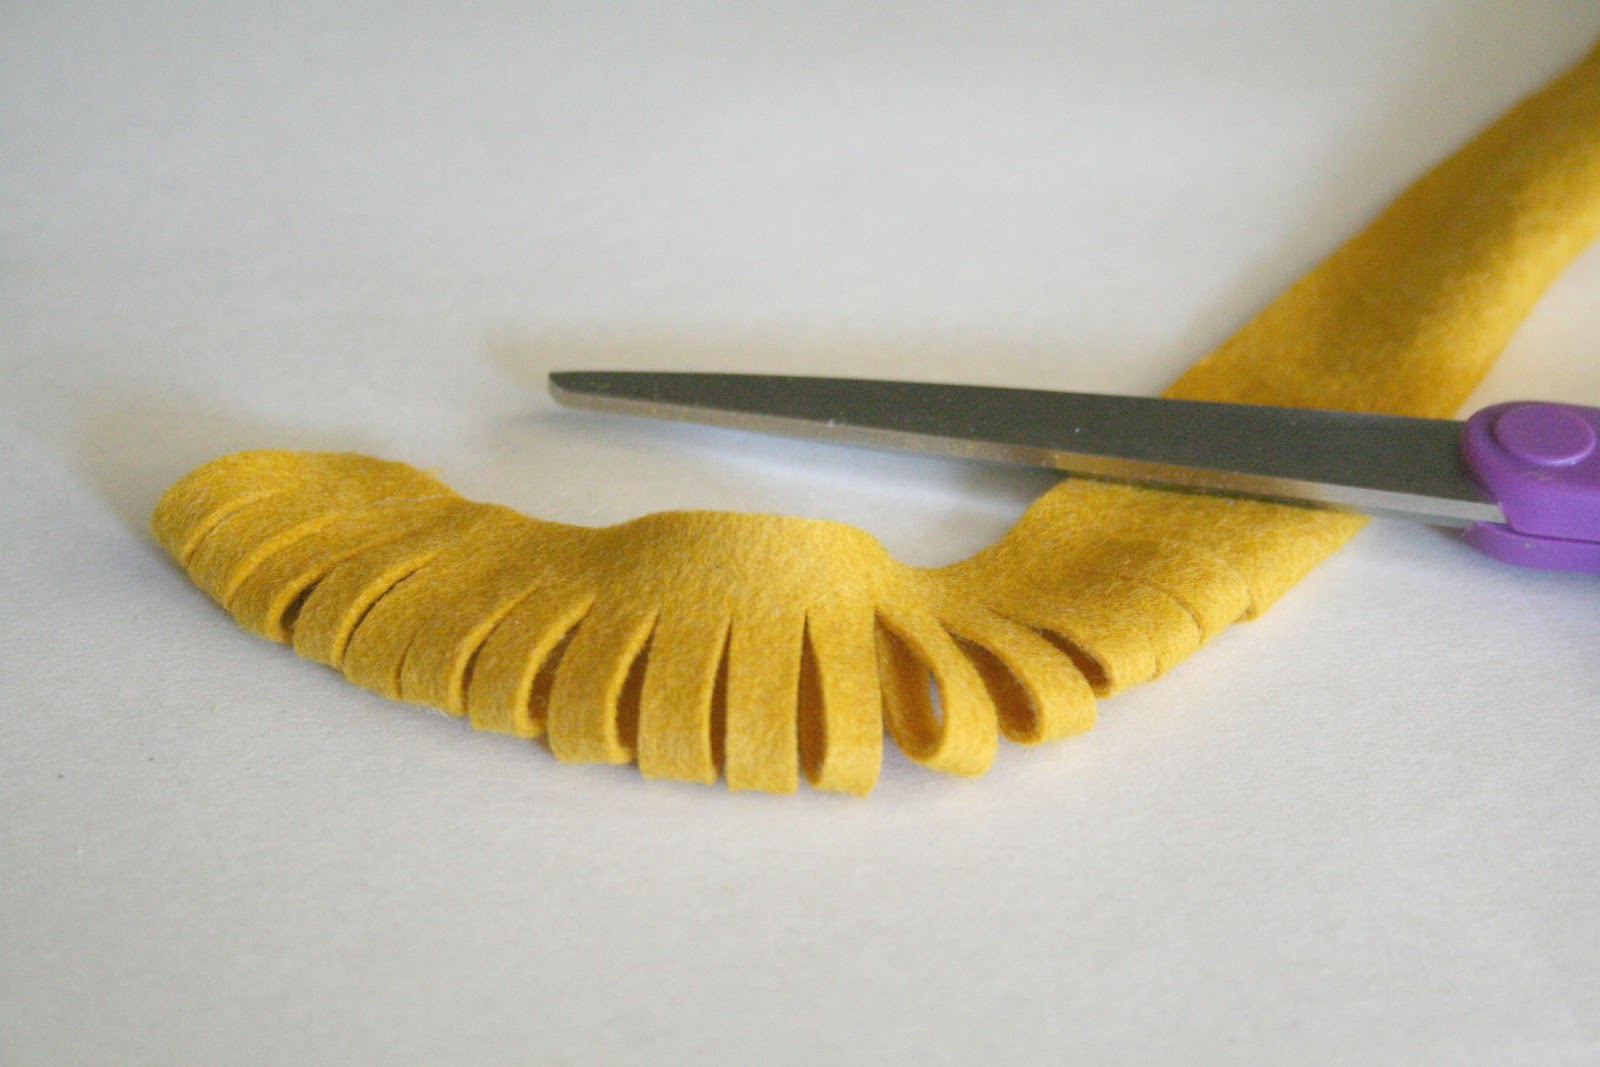
Exactly the same technique as the previous flower, except you don’t glue the edges together to create the looped look. Start with a strip of felt, again this was using felt by the yard to create a larger flower. I cut the width on this particular one to be about 1″ wide. A little wider would also create a nice whispy looking flower.
Same thing as before snip it all the way across evenly. I like them closer together to create narrow strands.

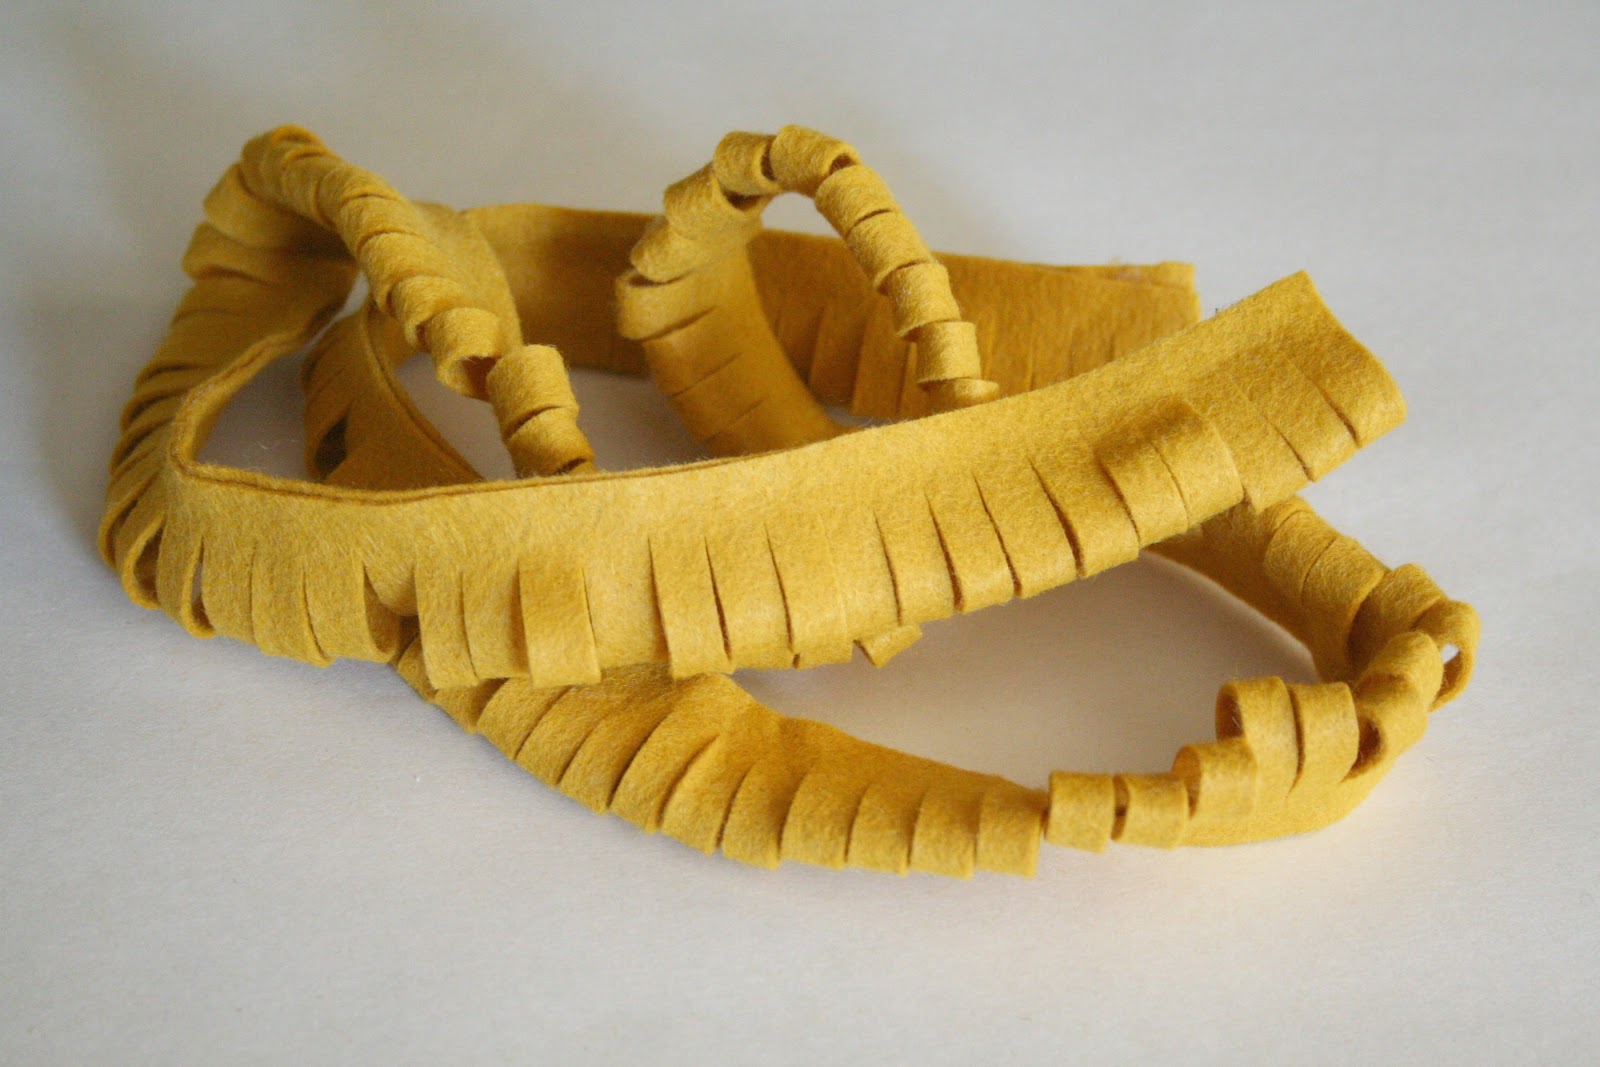
Again using your glue gun to place a dab of glue at one end, begin rolling it like so until you get to the end. You will be left with a flower looking like the above picture.

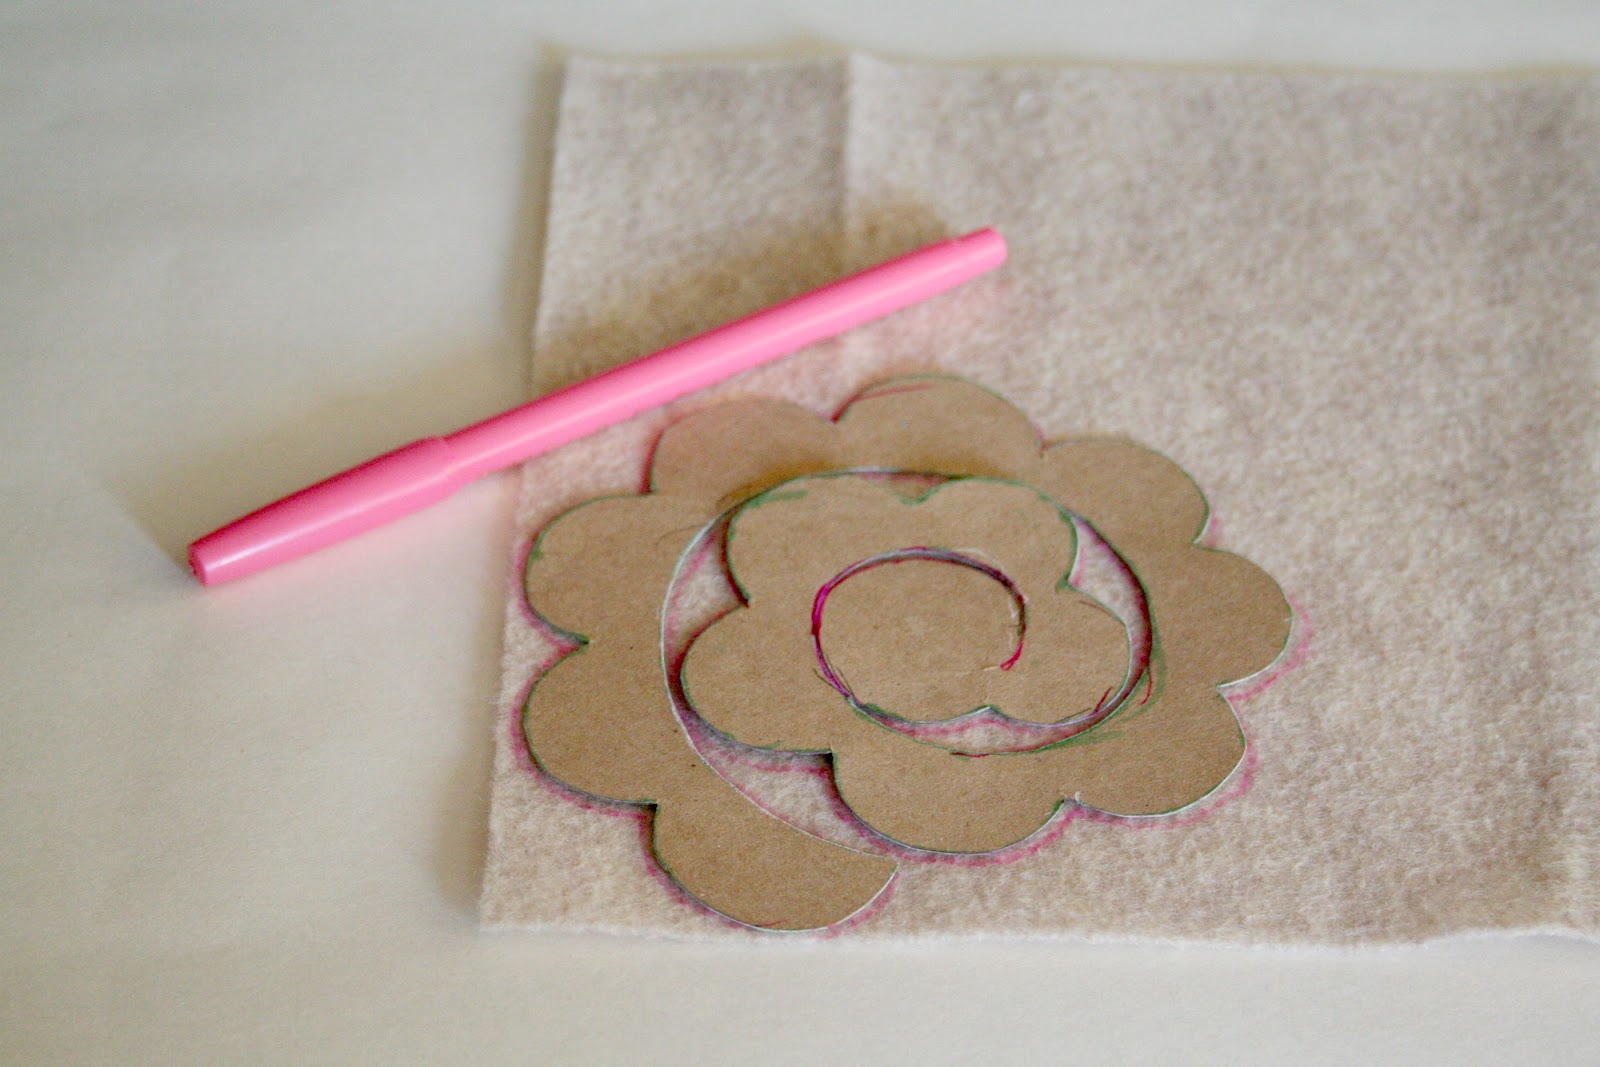
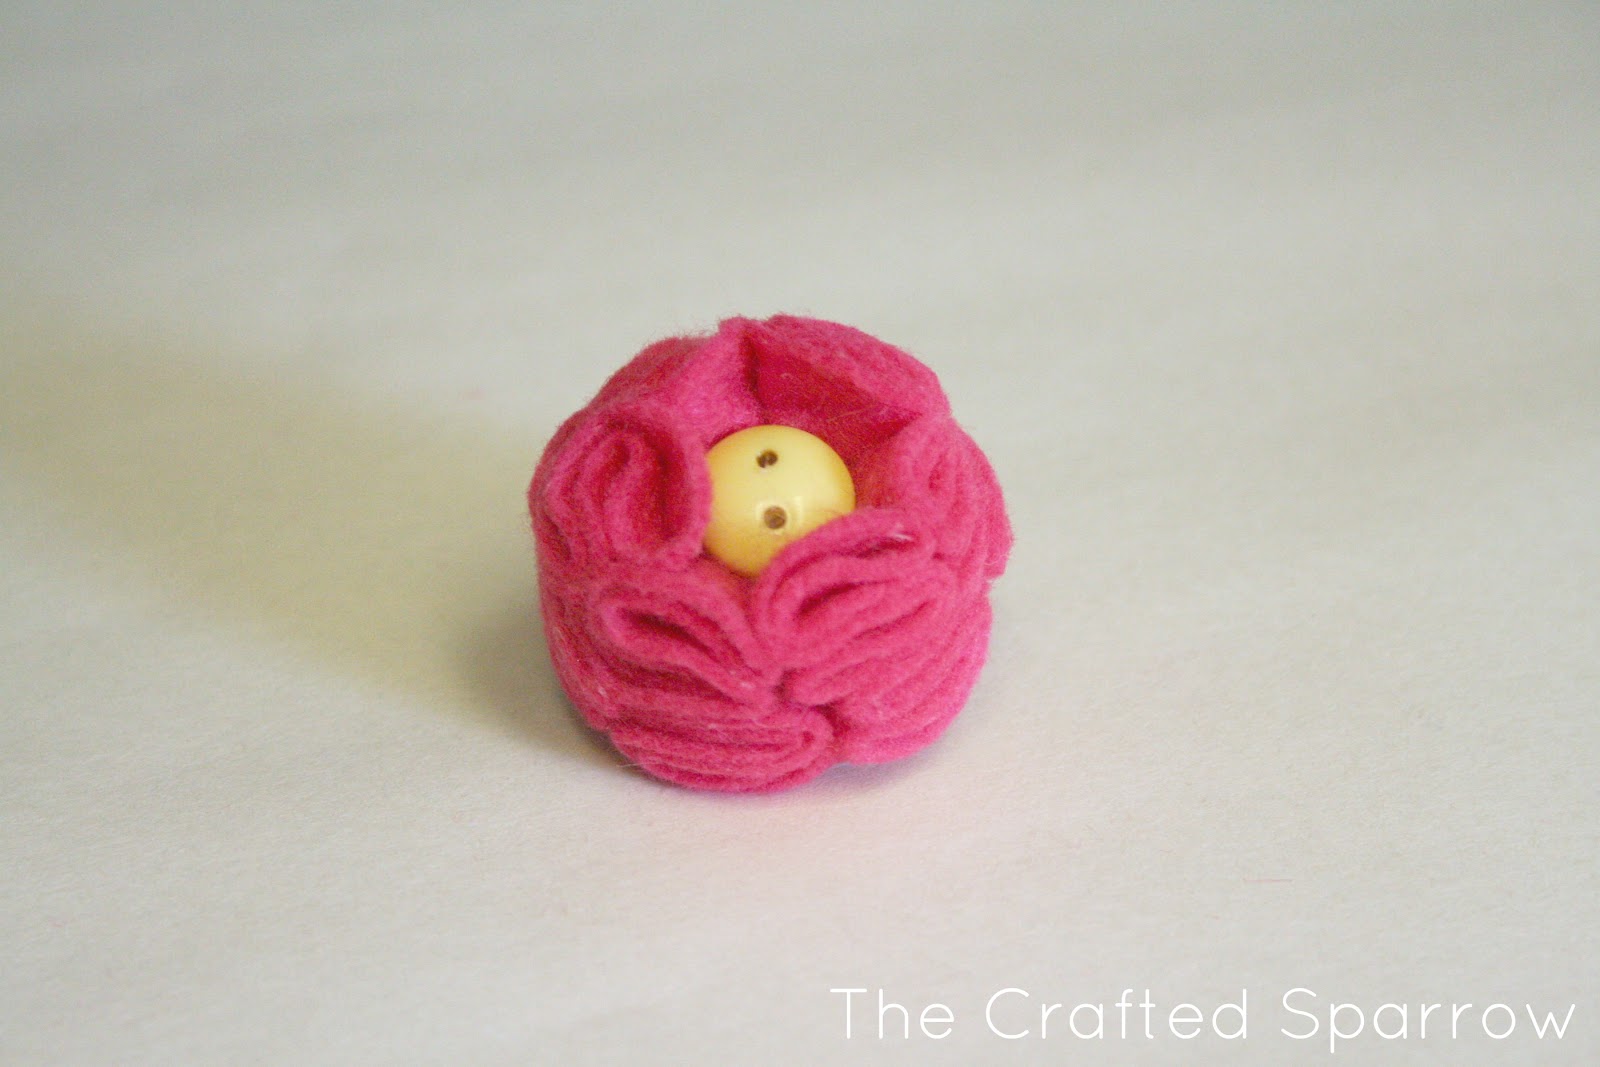
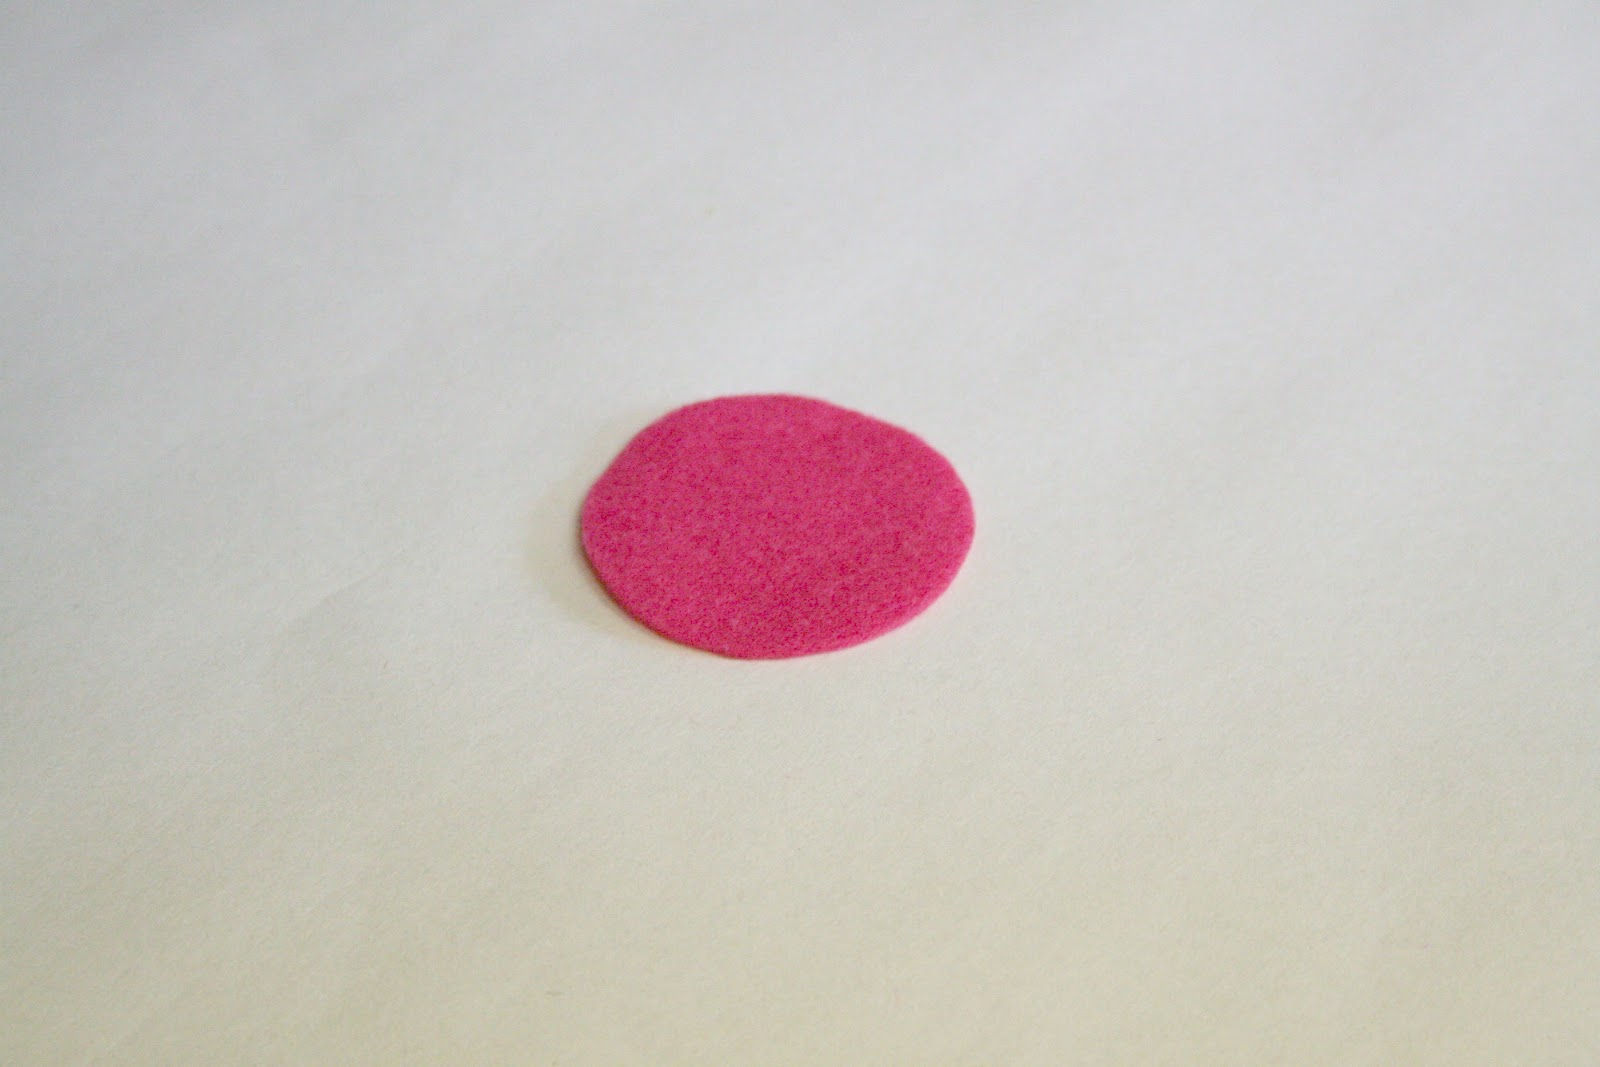
Flower #3 – Rolled Rose
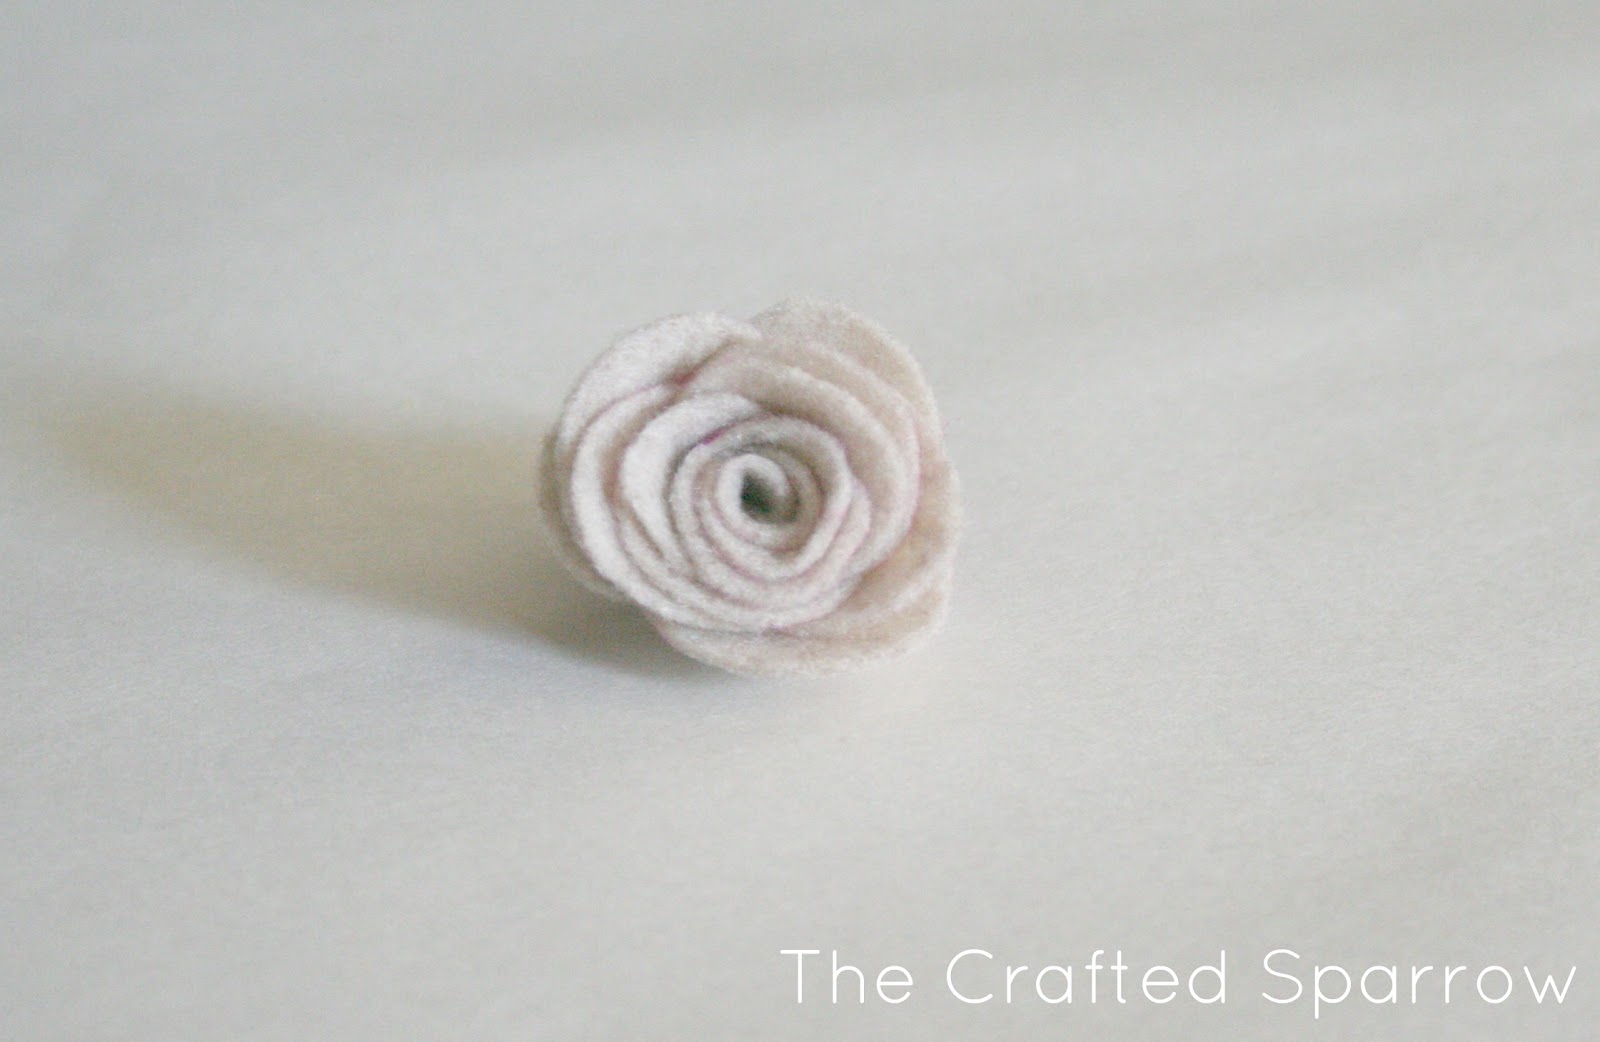
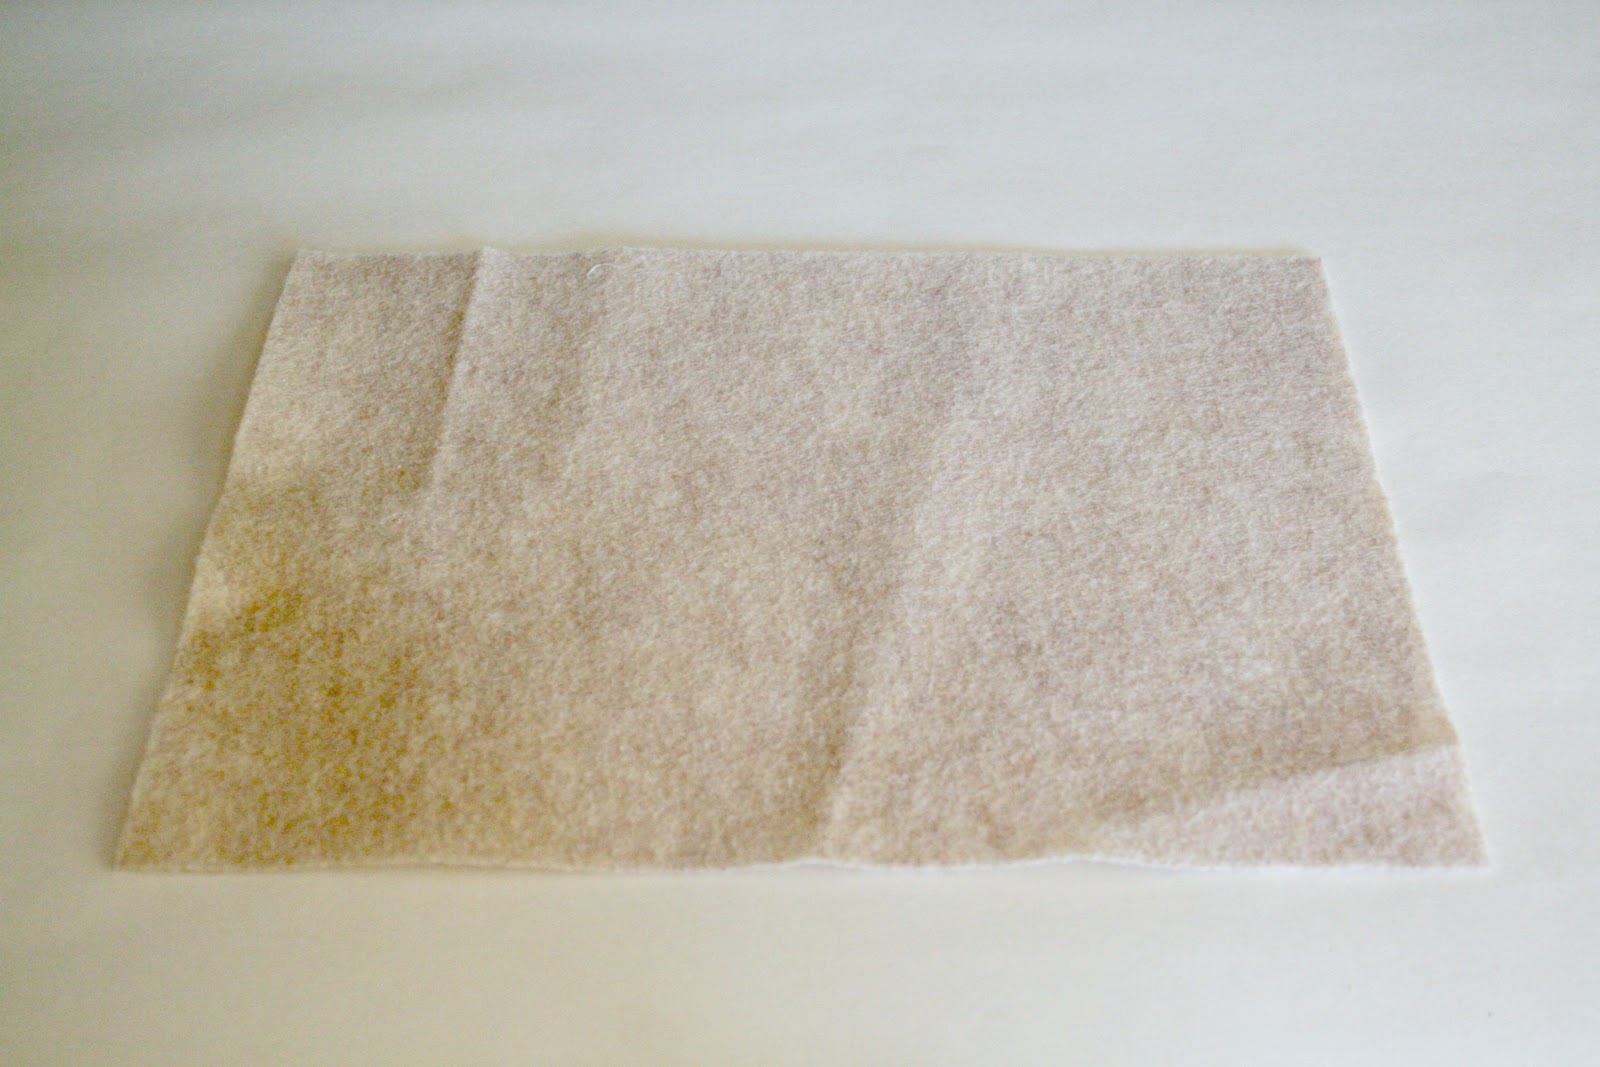
For this you will need the template from HERE. If you use the template at the size it comes in you will get roses about 2″ in diameter. You can enlarge your template bigger to create larger flowers. Start with your felt.
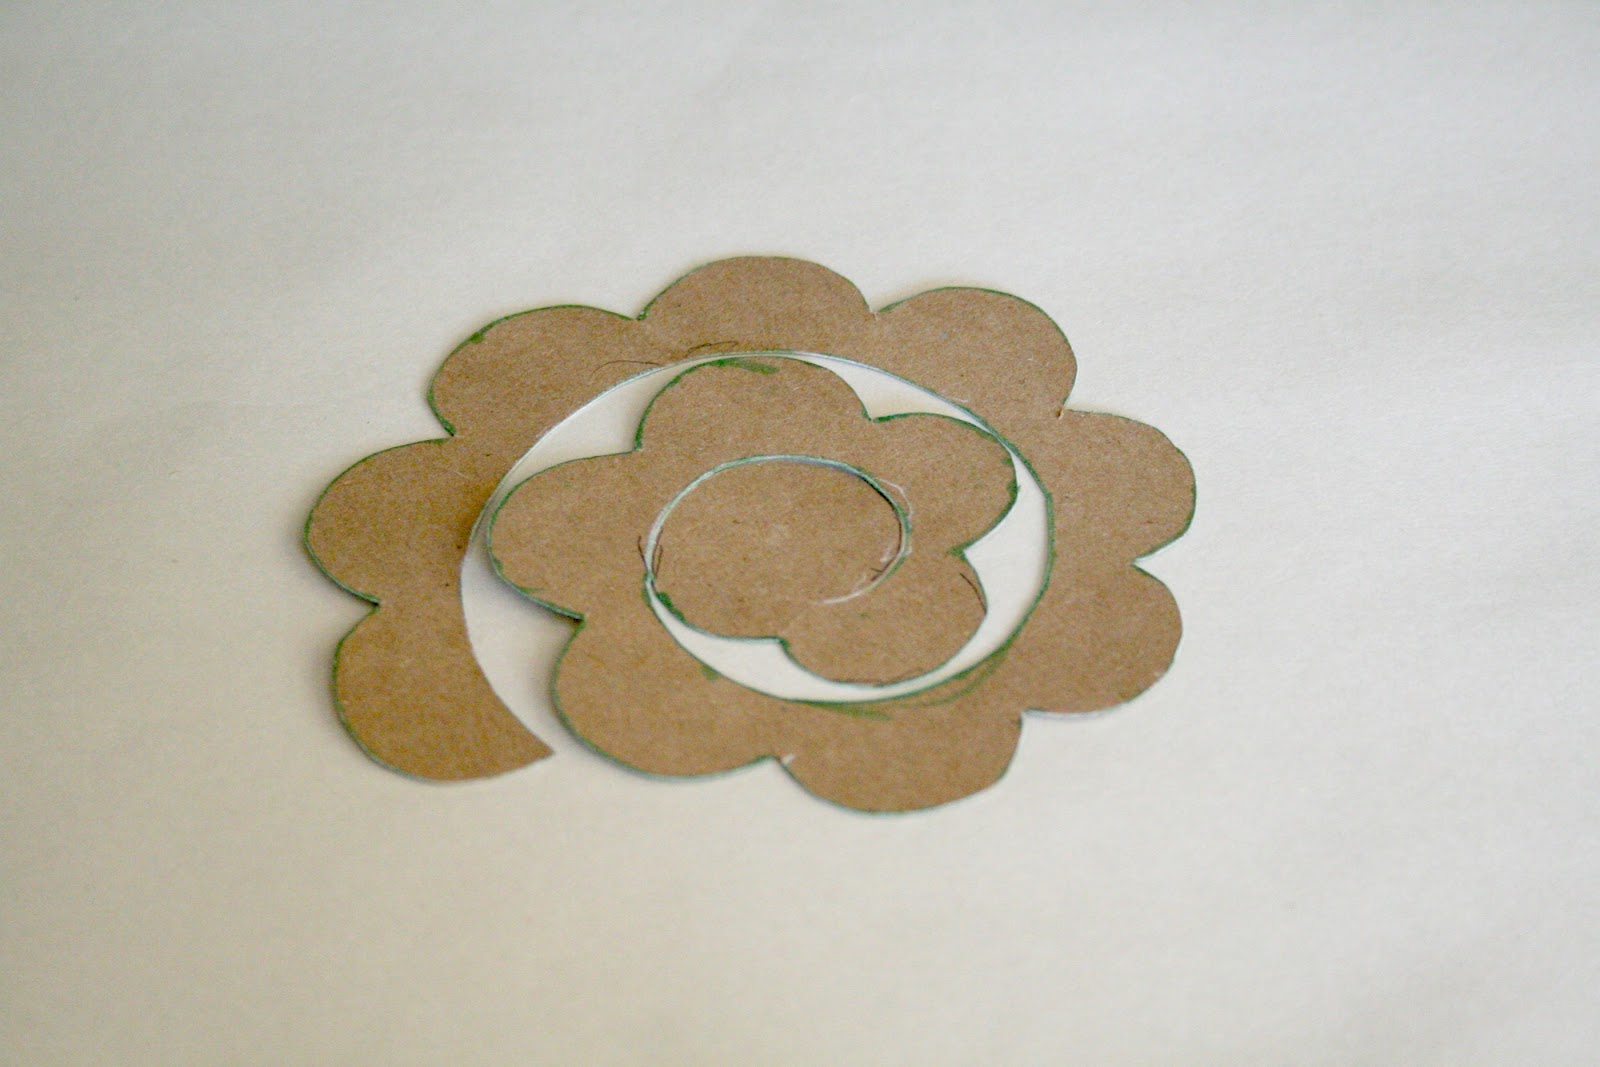
Your template should look like this when cut out.
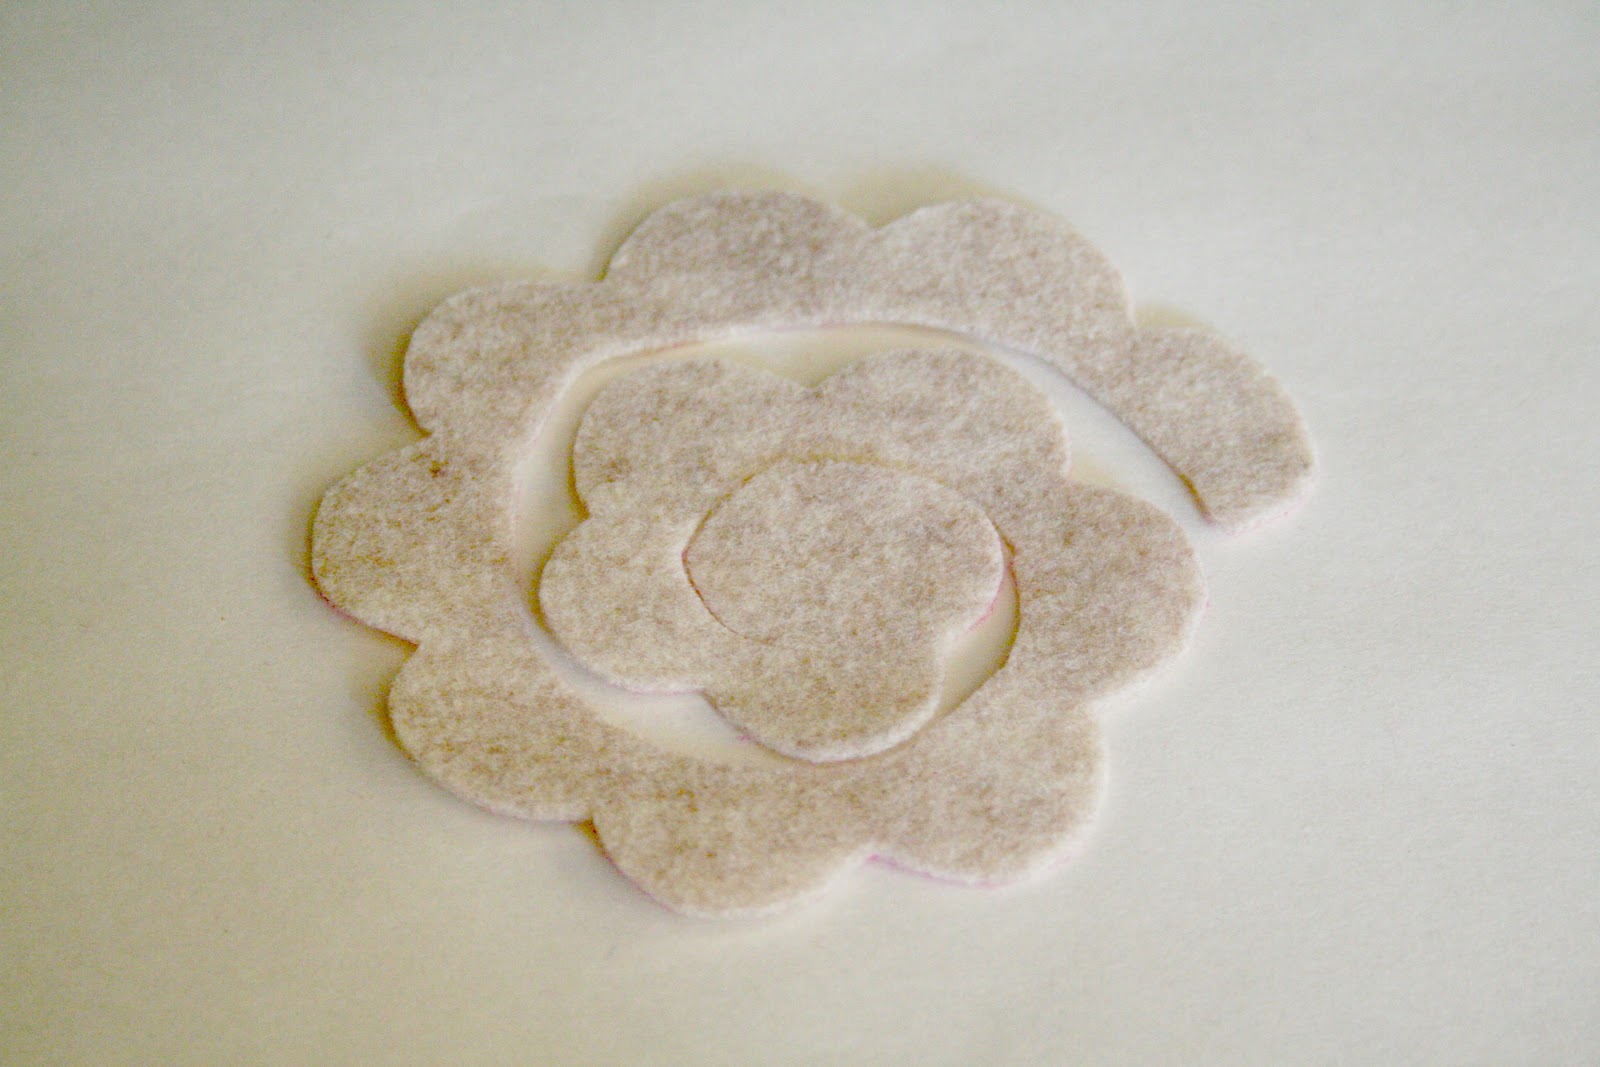
Trace your template on to your felt. FYI – using a pink or dark marker isn’t the best choice, white colored pencils on darker colors are ok or pencils maybe.
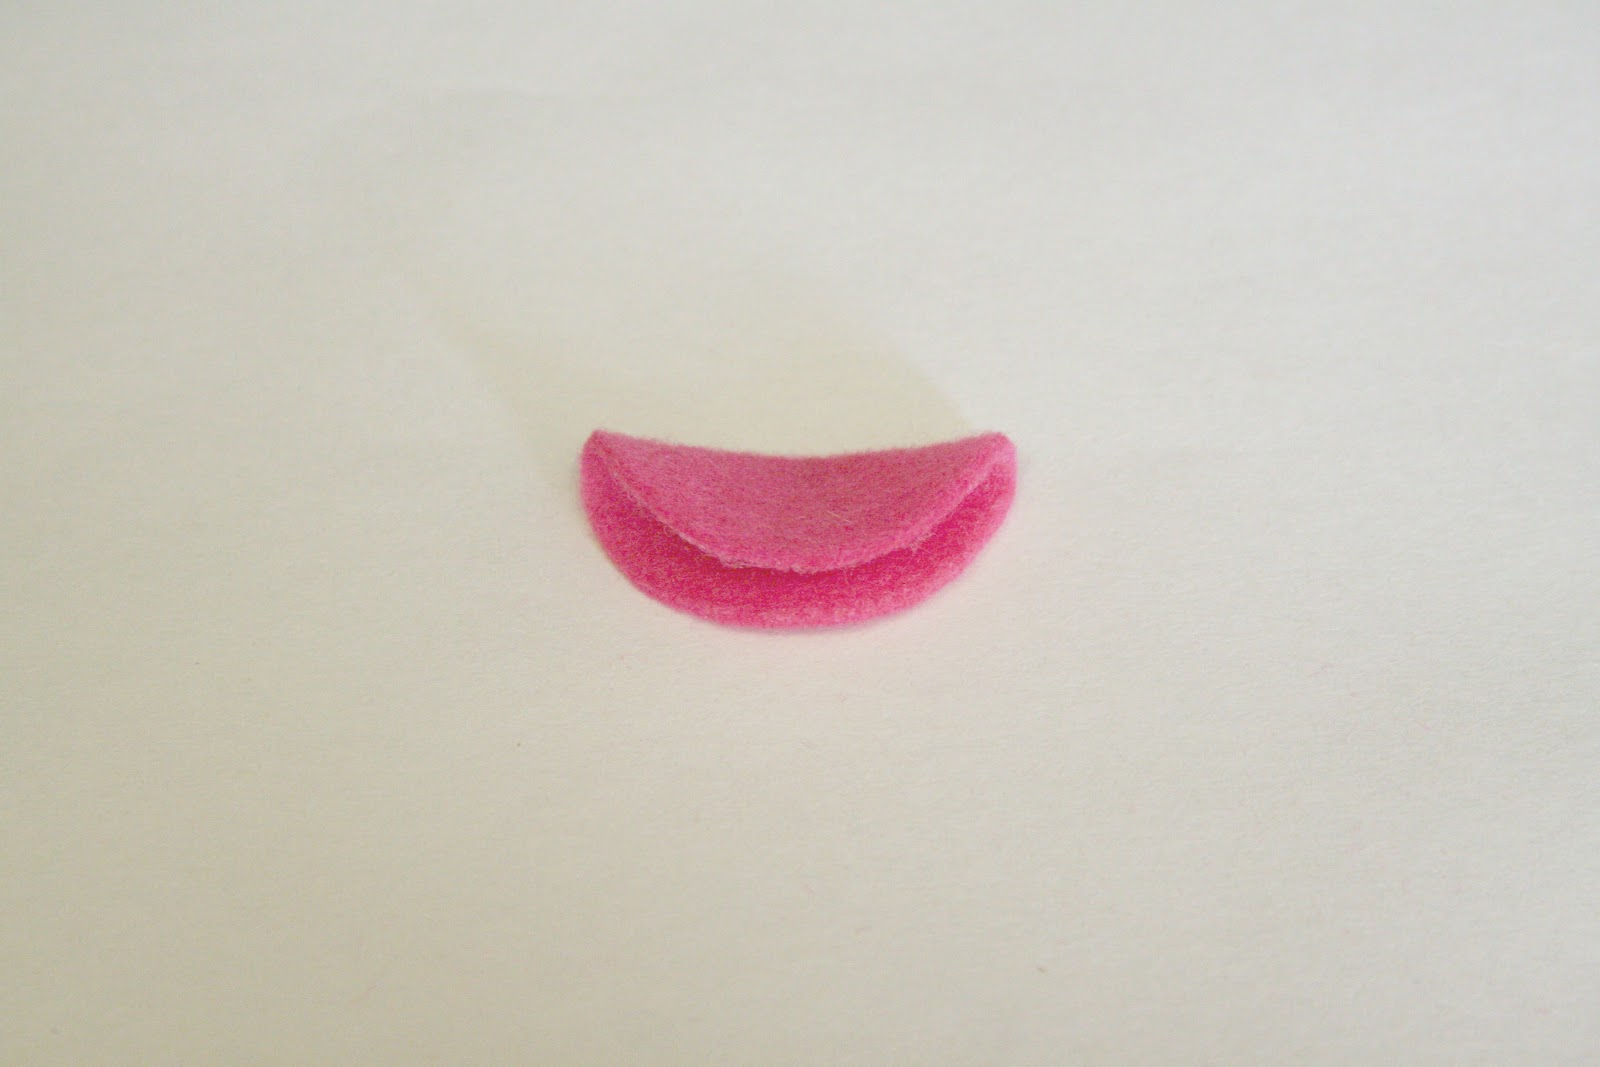
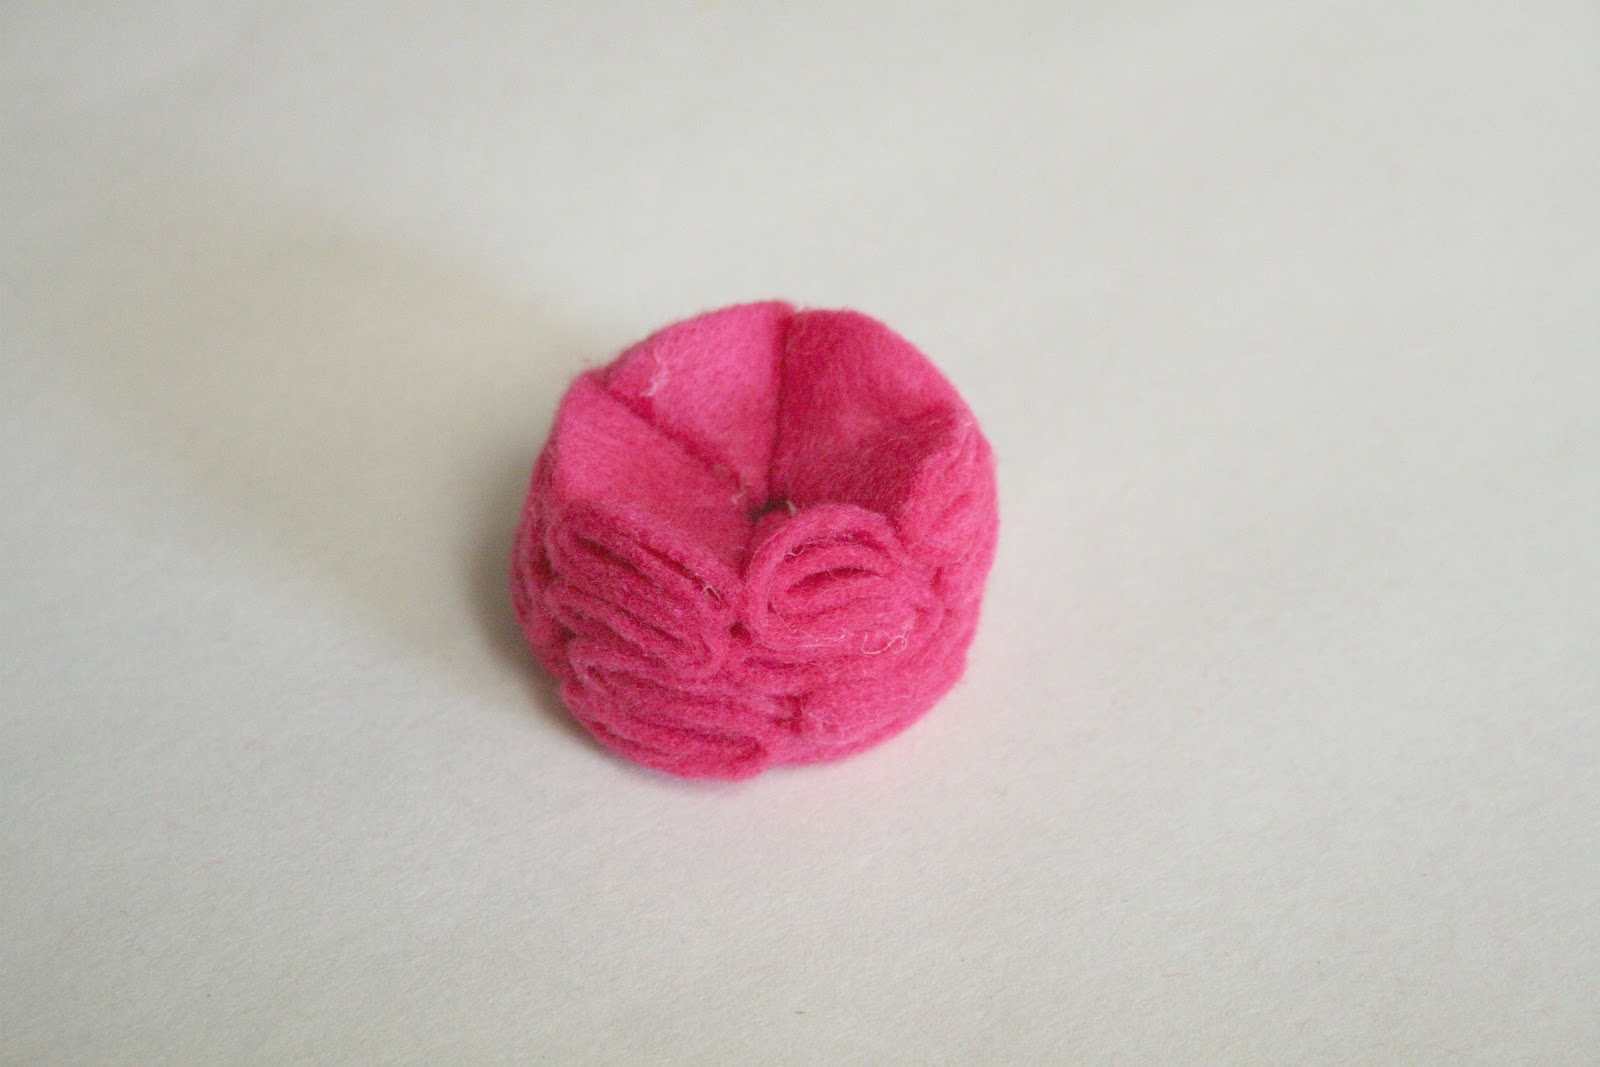
Cut out the template. And starting at the end you will place a dot of glue with the glue gun and begin rolling it all the way around gluing as you go. You should end with the large round circular piece that is the bottom of the flower. Sorry I forgot to take a pic of this process.
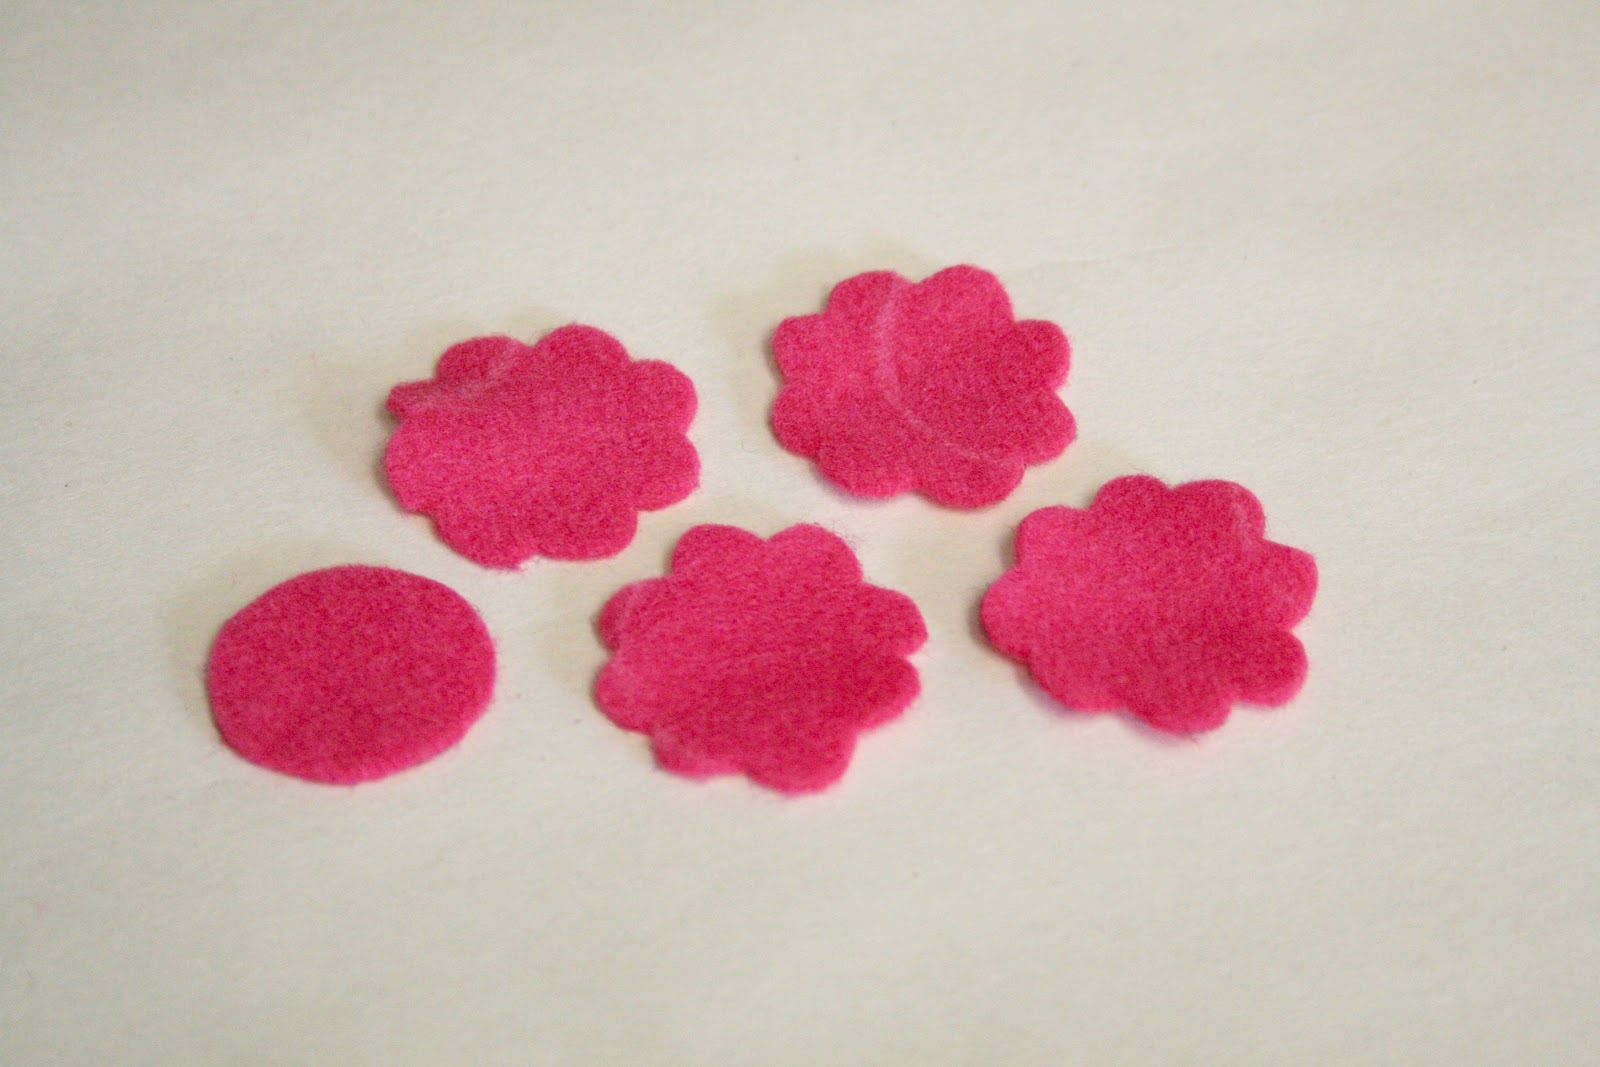
Flower #4 – Frosting Flower {couldn’t think of a better name}
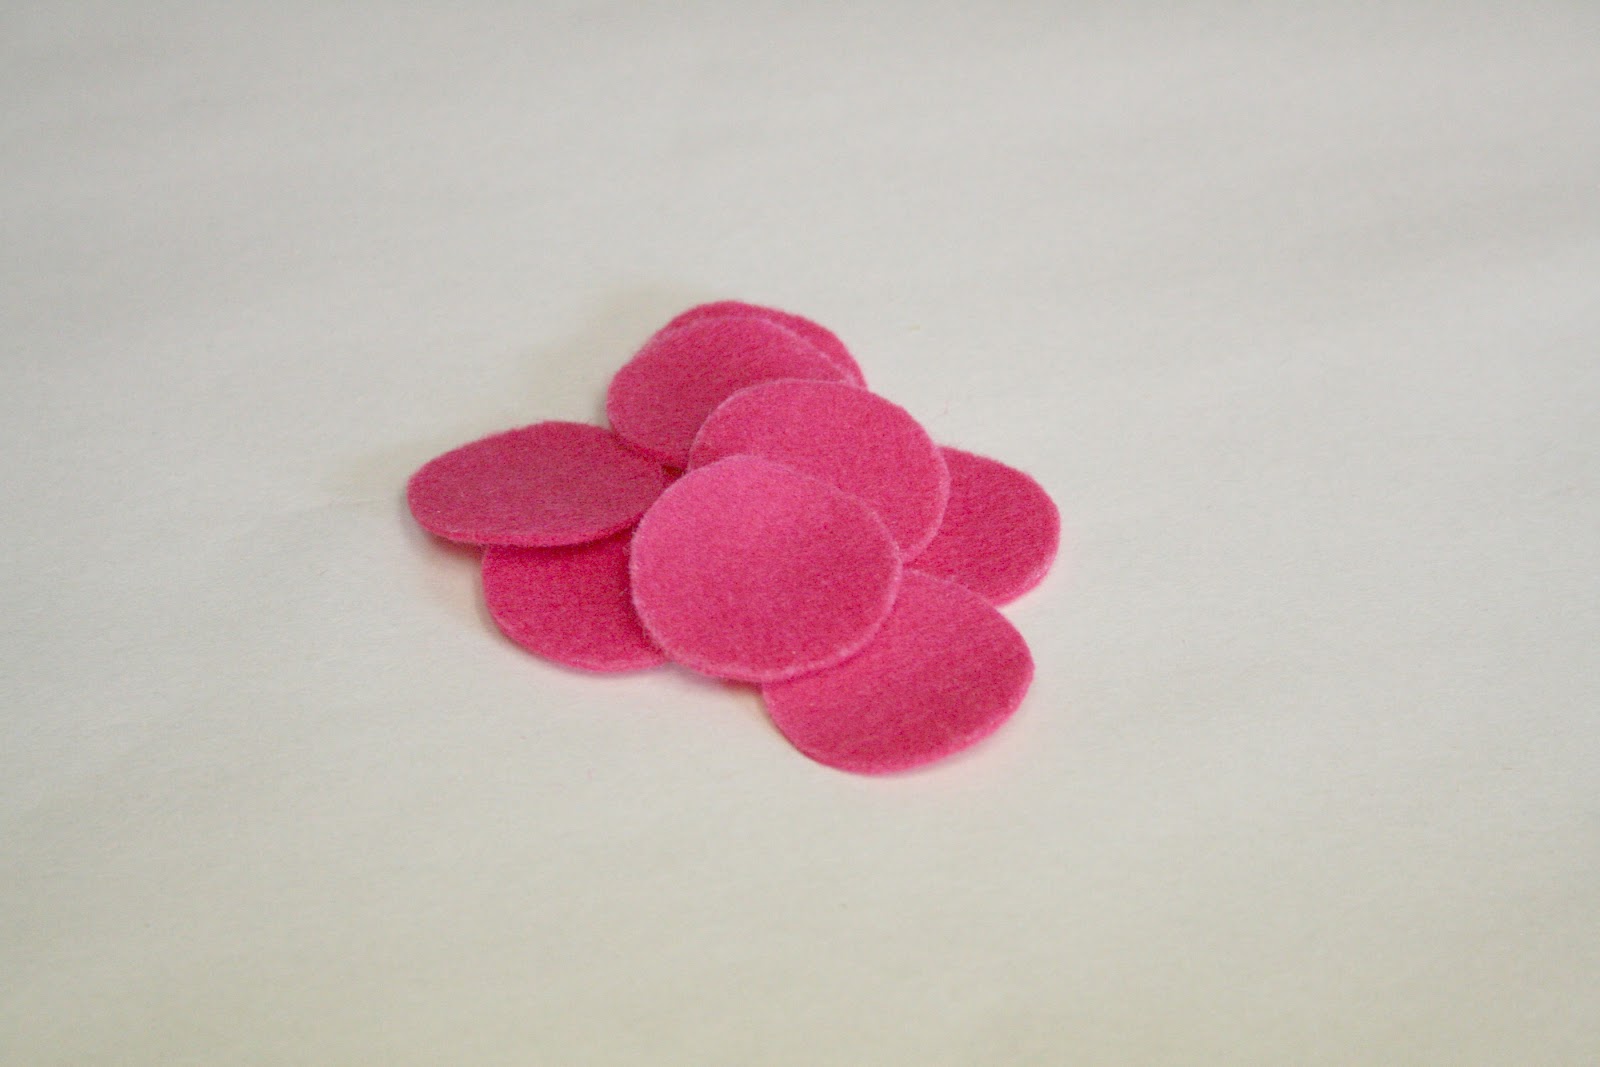
You will need to cut a bunch of circles out of your felt. I used a medicine measuring cup to trace for this particular flower since I wanted it small, but any round small cup or bowl is a great size for larger ones. For my small one I used 12 circles of felt. You will also need 1 slightly bigger circle as your base.

This is your base.
Start by taking your circles of felt and folding them in half and gluing a dot in the middle to hold it.
Place another dot of glue then fold it over like this. Then take the extra and fold it back the opposite direction. It should look like an “S” shape.


Like this.

Start gluing them to the base like fitting pie pieces back in to the pie. 6 pieces on the bottom.


Then another 6 on top of the first layer of 6. This will create a very full ball of frosting look. You can add a button or rhinestone with hot glue if you’d like. Fluff it up when it’s dry and it will look like the top picture.
Flower #5 – Scalloped Flower

This is the exact same flower as the previous one except this one has scalloped edges. You’ll need to create a pattern for yourself on card stock and cut it out for the scalloped edges. For this small flower I only used 4 scalloped circles, and 1 base circle.
Make the “S” shape petals again and glue on to the base. I placed a small button in the middle. Feel free to add leaves like I did to the top picture as well.
I hope all these tutorials helped you.


Thanks for sharing! I’ve been looking for something like this for a while!
I just bought felt & ric rac last night! I’m going get my flowering in! : )
Those cute flowers are calling my name. Good thing I have some felt on hand.
I’m visiting from the g*rated linky party. I hope that you can stop by my blog as well. 🙂
Thanks for sharing,
Laura
These are great Rebecca! I have been dabbling into more crafts these days. I made Elle a rolled flower tee the other week but it did not hold up at all in the wash.
DO you use the wool felt or the .33 cent felt at Joanns? i used the cheap .33 cent and its been great for headbands but I made a mistake with her shirt. Oops.
Your tips are very good which I like. I like how you tell us the measurements. Half the time I find a project and I am left having no clue in how much fabric I will need.
I can’t wait to try some of these out!
These are great. I love the first flower. I would love if you shared it with my readers on my link party.
http://www.kampenlane.com/2012/04/show-off-monday-3-and-craft.html
~Taylor
Brilliant! LOVE THEM ALL! Thanks for the TUTS. jen
Seriously awesome tutorials!
I pinned this …
🙂
Linda
Great ideas! You have educated me!!:))
Visiting from Show & Tell Party!
Great tutorial, they are all so very pretty! I would love for you to share this (and any other creations) at Pin It & Win It Wednesday @ http://www.cheapcraftymama.com!
this is a wonderful tutorial, thanks! would you mind if i pinned it?
cathy
Thanks for linking to Take-A-Look Tuesday – you were featured today!!
–Mandy, http://www.SugarBeeCrafts.com
These are GORGEOUS!! Thanks for sharing with all of us!! I would LOVE LOVE to have you share these at my link party going on right now! I am also you newest follower! YAY! Would love to have you stop by my site too!
http://www.pincushioncreations.com/2012/04/homemade-by-you-9.html
I love these! What a great tutorial! I like many of your projects and I’m looking forward to seeing more! Happily following you via GFC.
I just love these! I have been looking for some great flowers to put on my yarn wreath! I am so glad you made a post about these.
If you are ever interested check out my site some time.
http://scobellexpressions.blogspot.com
You always make the best tutorials!!!
The flowers are stunning!!
Thanks for sharing at The DIY Dreamer… From Dream To Reality!
I love making felt flowers. These are adorable! I love the bright colors. Thanks for sharing your projects over at The Winthrop Chronicles.
You have an amazing blog I love the layout, your projects, everything! 🙂
Thanks for a great tutorial. Your flowers are pretty! I can’t wait to try this out. Megan
Awesome! Love all the different styles of flowers. I’m pinning this as I will need it when I make another yarn wreath.
Thanks!
Oh thank you, I have been wanting to make felt flowers and now I can! Love them, thanks! Julie
wow, i love this tutorial really useful thank you..:)
Love the flowers! I especially love the first one! Thanks for the tutorials!
Thanks for this. I just got a bag of felt so there will lots to do with them.
Great tutorials! and CUTE flowers. I featured this on my blog last night.
Very cute! found you on The crafted sparrow!
Amber
recipeswelove.net
Thanks so much for sharing this; the flowers look great an I can’t wait to try my hand at them!
Totally Perfect!!! I’d love to have you share at my party…it JUST opened!!!
http://www.itsoverflowing.com/2012/04/overflowing-with-creativity-19.html
XO, Aimee
Sometimes, lightening strikes twice!
Congratulations – I’ve featured this project at Inspire Me Monday at Create With Joy as well!
Hope this brings a smile to your face and starts your week off right! 🙂
Create With Joy
http://create-with-joy.com
These are gorgeous! I love felt flowers and yours are really beautiful 🙂 I love to make paper flowers too! Coming from the Pinworthy party over at Just Us Four and Broken Treasures! Thanks for linking up – I’m your newest follower and for sure am pinning these 🙂
Hi, just wanted to let you know this will be featured tomorrow at TheWinthropChronicles.com
you have made me very excited! i’m totally making some of these – probably a lot 🙂
Oooooh so many possibilities where to put these!! I can see some pinned on my fav blazer or handbag… 😉 Great tute! We shared w/ our readers @ this weekends party! Woot woot!
xoxo
I just wanted to stop by and let you know that I linked up to this tutorial in my post. Stop by and check it out!
http://scobellexpressions.blogspot.com/2012/05/last-week-till-mothers-day.html
I just looking for something like this for a while..I am so glad you made it.
I just looking for something like this for a while..I am so glad you made it.
What an adorable idea. I wish I had a mantle. I’m glad I found your blog at The Shady Porch party. I’m a new follower too, so I can keep in touch. I would love if you stopped by and followed back on LF and GFC. Nice to meet you,
Amazing tutorial…making the flowers for a baby shower! Thank you very much for sharing.
I like it.. Thank’s for sharing 🙂
This comment has been removed by the author.
Thank you so much for posting these 5 felt flower tutorials. I am in the process of redecorating my home, and I am going to decorate some lamp shades with felt flowers. When I complete them, I’ll post them on my new DIY blog: zurirevisions.blogspot.com I hope you will stop by and check out my blog.
AWESOME!! I have been wanting to know how to make these! I am sure I will look at your other crafts!! 😀
Thanks for posting the pattern for Flower #3. I used it to make a banner for my sweet niece. Making those roses gets addicting!
Really amazing pictures very good.
Beautiful! Thank you for sharing!
how is felt washed? or is it? Would like to add these to shopping bags that I make. Also, can you point me to how to attach these to items? Would you use a pin or sew it?
Truely a great project. Thank you so much for sharing
Thank you for such great instructions on making these adorable flowers! Any recommendations on best felt to use to make these? I’ve tried a couple of widths and types and not happy with either. Suggestions on quality, dimensions and where to buy would be most appreciated!
I enjoyed reading it. I need to read more on this topic…I admiring time and effort you put in your blog, because it is obviously one great place where I can find lot of useful info..
florists singapore
Gorgeous! i love all of them. Thanks for these wonderful tutorial.
thank you for sharing this great idea
Waw great ideas, I lovet it.