
Hi friends! Today I am sharing a thrifty and fun way to accessorize your wardrobe. Vintage Button Earrings! I’m always looking for a great way to add to my collection, all while staying in budget. So what’s a girl to do? Raid her craft stash of course. Buttons!!! We all have them, and we can all get them for pretty inexpensive. Buttons are the perfect option for creating new earrings in just minutes.
Here’s what you will need:
– Buttons {any size, shape, color)
– E6000
– Pliers / Wire Cutters
– Pliers / Wire Cutters
– Earring posts & backs in a size
that will work with the whatever
size button your working with
that will work with the whatever
size button your working with
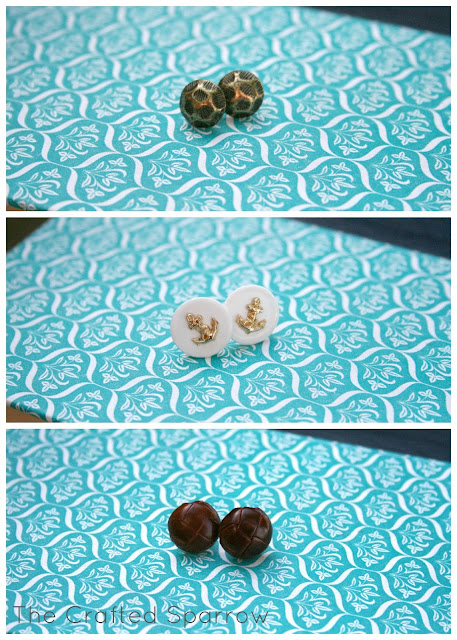
I love looking at my local thrift shops for buttons, although I don’t often find them…but every once in a while I get lucky and find a few fun vintage ones. I’m lucky to have a great fabric store that sells fabric by the pound nearby and they also sell buttons in bins. It’s like going on a treasure hunt every time I go. For this project I used two sets of vintage inspired buttons I found at that fabric store months ago. For the third pair of earrings I actually used upholstery tacks! Yep you heard right. I love upholstery tacks for jewelry, all you have to do is remove the pin from the pack with wire cutters and your good to go. Now when working with buttons if you have chosen a button with a back on it you will need to remove it with wire cutters or pliers. Just be careful. Once the backs are removed just apply some E6000 to the earring post and attach it to the buttons.
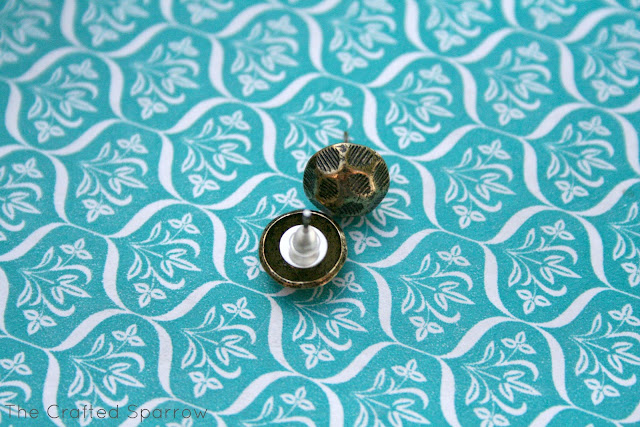

Set them aside to dry overnight, I set mine with the post facing up in to the air (button down). Once they are dry you have new earrings.

Can you imagine how many pairs of earrings you can make for less than $5?! So many! Now if I can just get my hands on my mom’s vintage button stash I’d be in heaven!


These are so cute Rebecca! Love the little anchors, great idea 🙂
xo, Tanya
Featuring YOU today! 🙂
Ginger @ GingerSnapCrafts.com
http://www.gingersnapcrafts.com/2013/05/15-teacher-gift-ideas-teachergifts.html