The Crafted Sparrow

Create to Inspire!

  • Home
  • About
    • Advertise
    • About Me
    • Disclosure
  • Tutorials
    • home decor
    • diy
    • crafts
    • Cricut
  • recipes
    • Appetizers
    • Sides
    • Soups and Salads
    • Dessert
    • Drinks
  • holidays
    • new years
    • Valentine’s Day
    • st. patrick’s day
    • mothers day
    • fathers day
    • 4th of July
    • halloween
    • thanksgiving
    • christmas
  • free printables
  • Contact

DIY Sleepy Hallow Halloween Sign

10/21/2013 1 Comment

While hanging out at a local Goodwill store with one of my favorite blogging buddies recently I came across a pretty simple Halloween sign.  Except it wasn’t my style, so today I’m showing you how I turned my Goodwill find in to a fabulous DIY Sleepy Hallow Halloween Sign.

I loved the shape of the sign, and the $3 price tag was perfect for me.  As soon as I was home I sat down and got busy designing a new sign.  Here’s the before:
Supplies:
–  Vinyl Stencil
–  Wood Board, or recycled wood sign
–  DecoArt Americana Acrylic paints in black, white, & a medium gray 
–  Foam Brushes
–  Sandpaper for distressing

I used my Silhouette cutting machine & program for this project, I purchased the pointing finger from their downloads.  The font used for the “Sleepy Hallow Inn” is Algerian.

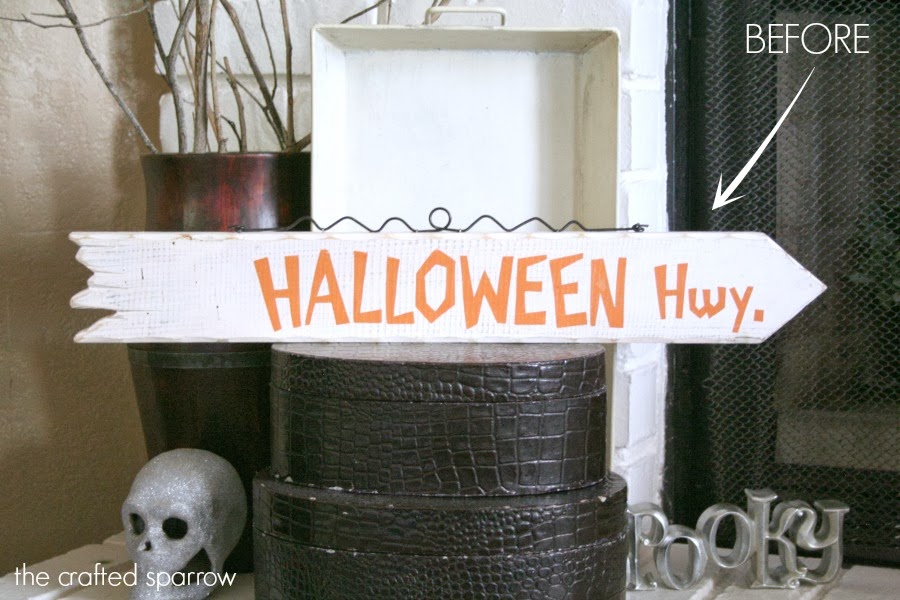
I prepped my sign by giving it a quick coat of a medium gray acrylic, it basically acted like a primer to cover up the old lettering since my sign would be primarily white.  Once the gray is dry give it a couple good coats of your white paint.  Be sure that the white paint is completely dry before applying your vinyl stencil.  Once stencil is applied use your foam brush to apply your black paint.  When it’s almost dry carefully remove your stencil by peeling it up.  If everything is dry and you want to distress your sign a bit use your sandpaper around the edges and in certain spots on the sign.  This allowed some of the gray to peak through, and even a tiny bit of the orange original lettering which looked good.  I love that this sign fits right in with my decor.

Related Posts

  • Notebook Paper ChalkboardNotebook Paper Chalkboard
  • Summer Wood BannerSummer Wood Banner
  • DIY Stamped Halloween Treat BagsDIY Stamped Halloween Treat Bags
  • DIY Black & White Geometric OrnamentsDIY Black & White Geometric Ornaments
  • Easy Halloween ArtEasy Halloween Art
  • Numbered Mason Jars – using DecoArt paintsNumbered Mason Jars – using DecoArt paints

Filed Under: decoart, diy, halloween, holidays

« Halloween / Fall Porch
Making better choices with Lean Cuisine Honestly Good meals »

Comments

  1. Katie says

    10/23/2013 at 1:19 PM

    Ahh! Love this sign! Now I want to make a few signs! 🙂

    Reply

Leave a Reply Cancel reply

Your email address will not be published. Required fields are marked *

This site uses Akismet to reduce spam. Learn how your comment data is processed.

  • Email
  • Facebook
  • Instagram
  • Pinterest
  • Twitter

Copyright © 2025 · Genesis Framework · Design By: Key Lime Digital Designs · Privacy Policy · Log in