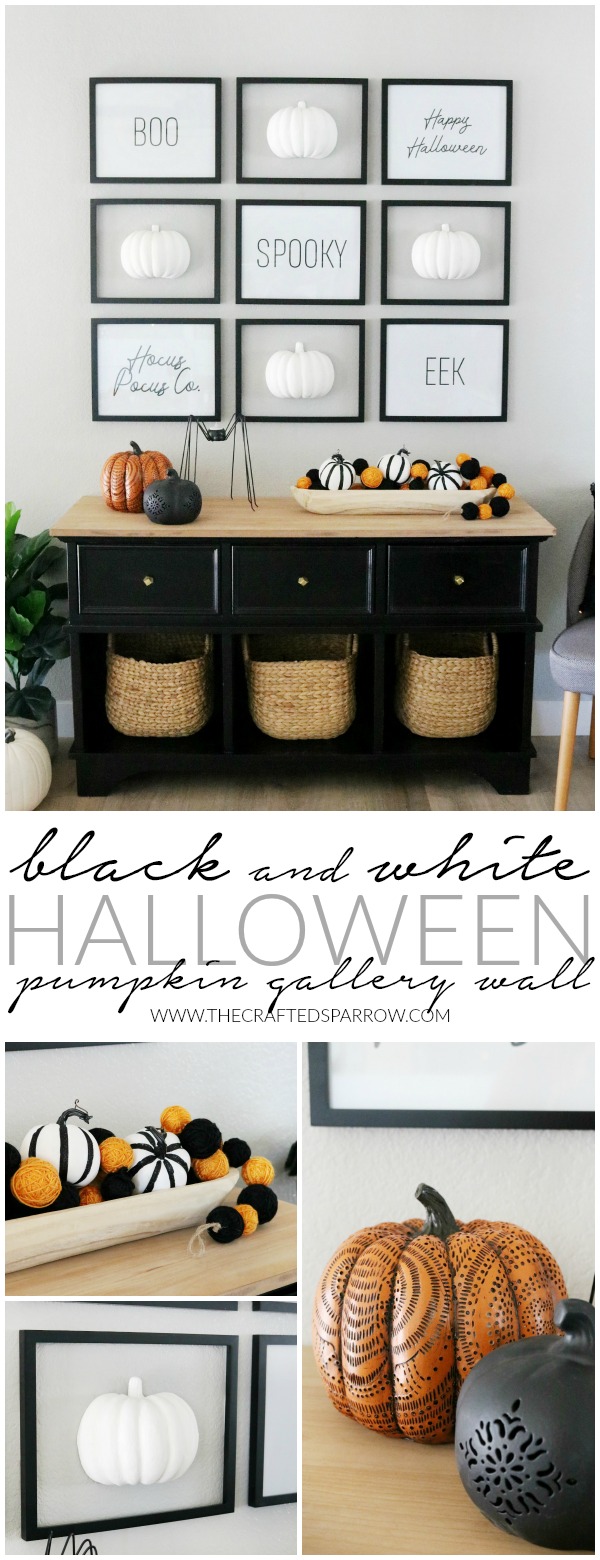
When it comes to decorating for Halloween I’m definitely all about a simpler more modern look lately. Mixing everyday home decor with festive Halloween-inspired DIY decor items and ready-made decor is my favorite way to decorate. This Black & White Simple Halloween Pumpkin Gallery Wall and Entryway is a fun way to incorporate both.
 DISCLOSURE | This post may contain affiliate links at no charge to you.
When you’re decorating for holidays it can be an extension of your everyday home decor, or you can completely change up the whole look and go all out. I definitely prefer having my holiday decor just be an extension of my everyday decor. With our home being small it makes it more practical and it’s a lot easier to store smaller amounts of holiday decor.
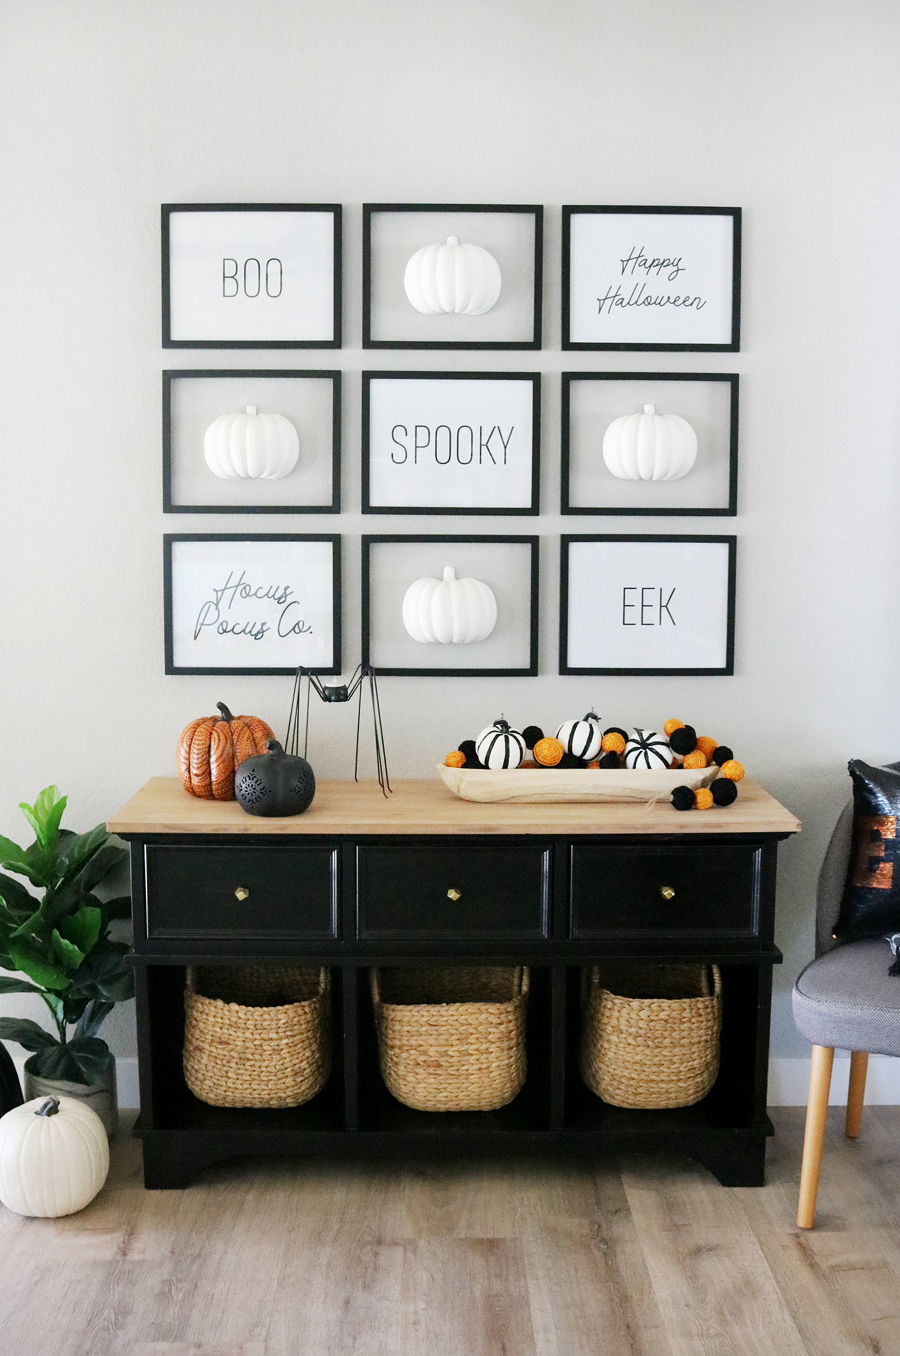
 When considering holiday decor for my entryway I typically start with my wall decor. I’m taking my black-framed gallery wall and making a few slight changes for Halloween. When Halloween is over I can either transition into Christmas decor or put family photos or art prints back in the frames from our everyday decor.
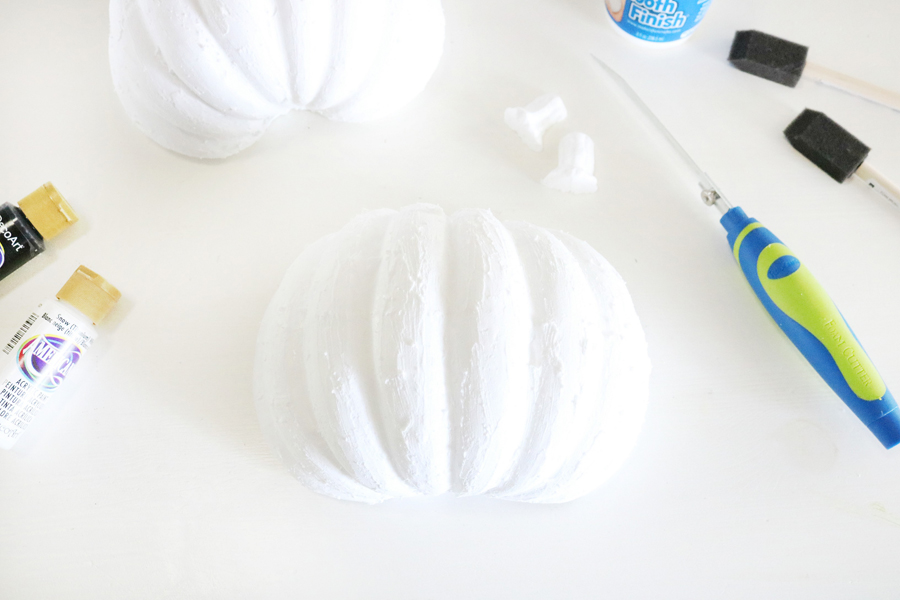
To add some dimension to this Black & White Simple Halloween Pumpkin Gallery Wall I created these DIY Faux Plaster Pumpkins with just a few quick supplies from my local craft store. Let me show you just how easy they were to make.
 Supplies:
- 11 x 14″ Picture Frames
- Styrofoam Pumpkins, Ready to Paint
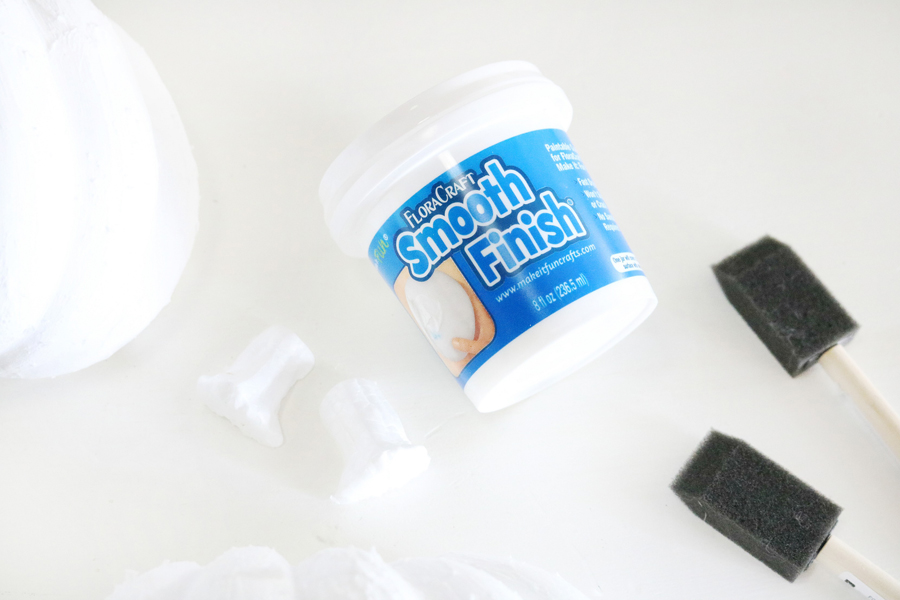
- FloraCraft Smooth Finish
- FloraCraft Foam Knife
- DecoArt White Acrylic Paint
- Foam Paint Brush
- Fine Grit Sandpaper
- Heavy Duty Removable Double Sided Tape, or 3M Command Strips
If you can’t find the styrofoam pumpkins online be sure to check your local craft stores in the holiday craft section. For this gallery wall, I grabbed two foam pumpkins since I was cutting them in half to create the 4 pumpkins for my frames.
HOW DO I CREATE DIY FAUX PLASTER PUMPKINS?
Using the FloraCraft Foam Knife cut the entire foam pumpkin in half. It’s optional if you want to keep the stem or remove it, it will look great both ways on your gallery wall.
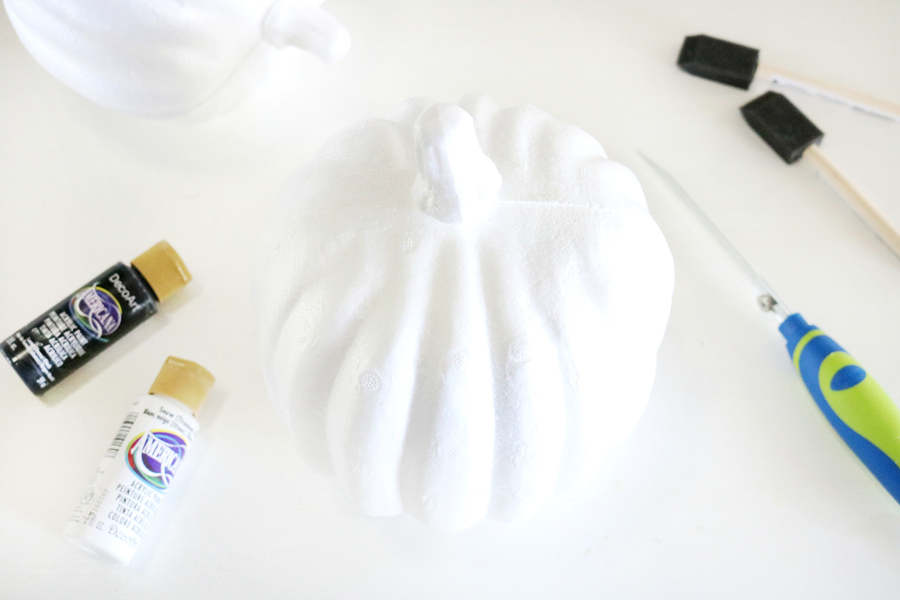
Since I wanted to give the foam pumpkins a faux plaster look, I used FloraCrafts Smooth Finish. It basically takes any styrofoam item and creates a smooth texture over the whole surface and even makes it easier to paint.
When applying the Smooth Finish product I typically just use my fingers to apply a thin coat of smooth finish over the entire front surface of the foam pumpkin, you can use a popsicle stick if you prefer. It doesn’t need to be perfect since you’ll sand out the imperfections at the end. Let the first layer of smooth finish dry, it should be dry to the touch. Apply a second layer of smooth finish and repeat the drying time. If you feel it needs a third layer you can go ahead and do that. I only needed to do two coats on my pumpkins.
 Once the foam pumpkin is completely dry you can use fine-grit sandpaper to gently smooth out the pumpkin’s finish. It doesn’t have to be perfectly smooth, I like to leave just a little bit of texture.
Note: You’ll want to sand this outside, it will create a lot of dust.
When you’re done sanding, you can paint your pumpkin with two coats of white acrylic craft paint and a foam brush. Feel free to paint your pumpkins to match your home decor if white isn’t your thing. Be sure to let the first coat of paint dry before applying the second coat. Paint those foam stems too!
 HOW DO I HANG THE DIY FAUX PLASTER PUMPKINS?
When the DIY Faux Plaster Pumpkins are dry and ready you can use a toothpick to adhere the stems back into the tops of the pumpkin halves. If you need any type of glue to adhere them back on you can use a low-temp glue gun.
I attached my pumpkins to the wall using heavy-duty removable double-sided tape, or command strips. You can find links to those products in the supply list.
 WHERE CAN I GET THE ART FOR THE GALLERY WALL?
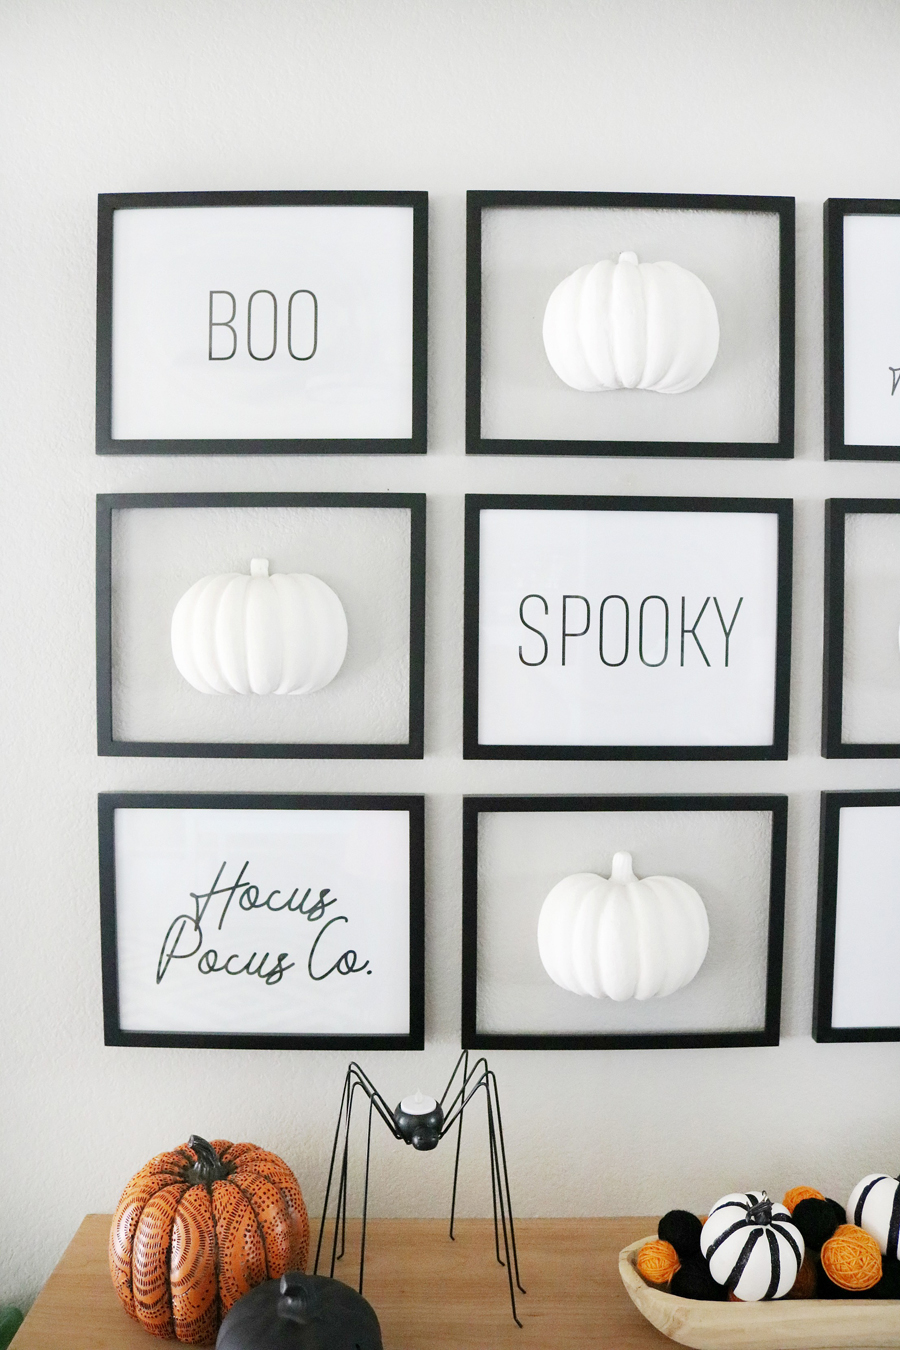
When I was planning my Black & White Simple Halloween Pumpkin Gallery Wall I knew I would need some cute art for the frames where I didn’t have faux pumpkins. I created some simple prints on my computer and had them printed to fit inside the 11 x 14 Black Floating Frames. I then hung the DIY Faux Plaster Pumpkin Decor in empty frames that I removed the glass from. If mixing and matching isn’t your thing you can fill all the frames with your faux plaster pumpkins.
SHOULD ALL MY PICTURE FRAMES BE THE SAME COLOR ON A GALLERY WALL?
This is really a personal preference, but when you are putting together one similar to this modern Black & White Simple Halloween Pumpkin Gallery Wall having the same frame color provides a more cohesive look. If the gallery wall you were designing has a more eclectic feel to the look you could certainly mix and match frame colors and textures.
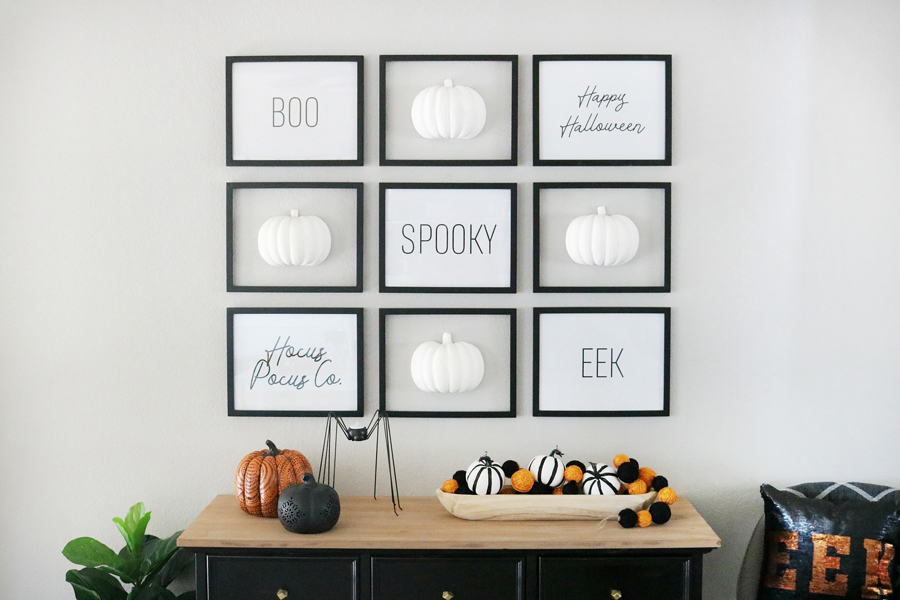
 To complete my Black & White Simple Halloween Entryway Decor I paired it with some cute holiday decor, pulling in small pops of the orange to accent all of my neutral wall decor. Just remember, there are no rules when it comes to holiday decorating as far as color goes! So if the traditional color palettes you see in stores are your thing, make it your own! For me, it’s typically a base of neutral colors and if I’m adding color to my decor it’s as an accent.
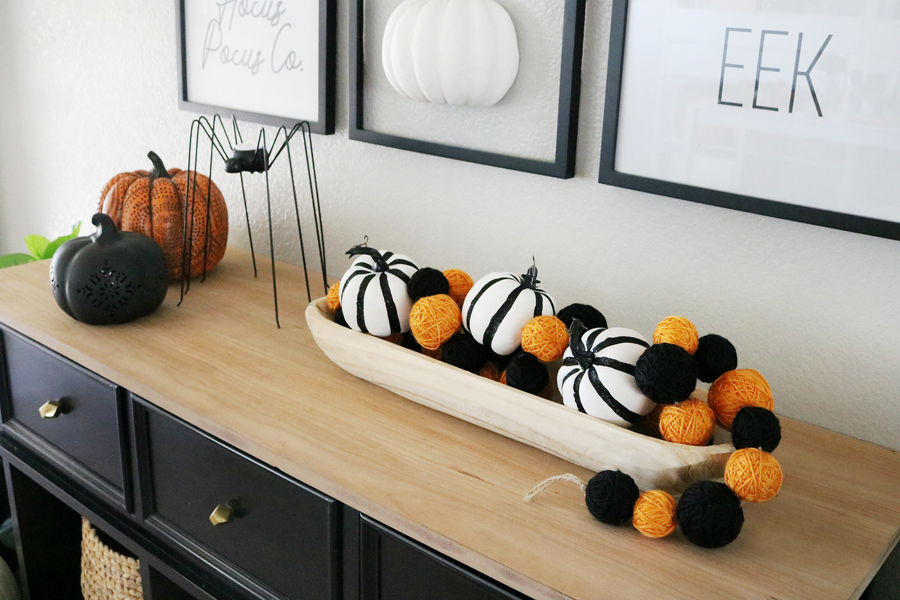
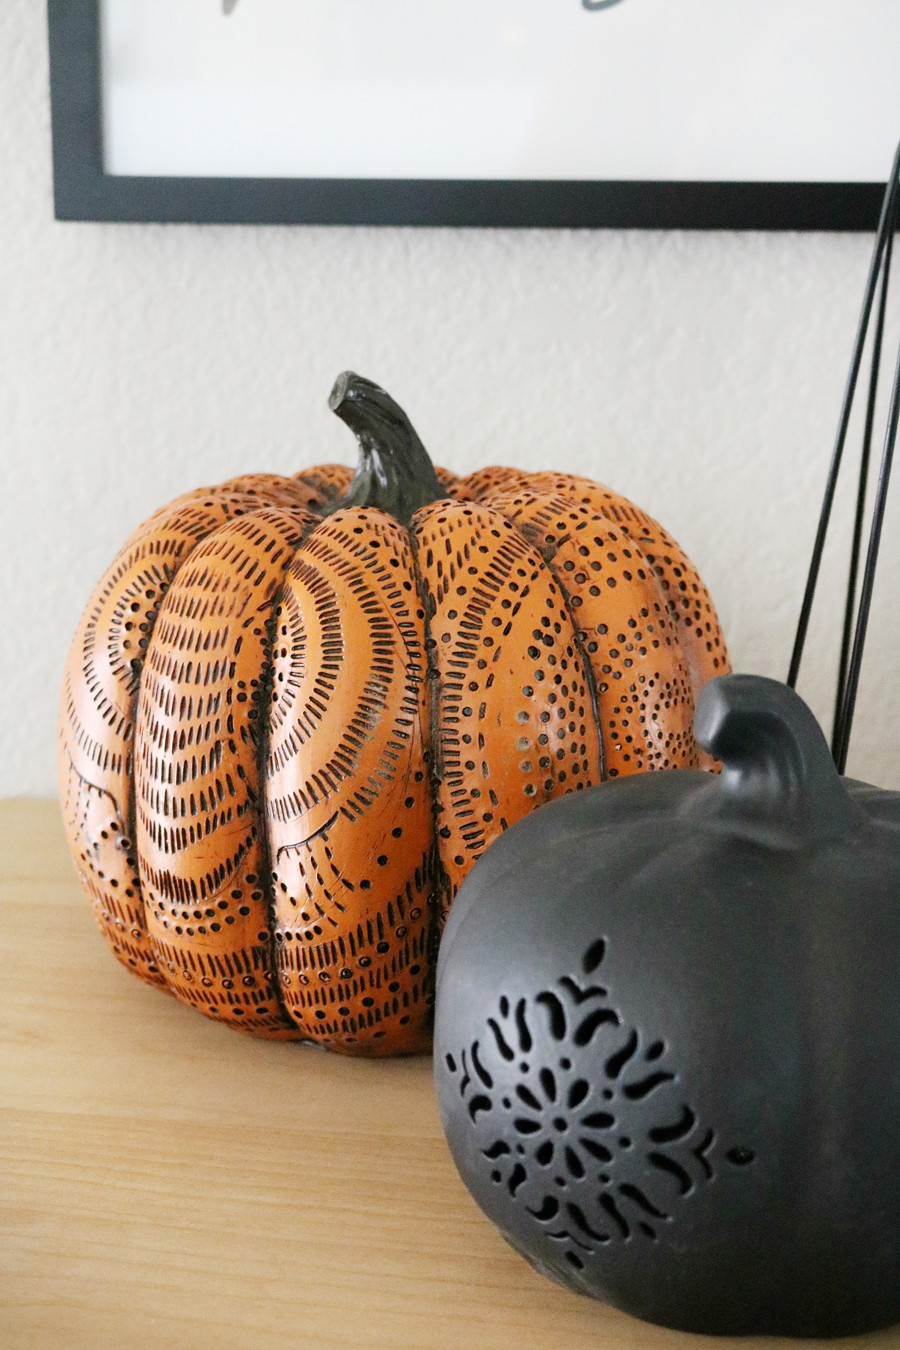
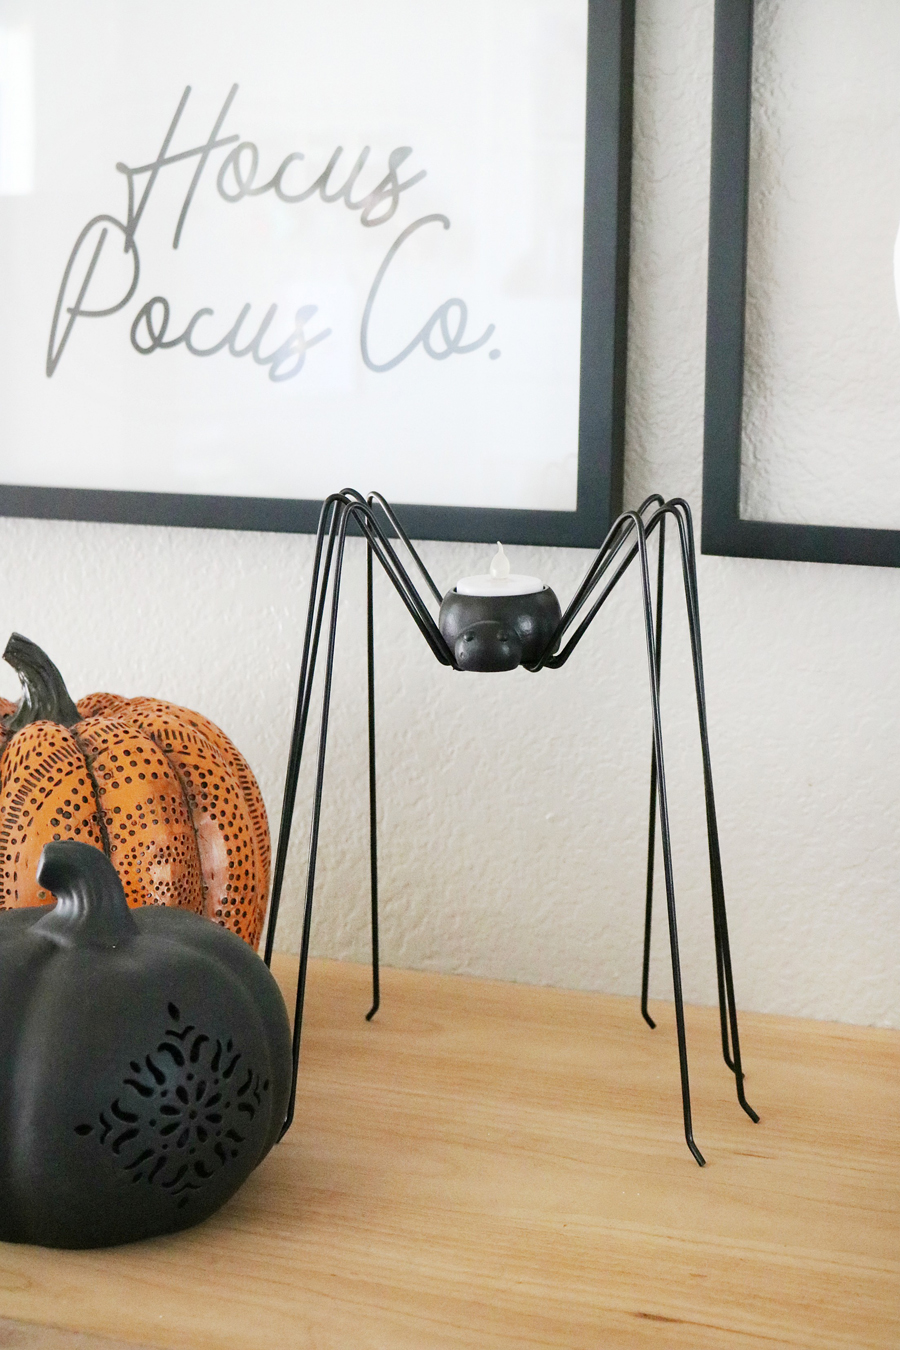
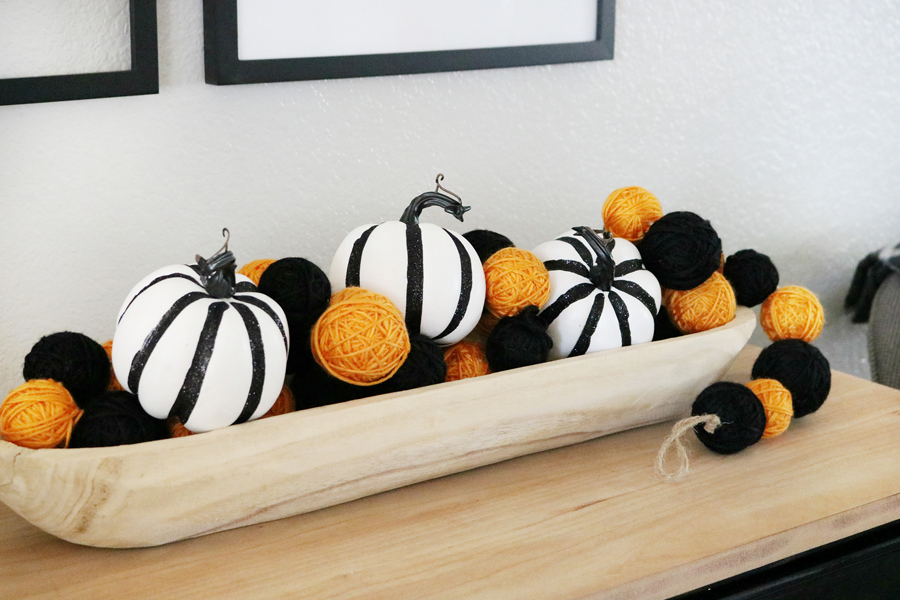
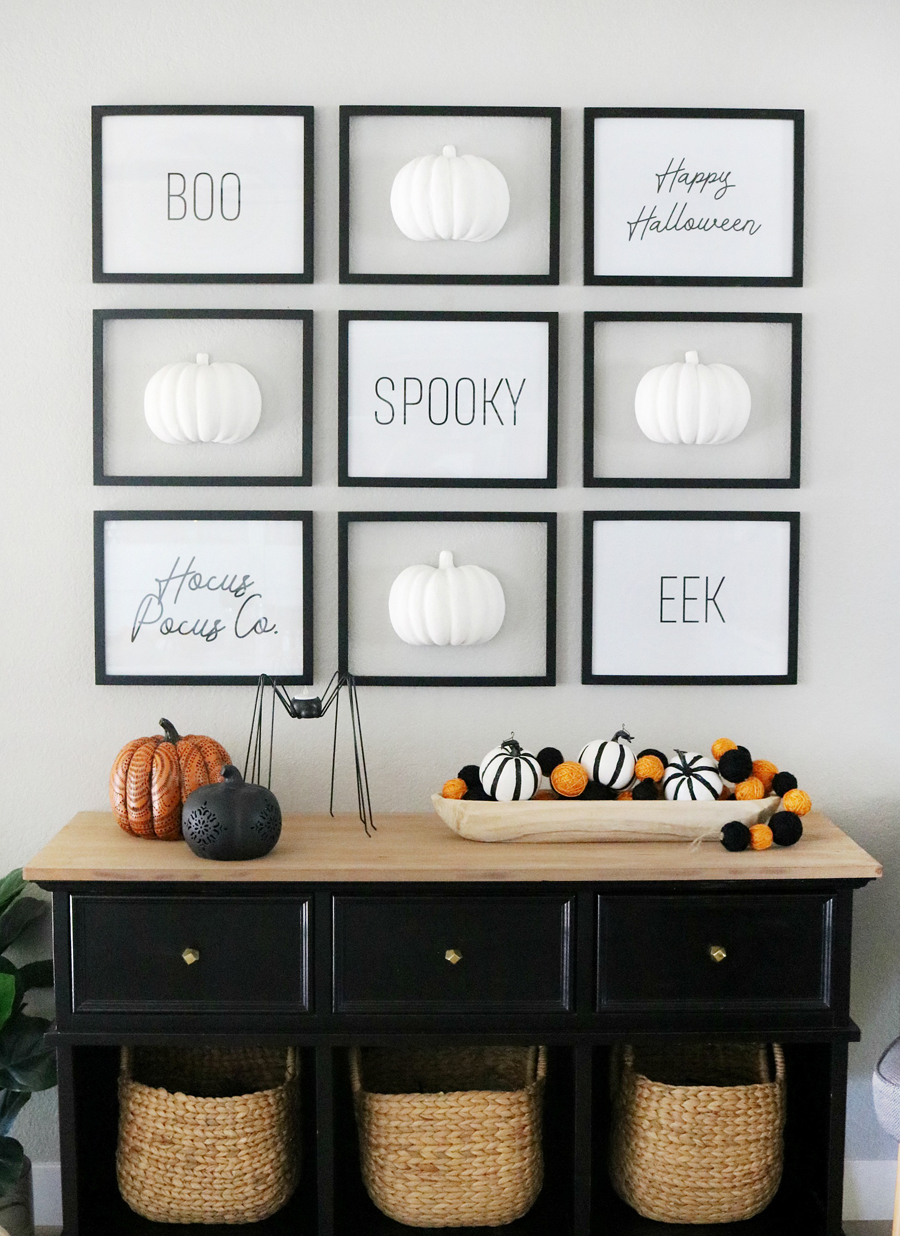 I kept my tabletop decor simple. A wood bowl filled with pumpkins and textured yarn ball garland. More pumpkins in varying heights that light up to add warmth at night, and let’s not forget my cute spider tealight candle holder.
 If you’re looking for even more Black & White Halloween Decor Ideas or easy Halloween DIY’s be sure to check out these posts…
- Black & White Halloween Mantel Decor
- Trick or Treat Yo Self Halloween Pillow
- Sugar Skull Halloween Decor
- Black & White Halloween Wreath
- Halloween String Art
- Black & White Simple and Modern Fall Mantel Decor
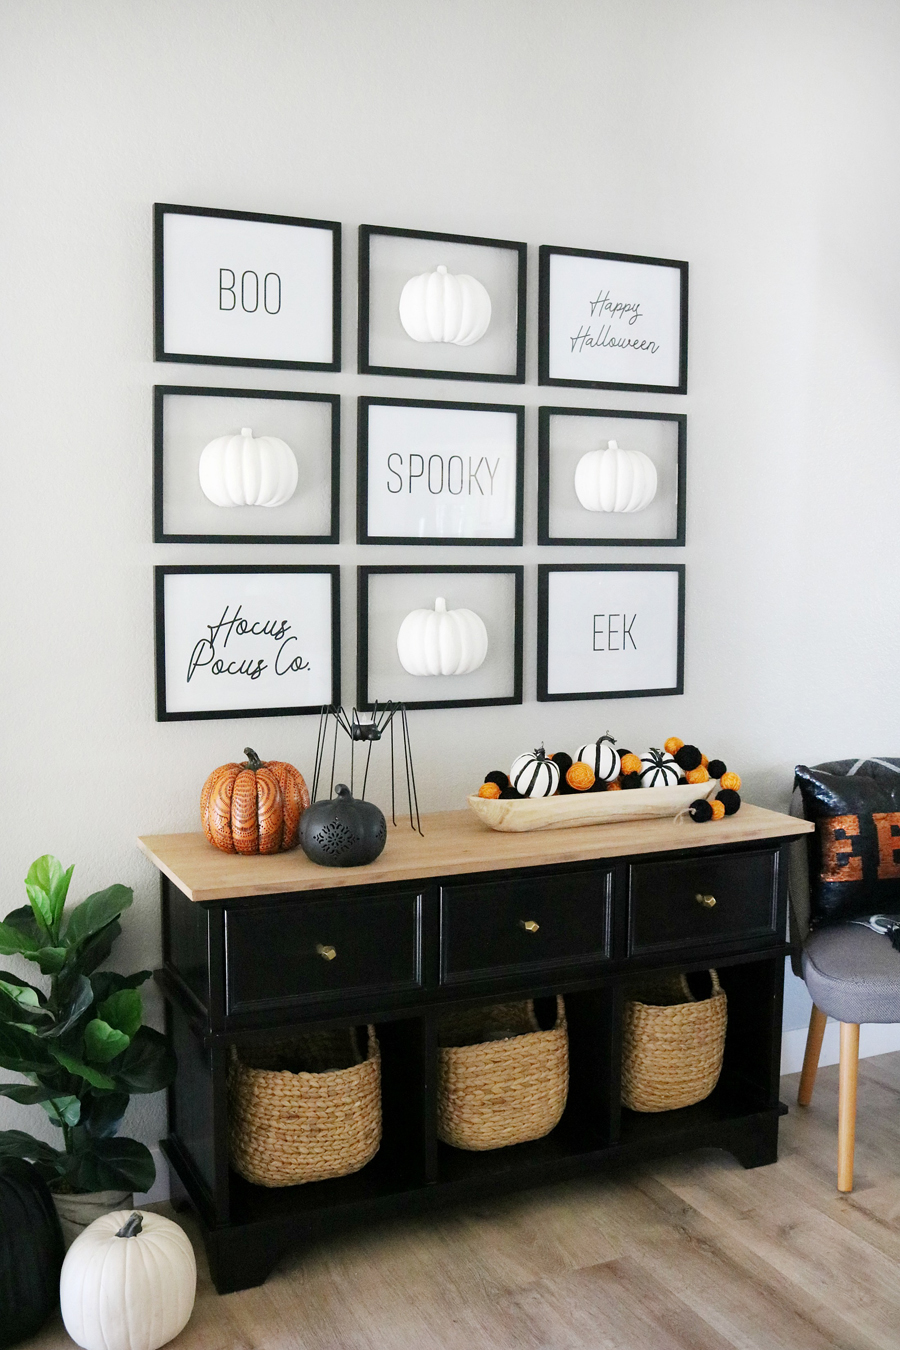 To complete your entryway space you can add baskets with throw blankets, a chair along side with a fun pillow, even more pumpkins…there are lots of options.
This Black & White Simple Halloween Pumpkin Gallery Wall Entryway and Decor turned out so cute! I love how it looks, and it was pretty easy to put together.


Leave a Reply