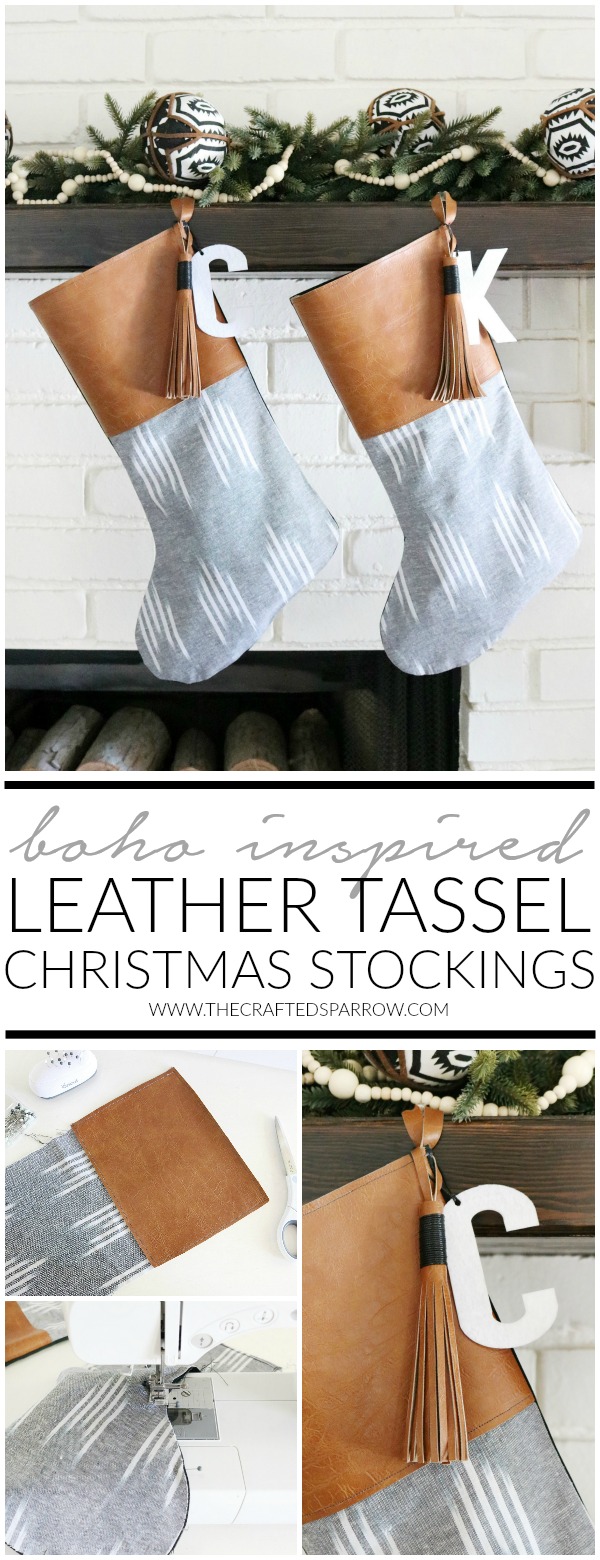
One of my very favorite things to do every year is decorating for Christmas, it seriously brings me so much joy! Since I love switching up my decor from year to year and adding new items it’s often times easier to create the custom pieces I’m looking for. That’s where my favorite crafting tool comes in, the Cricut Maker. I’m so excited to be sharing how to make these fun DIY Boho Inspired Leather Tassel Christmas Stockings.
 You’ve heard me say it again and again but it’s so stinking true, the Cricut Maker is my favorite crafting tool hands down. I probably use my machine more for holiday decor than anything if we’re being honest. It’s just one of my favorite things to create. The Maker allows me to create so many DIY holiday decorations for my tree every year, this year I thought I’d try and make some cute stockings.
Since my holiday decor will have a little bit of a boho-inspired vibe I knew I wanted to work with a mix of fabrics and textures. I also wanted my stockings to be an easy project, I’m not a girl who loves to sit and sew for hours so the quicker the project the better. Let me show you how I made these DIY Boho Leather Christmas Stockings in under an hour.
 Here’s what you’re going to need to make these DIY Boho Tassel Christmas Stockings…
Supplies:
- Cricut Maker
- Cricut Cutting Mats, Fabric & Strong Grip
- Cricut Rotary Blade
- Cricut Sewing Kit
- Faux Leather
- Cotton Fabric of your choice
- Sewing Machine
- Leather Sewing Machine Needle
- Hot Glue Gun
- Cotton Cording
- Stiffened Felt
- DIY Tassels & Initial Charm Cut File, found HERE
- DIY Christmas Stockings Cut File, found HERE
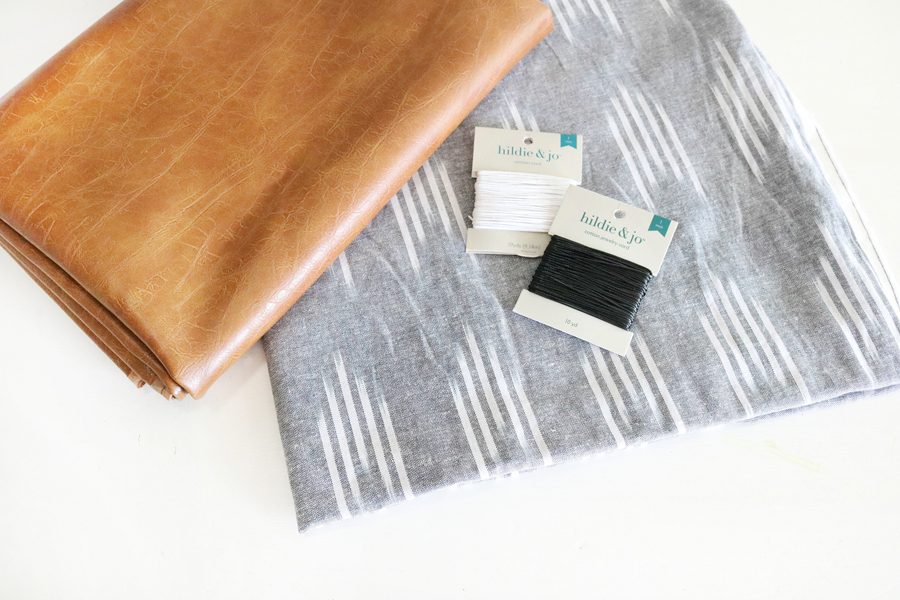
 I decided to go with a camel colored faux leather and a gray Ikat print fabric I found at my local Joann Fabric and Craft Stores. I loved the color combo and the print on the cotton/linen blend fabric was perfect, not super busy. I also grabbed some cotton cording in black for the tassels we are going to make later in the post.
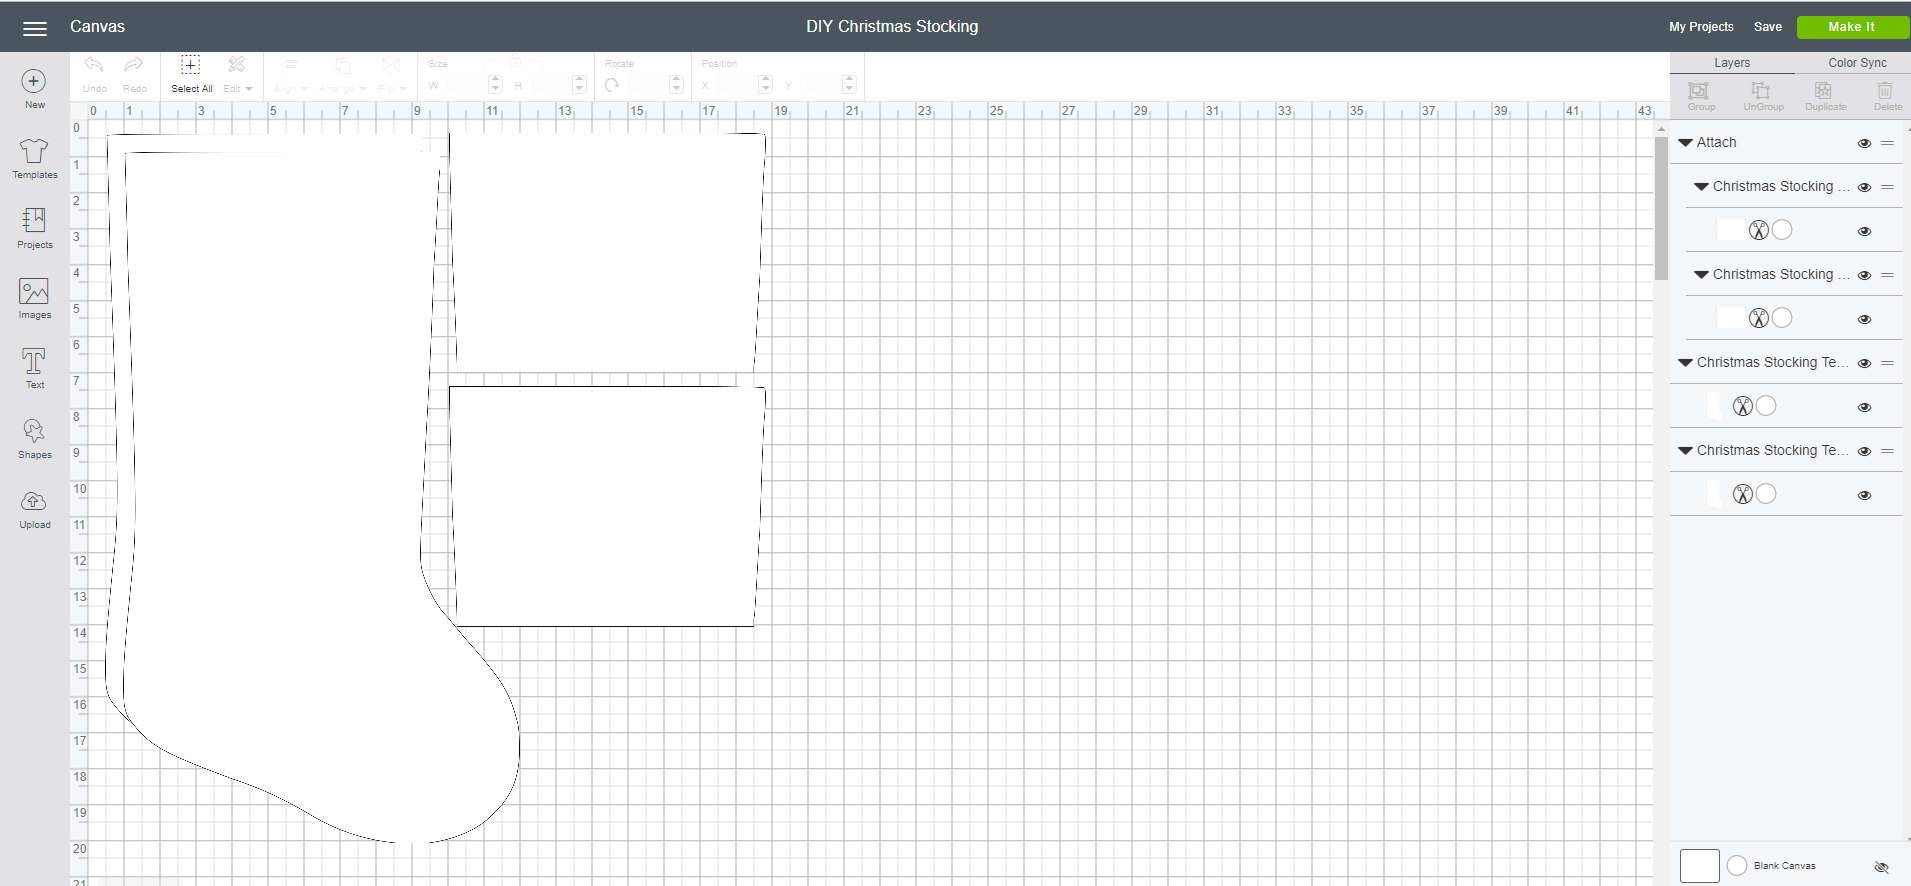
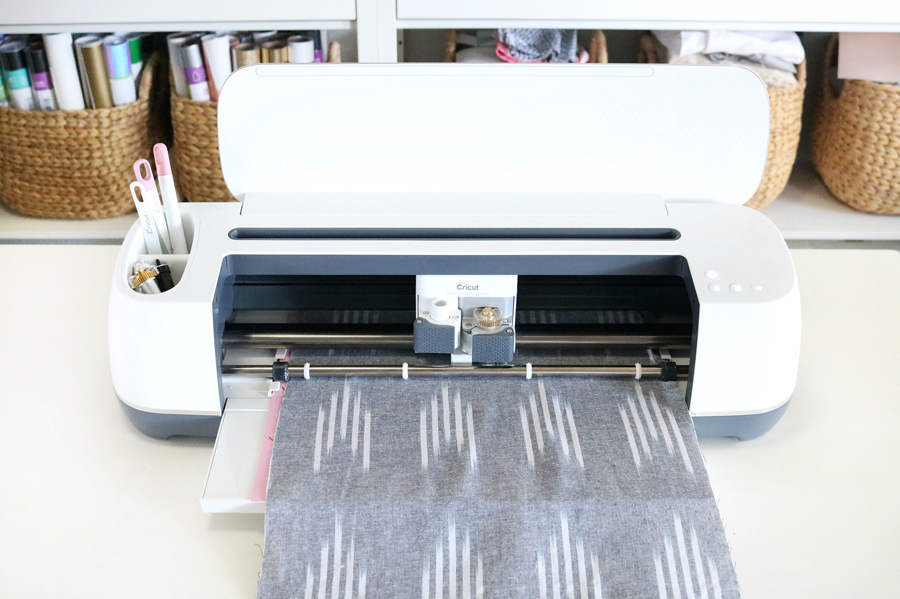
 Start by setting up your Cricut Maker and opening Design Space. First, you’ll need to cut the pieces to create the stocking itself. I’ve created a very basic stocking template that you can cut with your Cricut Maker super easy. Find the link to that above in the supply list. I don’t think I’ll ever go back to cutting things like this by hand when using my Maker with the Rotary Blade attachment is so easy.
 Speaking of the Rotary Blade, it’s one of the biggest things I love about the Cricut Maker. It quickly and accurately cuts hundreds of materials, from things that are super delicate to heavy duty materials like leather! The Rotary Blade is just one of the adaptive tools the Maker can use, the others include tools like the Knife Blade – Scoring Wheels – and so much more. Every cut made with my Maker comes out perfect when the Adaptive Tool System makes the decisions. This unique cutting technology controls the direction of the blade and the cut pressure to match your materials. It has 10X more cutting power, which means there are so many more materials you can cut than with other machines.
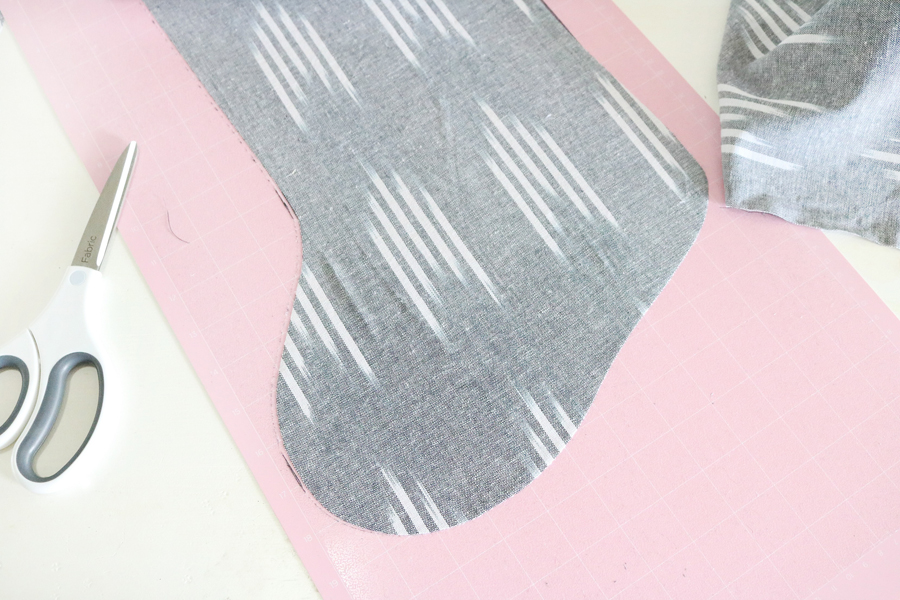
You will need to cut four pieces for the main part of the stocking, I chose to only use the patterned fabric on the front of my stockings and cut a solid piece of black duck cloth on for the back of my stockings. This is up to you on what fabrics you do.
Once those pieces are cut you will cut two pieces of the faux leather for the tops of the stockings. Set those aside for a couple minutes.
 With both your front and back pieces of the stocking you will need to create a clean 1/8″ hem at the top using your sewing machine. For this I don’t even iron it, I just eyeball it and sew. Not super professional, but again I’m not usually very precise when it comes to sewing.
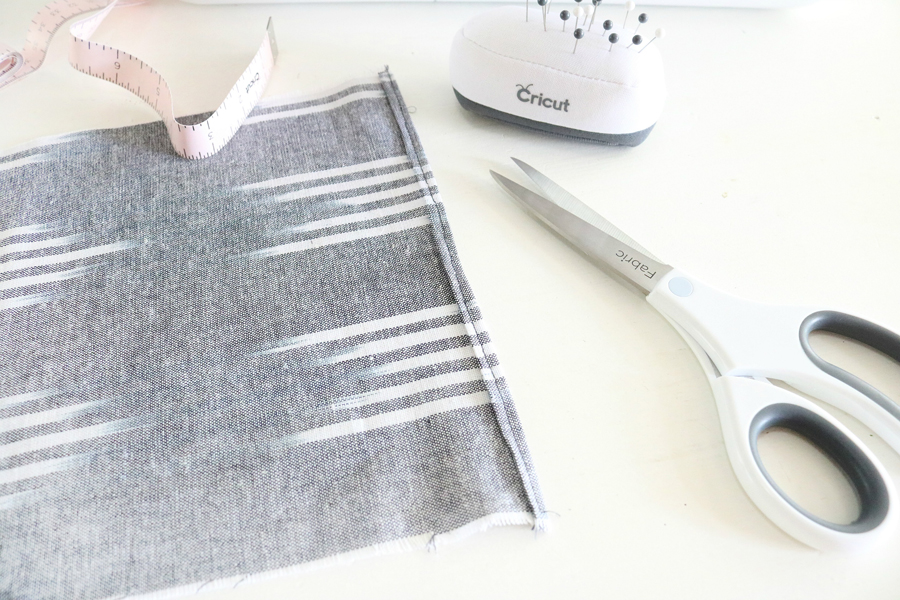
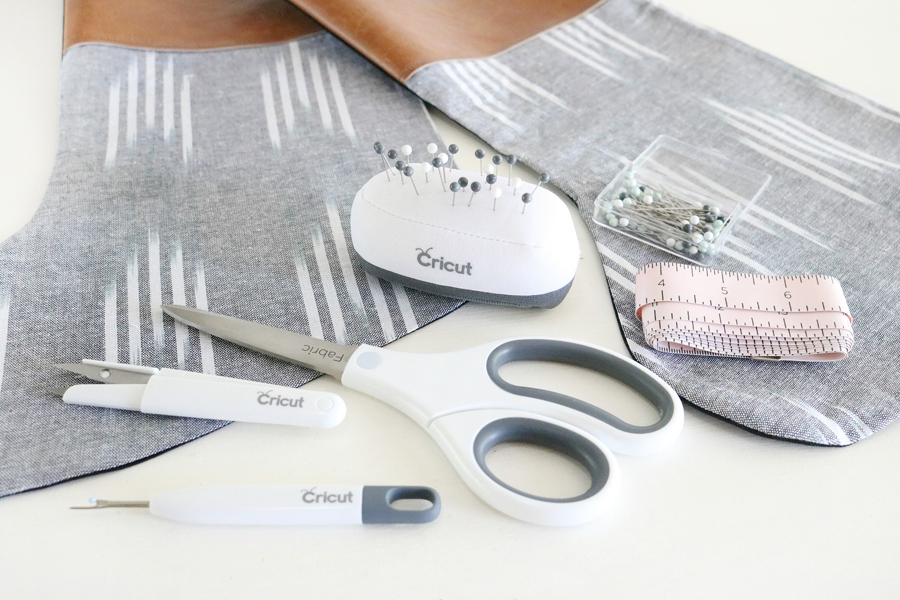
One thing I do love about sewing, cute accessories to help get the job done! How cute is my Cricut Sewing Kit?! I love everything that comes in this kit, the pins are awesome and long and the pincushion is such a help when sewing. That pink tape measure also makes me very happy.
 Now grab the pieces of faux leather you just cut and sew them to the top of the front of your stocking piece. Super basic nothing fancy just line it up and sew it all the way around, I tried to keep it at about a 1/8″ seam allowance. Be sure you’re using a leather sewing machine needle to sew this stocking, trust me you’ll save your sanity if you do.
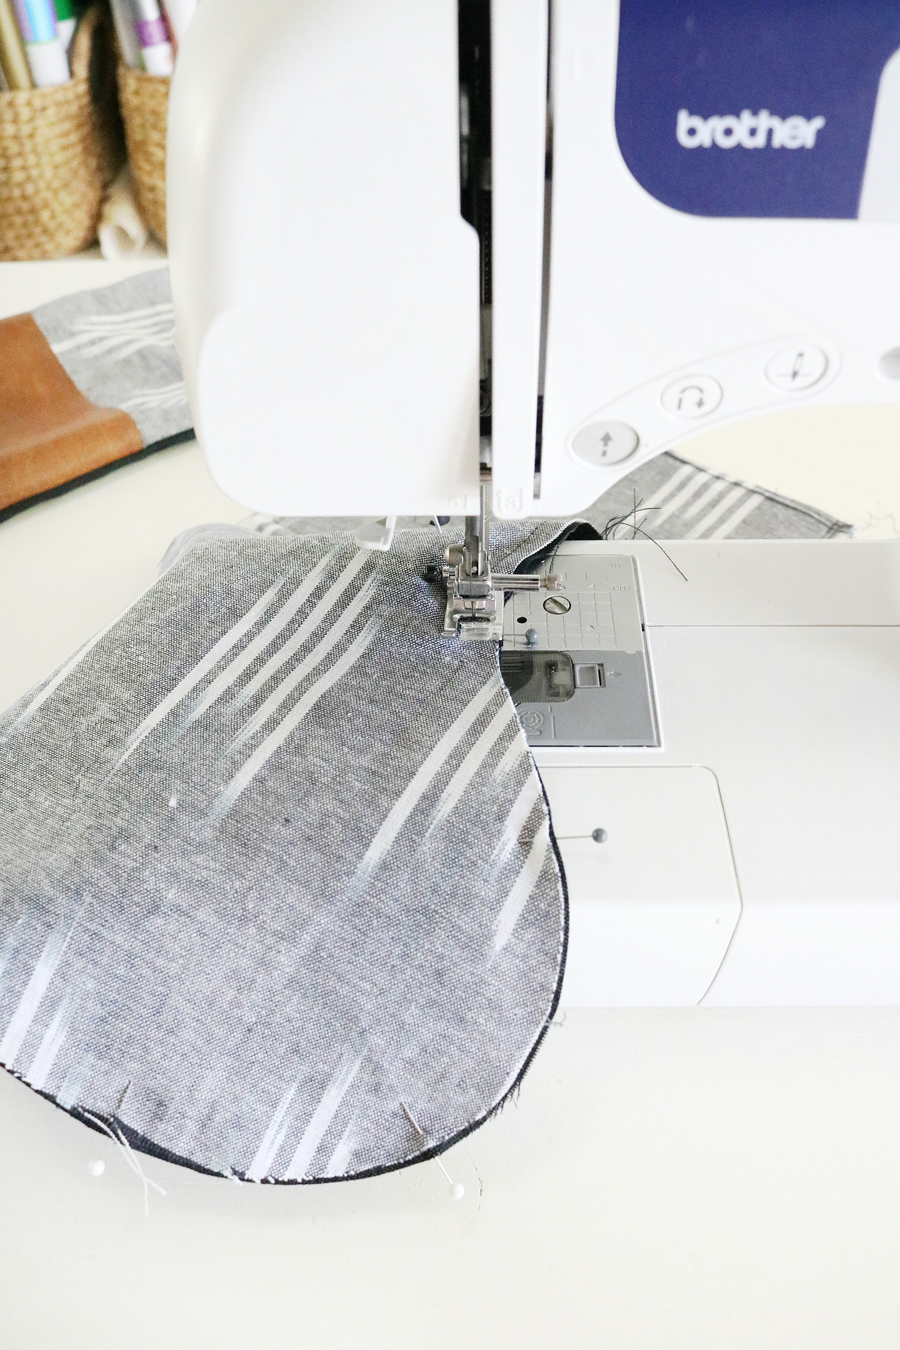
 Once that is done take your two stocking pieces front and back, and you will lay them right sides facing together. Pin them together and sew the edges all the way around with a 1/4″ seam allowance, leaving the top opening of the stocking open.
When you’re done sewing it turn it right side out and you’re done with that part.
 Here’s how to make the DIY Boho Inspired Leather Tassels and Initial Charms.
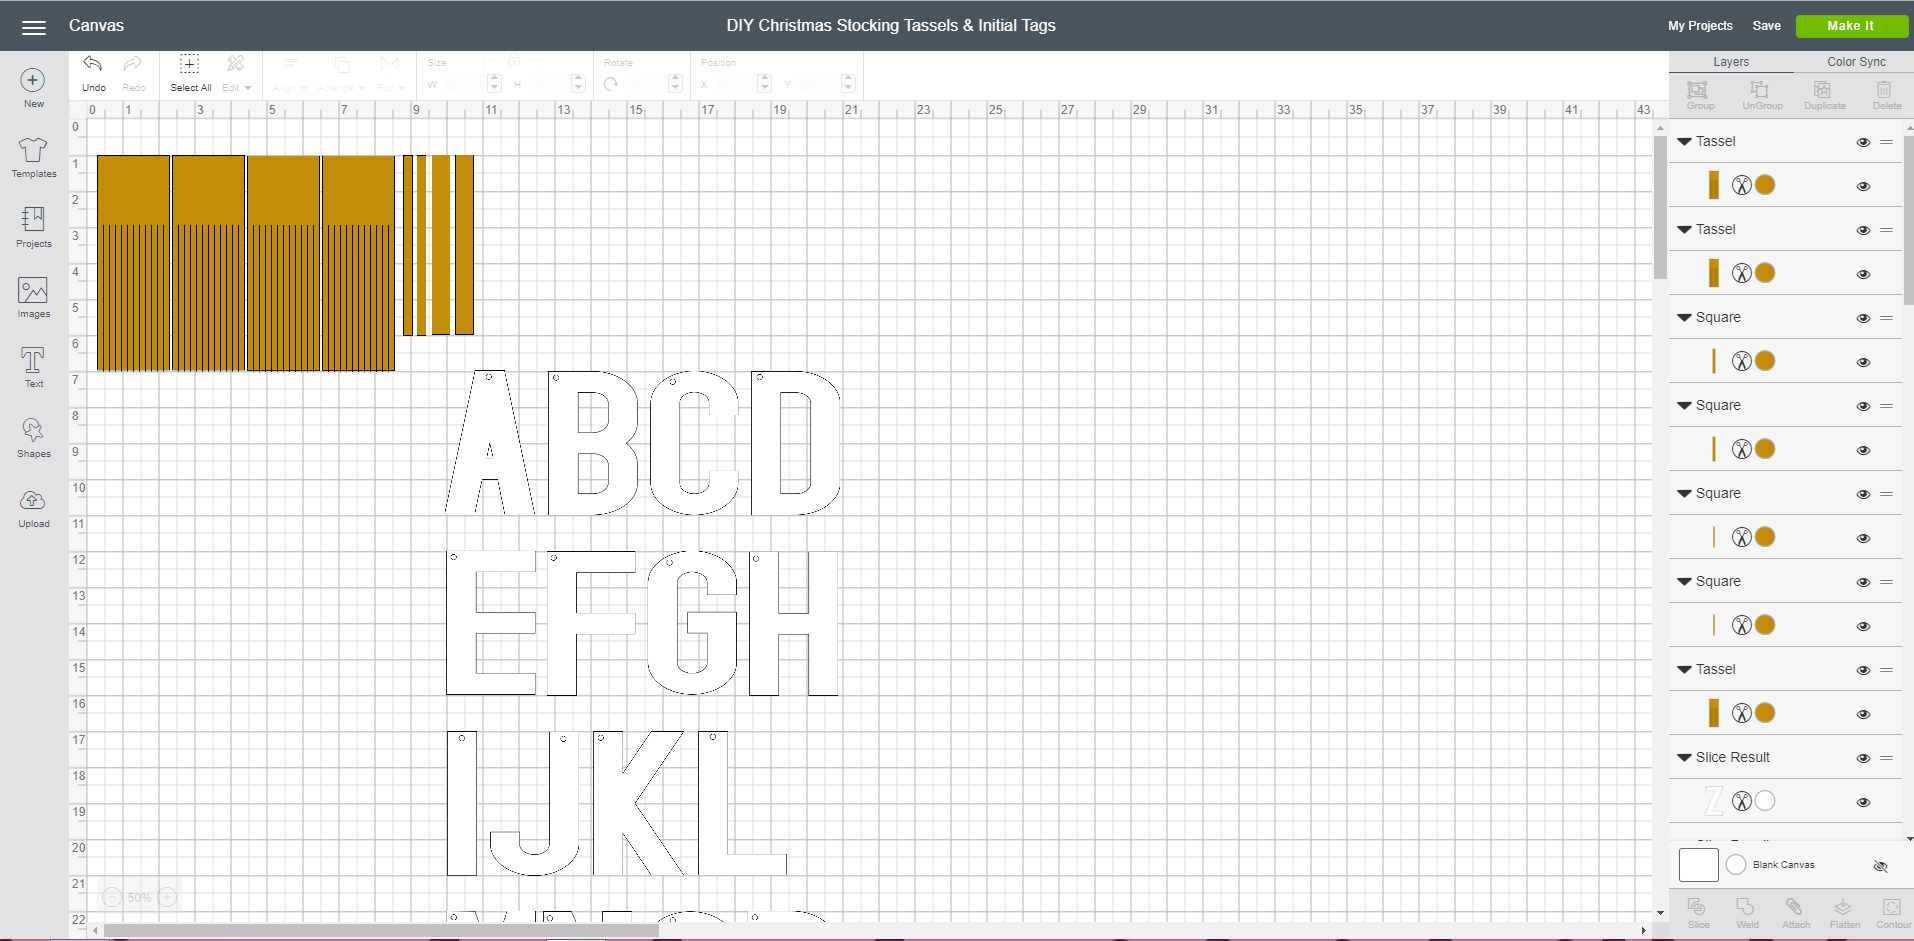
Start by opening the cut file found above in the supply list in Design Space. You can customize the sizes of your tassels and initial charms to your liking. The initial charms can be cut from a variety of materials I chose a stiffened felt to go with my stockings. Since I’ve created the whole alphabet in this cut file, simply just hide the letters you don’t need during the cutting process. This cut file also has the faux leather strips to create your stockings hanger, those are the wider of the two sets of rectangle pieces. The other rectangle pieces are for your tassels to create the hanging loop.
For each faux leather tassel, you will need three separate pieces of the fringe portion for one tassel.
Go ahead and sew the hanger on to your stockings before making the tassels.
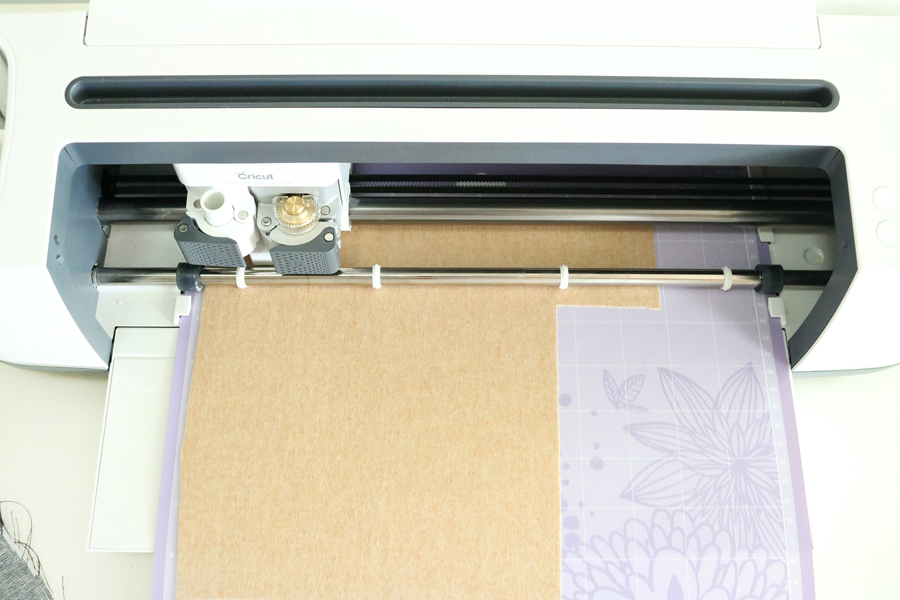
 When cutting your faux leather place it shiny side down with the fabric backing facing up. This helps to keep the cuts super clean otherwise, the faux leather can stretch and shift during cutting.
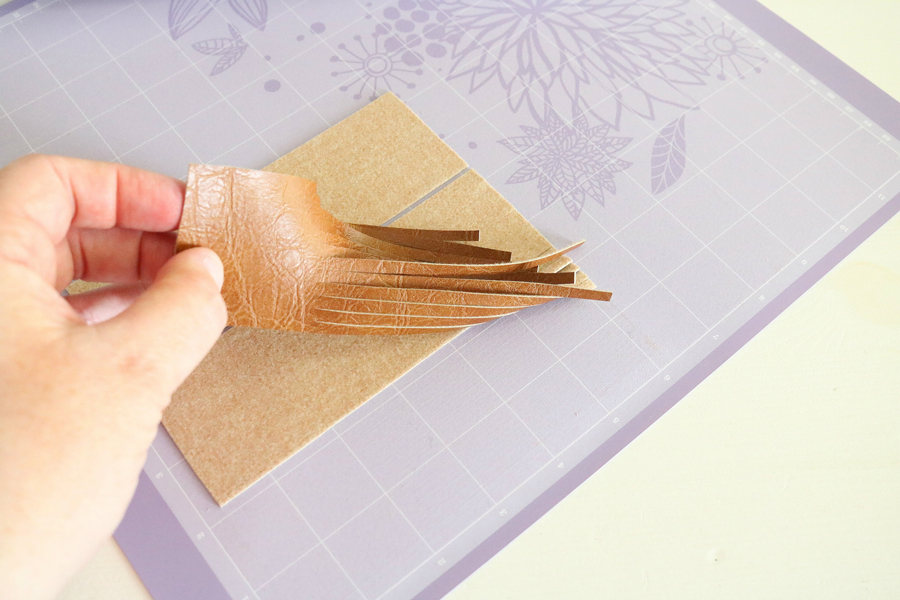
These fringe pieces cut so clean and effortlessly with the rotary blade. A few years back I created much larger faux leather tassels as ornaments for my tree, and I cut them all by hand…I wish I had of had this Maker when I made those! You can see those HERE.
 When all your pieces are cut for the tassels it’s time to assemble. Grab the rectangle faux leather piece that was cut to make the hanging loop and fold it in half, securing it at the ends with a dab of hot glue. Simply roll your faux leather fringed pieces around the hanging loop, hot gluing as you go. Be careful, you’ll probably burn yourself…but that’s what making is all about right?! Continue gluing until all three sections have been glued around to create a tassel.
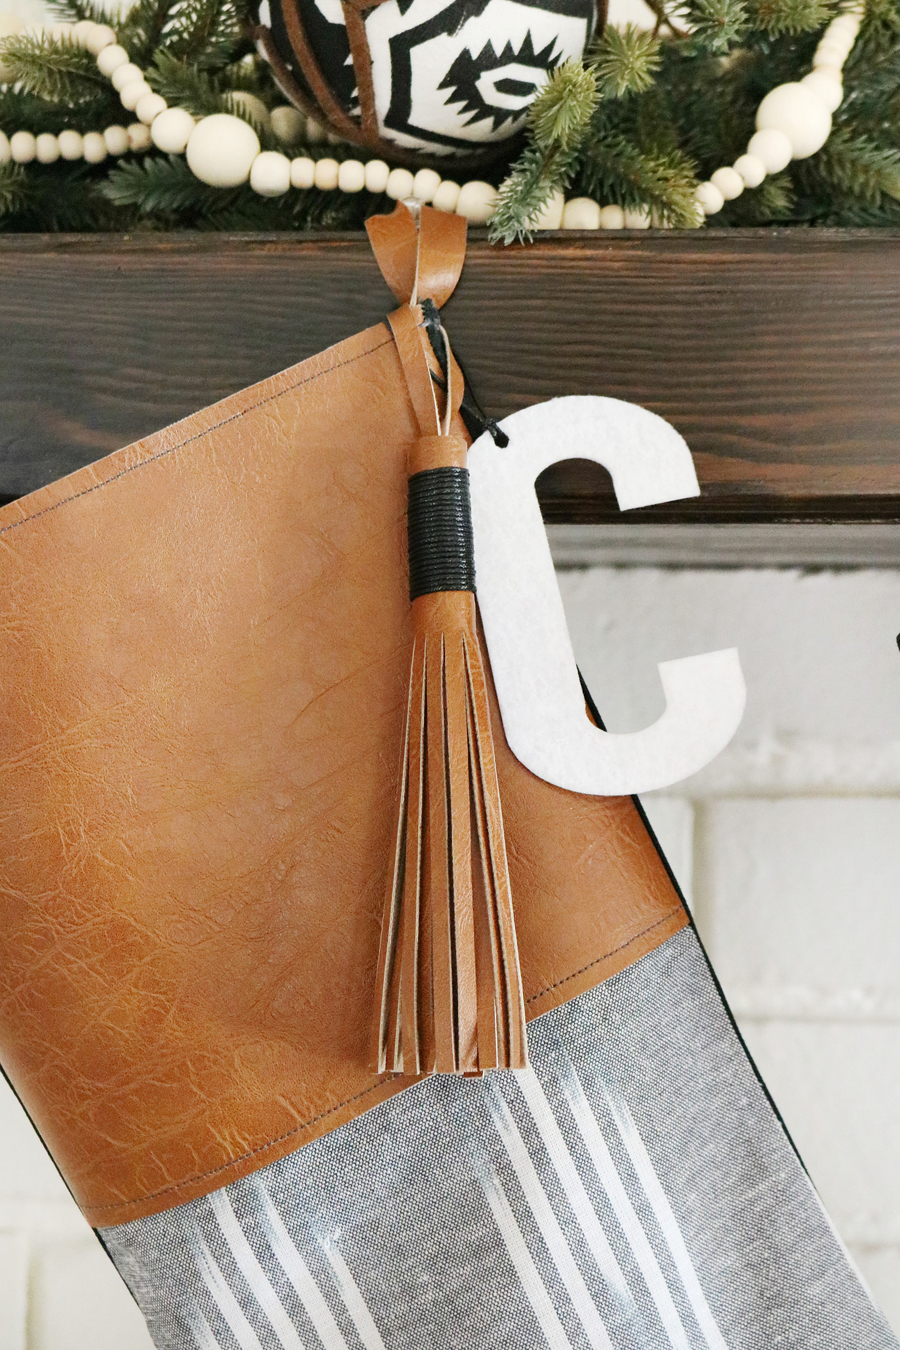
Using some cotton cording or any trim you like just secure and wrap around the top portion of your tassel.
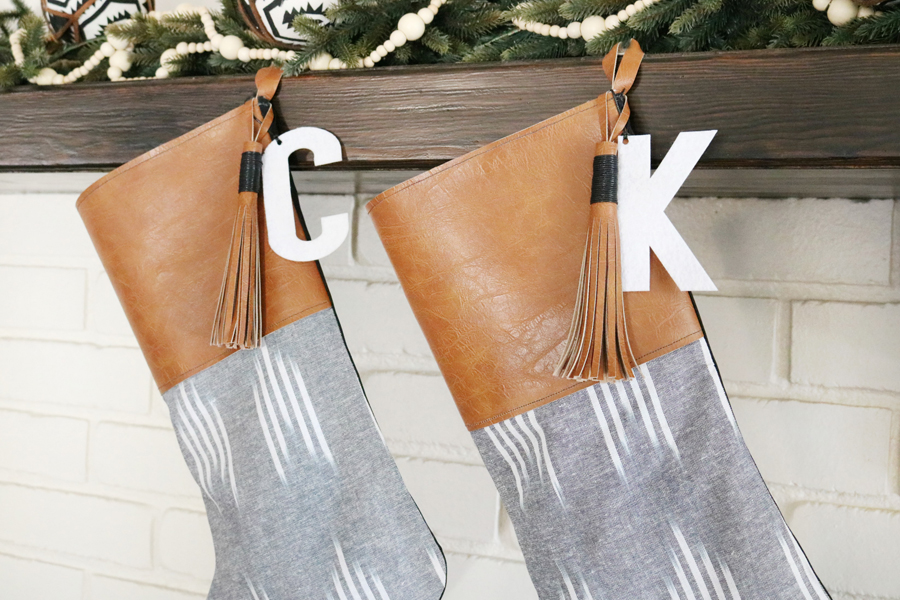
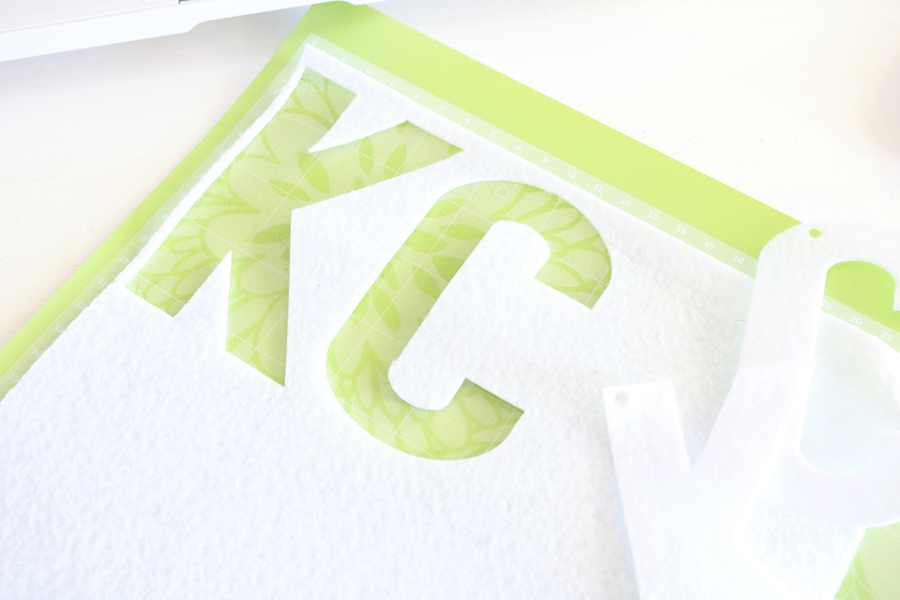
 You’ll cut the stiffened felt or material of your choice also using the rotary blade. It cut these letters so clean, and I have to tell you how impressed I always am when it cuts even the smallest of circles so awesomely for the hanger. I just added some of the same cotton cording I used on the tassels to secure these initial tags to my stockings.
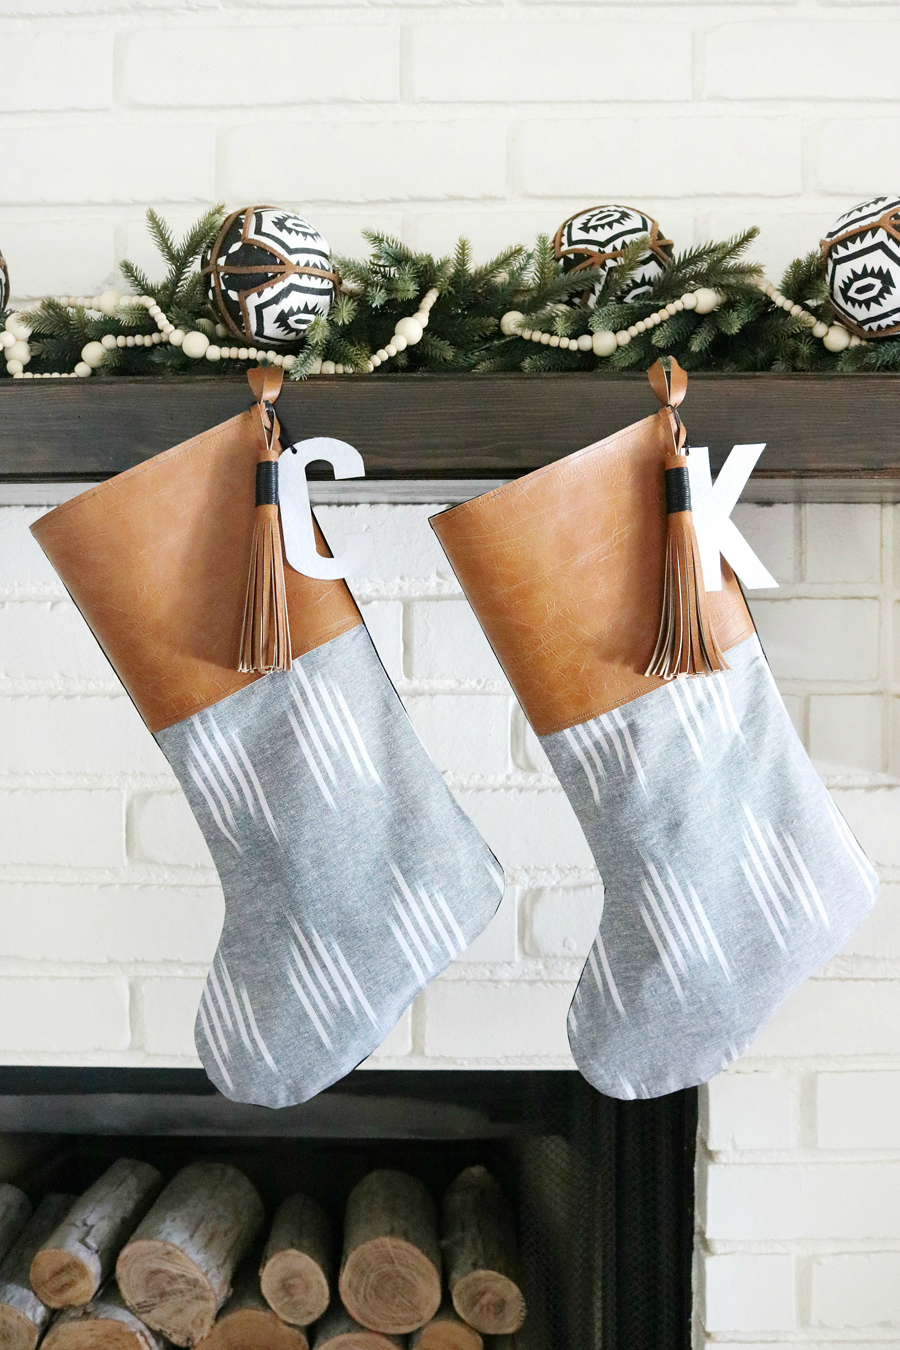
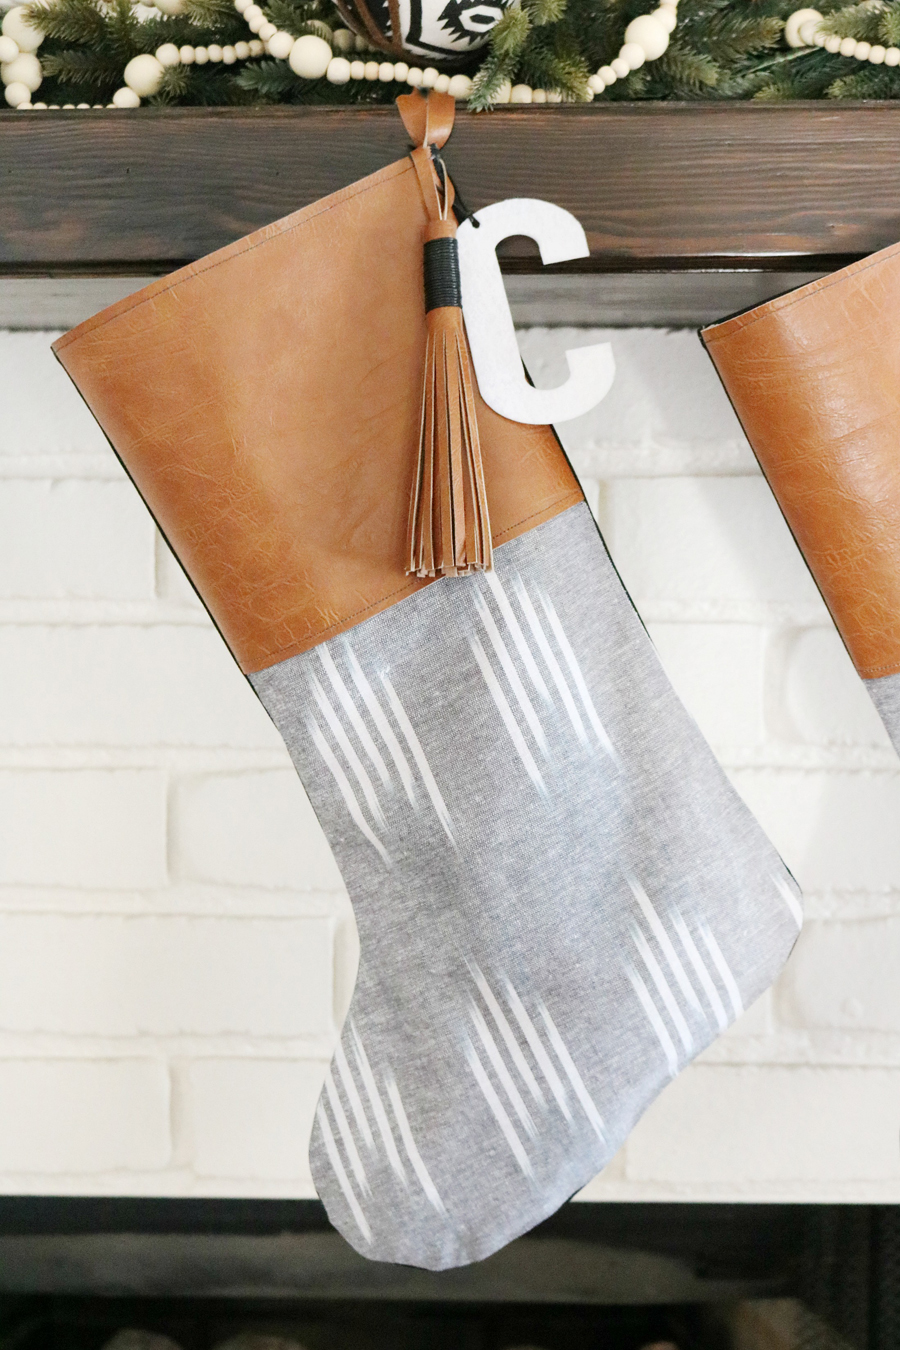
 I just slipped both the tassel and the initial charm over the hanging loop on my stocking so they could be removable or changed out if I wanted something different. How cute is that faux leather tassel?!
 I absolutely love that my Cricut Maker makes DIY’ing such fun decor so easy, these DIY Boho Inspired Leather Tassel Christmas Stockings turned out just as I imagined and I’m so in love with them.
 If you loved these DIY Boho Tassel Christmas Stockings be sure to check out these other Christmas DIY’s…
- Black & White Modern Snowflake Christmas Mantel Decor
- Black & Whtie Modern Snowflake Christmas Tree Decor
- DIY Faux Leather Christmas Tree Pillow
- Vintage Truck Christmas Pillow
- DIY Fa La La Christmas Pillow
This is a sponsored conversation written by me on behalf of Cricut. The opinions and text are all mine.


Leave a Reply