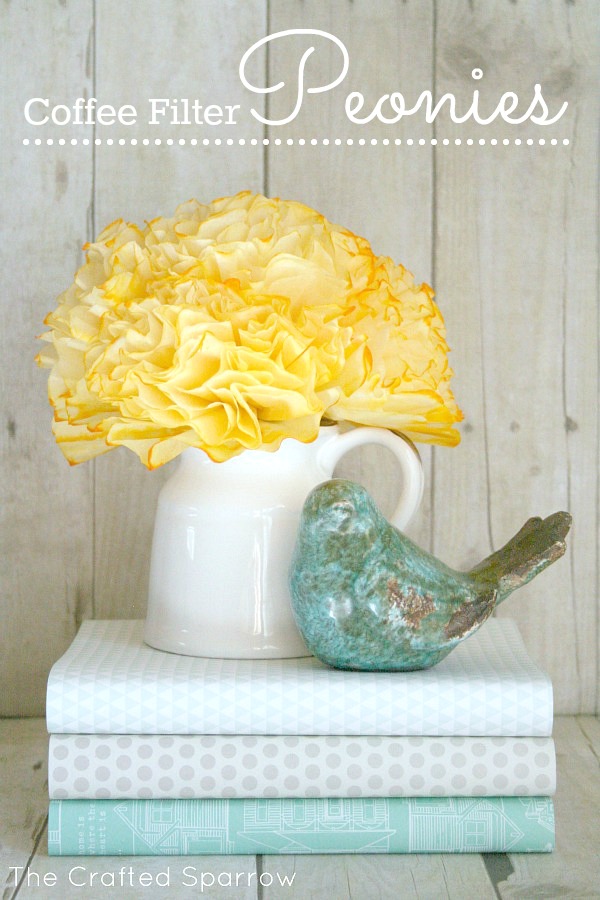
I love fresh flowers, I love seeing them every morning on my kitchen counter when I’m lucky enough to have them. Unfortunately that doesn’t happen often. And honestly it’s not in my budget to buy them weekly either. I decided I needed something that would bring a pop of color to my office / craft area and make me happy to see, and that didn’t break the bank. Today I’m sharing these Coffee Filter Peonies Flowers with you.
Supplies:
* Coffee Filters {white}
* Scissors
* Floral Wire
* Floral Tape
* Food Coloring
* Glue Gun or Very Tacky Glue

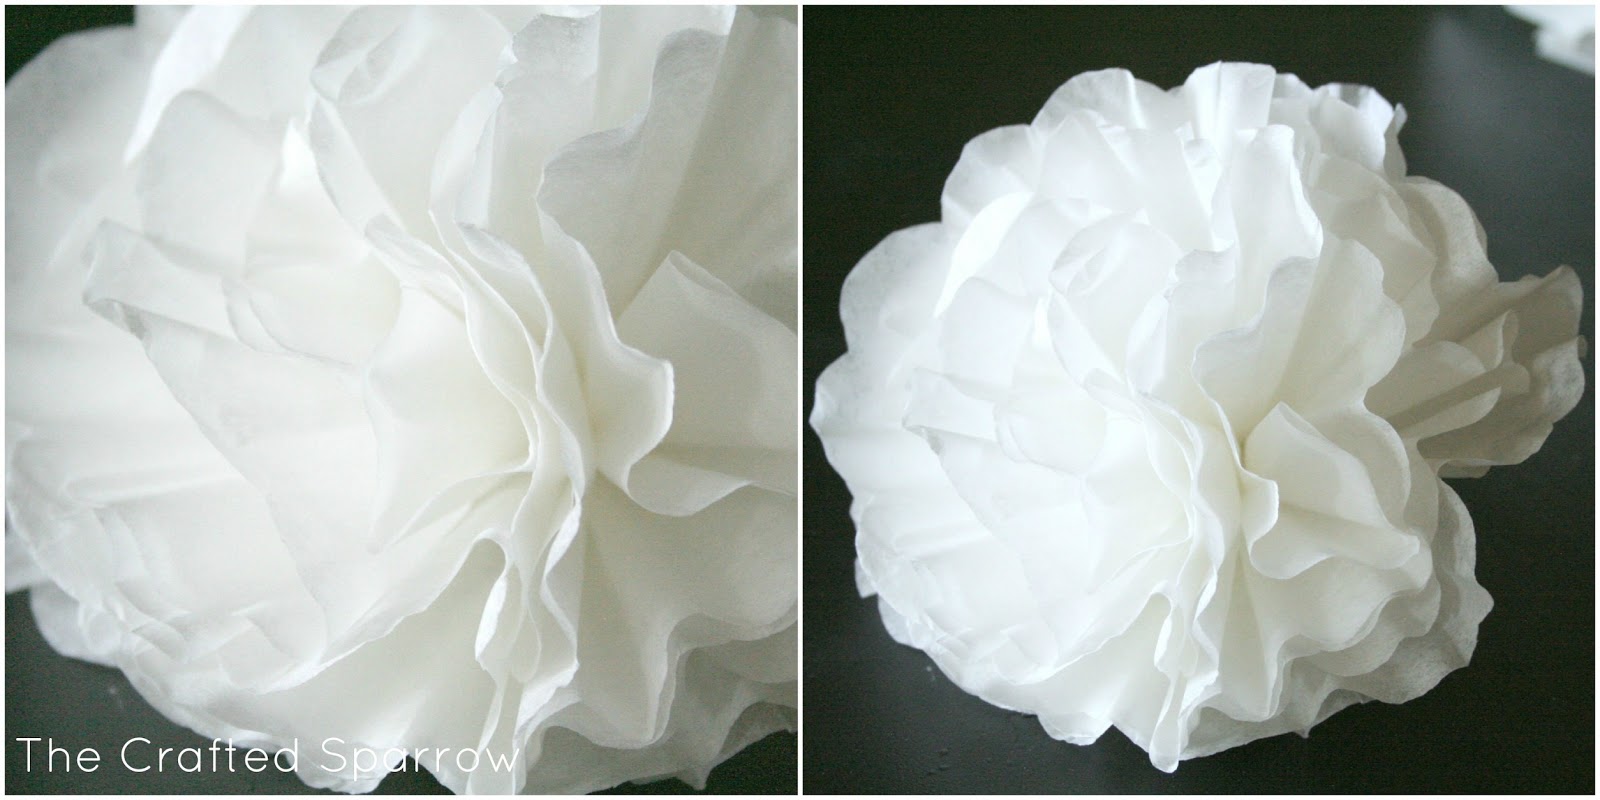
1. Fold your coffee filter in half {I did two filters at a time}.
2. Fold again in to fourths.
3. Fold again in to sixths.
4. Last fold so that it is in eights.
5. Take your scissors and create a scalloped edge around the top of the filter. You can create a short scallop or a deeper scallop depending on how you want your petals to look.
6. Unfold to see your pretty scalloped edges.
7. Once all your coffee filters are scalloped {I used 8 filters per flower, and the flowers are large…so you can use that as your guide for how many filters to cut}.
8. Grab your floral wire and cut in to 12″ lengths, double that if you want your wire extra sturdy. Using a pencil wrap the end of your wire several times in to a coil, then press your coil together after you slide it off the pencil. This gives you a center for your flower that wont slip through the filters.
9. Poke the floral wire through the center of the first coffee filter petal, I used a small dot of hot glue on the floral wire coil to secure my filter to it and twist the bottom of the filter. You can either use regular tacky glue or hot glue {if using hot glue just be careful, it’s hot and the filters are thin}. I repeated this step until all my filters were on the wire, I glued every two filters, and the very last filter.
10. Tear off a long strip of your floral tape, about 12 – 16″ long, once you tear it off the roll you will need to gently stretch it – this activates it’s stickiness.
11. Starting at the base of the coffee filter where your wire pokes through place a dot of glue and adhere the end of your floral tape. Start wrapping and spinning your floral tape all the way down your floral wire to create your stem. I wrapped all the way down and then back up again to give it some sturdiness.
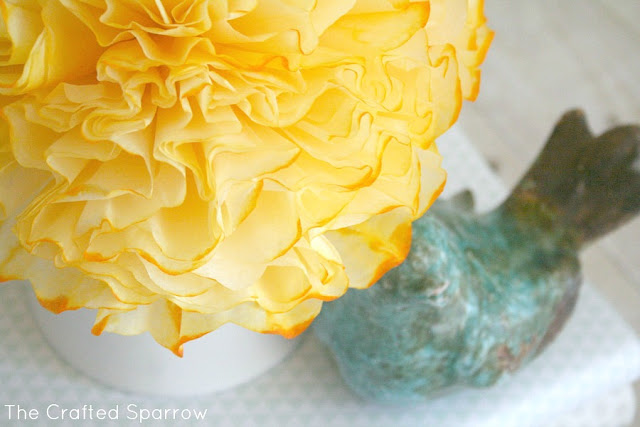
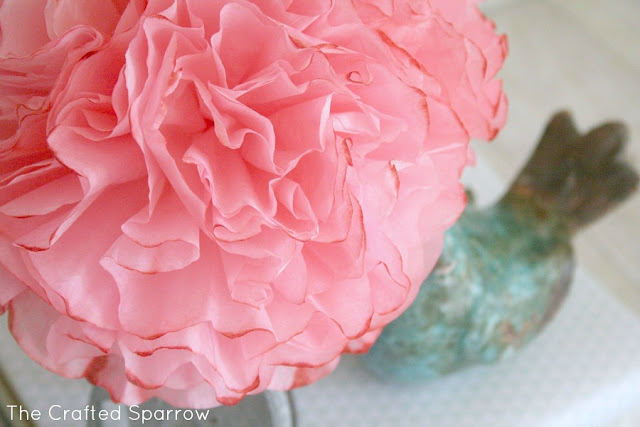
12. I wanted colored peonies, but you could also leave them white. If you choose to dye them all you need is food coloring. Just mix a bowl full of water and tint the water with your food coloring until it’s the color you want. You can test it by dipping an extra filter in and see how it turns out. All I did was gently dip my peonies one at a time half way in to the water. Quickly pull it out and lay on a cookie sheet to dry.
13. Once completely dry you can fluff your peonies and place them in your favorite vase.

These are great for lots of occasions – centerpieces, party decor, and gift toppers. Best thing is they won’t die and you can switch up colors as often as you’d like. They make me really happy when I see the bright colors when I walk in to the room.


These are lovely! They add such a nice pop of color without looking too homemade, which is what you might expect from coffee filters…I will have to try this!
These are beautiful!! Thank you for sharing 😀
So dang cute! Definitely pinning!
Ok, I’m back again! I’m totally going to feature these in my [so cheap, so easy] series tomorrow. I’ll link back to your original post. Thanks for sharing!
Jamie
Beautiful!
Adorable! I have a wedding coming up and love the yellow for the tables…yea!!!!
Rebecca, visiting from the party at Tatertots and Jello – these are simply gorgeous and look so much like the ones I just cut from my garden! Thanks so much for sharing, they are beautiful. Have a wonderful weekend!
So, so, so pretty! I love how the edges are a little darker – makes them look so much more real! Jenna @ Rain on a Tin Roof
These are gorgeous! I love fresh flowers, but I do not have a green thumb, so they last about 3 days before they all die. I am totally doing this! Thank you for sharing: visiting from TT&J!
Chrissy
http://www.everydaywiththejays.blogspot.com
Love love love!!!
Anna
askannamoseley.com
Wow – I need to pin these, they are so pretty! I love peonies!!
Krista
LOVE! and pinned :O) beautiful job!
These are adorable! Im going to sit down and make some of these for my daughters room!
I just love this thanks for sharing and providing a great tutorial! I shared this as inspiration on my blog today with my readers! feel free to come check it out! thanks
http://littlebitsofeverythingqce.blogspot.com/2013/07/weekly-wrap-up-and-pinned-it-friday.html
Hi Rebecca! This vignette is so pretty, and your coffee filter flowers are spectacular. I shared your post today on Friday Finds. Thank you, and enjoy your weekend.
Oh how pretty!
Oh, I like this, I have pinned it so I can make it one day!
So cute! I will definitely be adding these to my project list!
Curious how you got your peonies so pink. I’ve used almost a whole bottle of red food coloring and they still have a coral tint to them. Trying to get that “baby shower” pink that you have. Will they dry a little brighter?
JoDee – I hope you see this. There was no email to respond to you. I think for the pink ones I used a gel food coloring, try that it might help. It’s usually a bit stronger in the color department.
These are great!! Would it work to color/dye them before putting them together?
Rebecca Hanson – Yes they would work that way too! 🙂
this is a great post, thanks! I was wondering if you have a post about the books? did you purchase them covered, or did you do it yourself? thanks!
Thanks Cally. They are covered in scrapbook paper that I did myself. 🙂 Have a super weekend.
How did you cover the books?
Hi! These are adores! Which and how much water coloring do i use to get the pink in the photos?
Hi Mireya. I used a gel food coloring which allowed for a deeper color, I honestly didn’t measure so I’m not sure exactly how much I used. By the way it was red coloring. 🙂
Absolutely beautiful! Thank you for hating these! I love the bird too. Where did you get it?
Thanks Kristen. The bird is from a shop called RodWorks here in Az. 🙂
Hi Rebecca, thank you for an awesome tutorial! I was wondering what gauge floral wire you used for this project. I’ve never made paper flowers, and I got stuck because Amazon has different sizes of floral wire. Thank you in advance!
Hi Anastasia. I’m not sure what gauge I used it’s been a few years since I made these, it was just basic inexpensive green floral wire. If you’re looking for a thicker gauge you can double the wire up to make it thicker. The wire I used was thinner and could be cut with scissors or wire cutters. Hope that helps. 🙂
Thank you very much for your reply, Rebecca!
Dear Rebecca, HI!!! I’m new to making paper flowers, and when I saw your coffee filter peonies I was SO HAPPY! They are BEAUTIFUL, & I was also thrilled that all you needed was coffee filters!!! I’ve seen ALOT of pretty crepe paper flowers, but I need to order “special, Italian or premium weight paper” , which is expensive and one of the 2 places that carries it, is OUT until October!!! So you can understand my excitement!!! Your site is amazing, & you are extremely talented! I know I will be enjoying your site for a long time!!! THX again, Sincerely JULIE ( :
JUST FINISHINED MAKING THEM BUT I FEEL LIKE I NEED FOAM AS A BASE TO GIVE THEM MORE SUPPORT IN THE BASE. GREAT OTHERWISE !!
Thanks Julie! Have an awesome week. 🙂
Yes Susan that sounds like a great idea. I twisted all my stems together to great one big stem but having a bit more weight would keep them in place better for sure. 🙂