Monday I shared the Boys Room Art & Homework Station with you, yesterday I shared the DIY Lego Mini-Figure Display, and today I’m sharing the DIY Sheet Pan Chalkboards I made for my son’s room makeover.
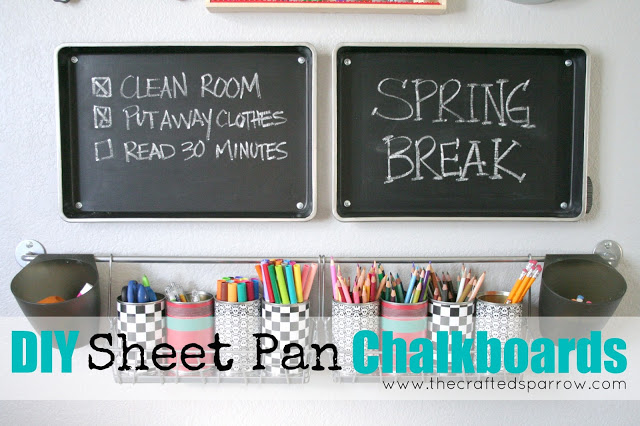
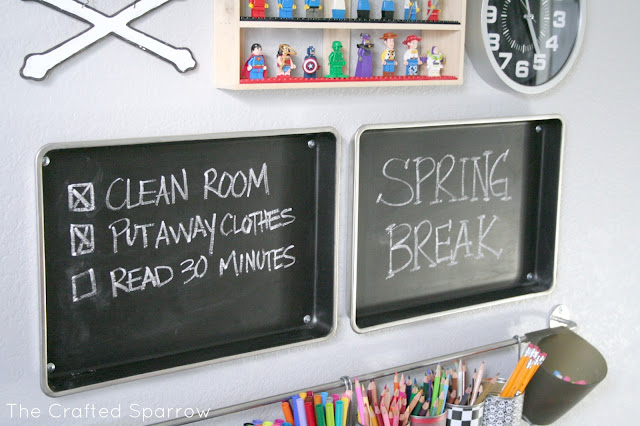
My original inspiration for this project was something I had seen on Pinterest where someone used a metal drip pan that you can purchase in the automotive department at Walmart and turned it in to a chalkboard. Well since the drip pans are 4 ft. long I knew that wouldn’t work. I needed something that would fit the space above my son’s desk better. So I purchased two sheet pans from Walmart in the baking section. They have a 1″ lip on them, I can’t remember the brand but they were under $7 each. These are a nice sturdy pan too.
Here’s what you need:
– Sheet Pan with sides
– Krylon Spray Chalkboard Paint

– Painters Tape or Masking Tape
– Screws & Anchors
– Level & Drill
– Chalk
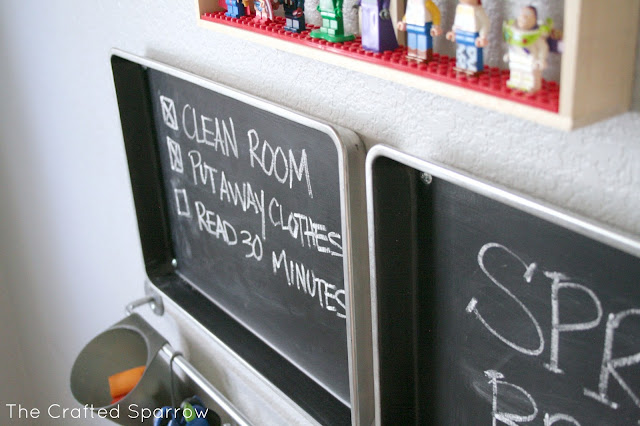
First thing I did was tape off my top edges with masking tape. I new I wanted the chalkboard paint to be on the inside edges just not on the top lip of the pans. Once I taped them off well I took them outside and gave them a really nice coat (or 3) of the Krylon Chalkboard Spray Paint. I had originally tried to use a brush on version of chalkboard paint from the craft store and that was a fail. It kept flaking off the metal. The brush on kind that you find in craft stores is better for wood products. This spray or the Krylon brush on paint from Home Depot & Lowes will work on metal as well as any surface. I purchased my spray paint from Hobby Lobby with a 40% off coupon! Once it dried I peeled off my tape. Grab your chalk, it’s time to season your chalkboard. You will need to rub the entire board going vertical first with chalk. Then go across the entire thing horizontally. Then once again vertically. Honestly you could probably do a few more coats going each way. Then wipe it all off with a clean soft cloth. I then grabbed a level, drill, my screws and anchors and got to work hanging them.
After figuring out the placement of where I wanted my chalkboards to go I used my drill to drive the screw through the pan in each corner. This created the hole in the pan as well as in the wall for my anchors. I then unscrewed it all and placed my anchors in the wall. Then re-screwed it all back in. Now it was going no where!
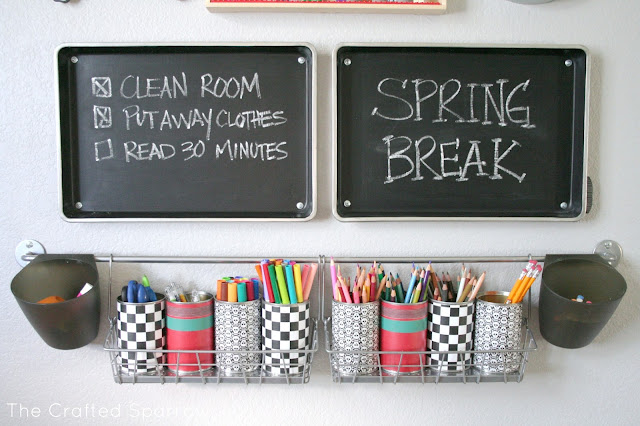
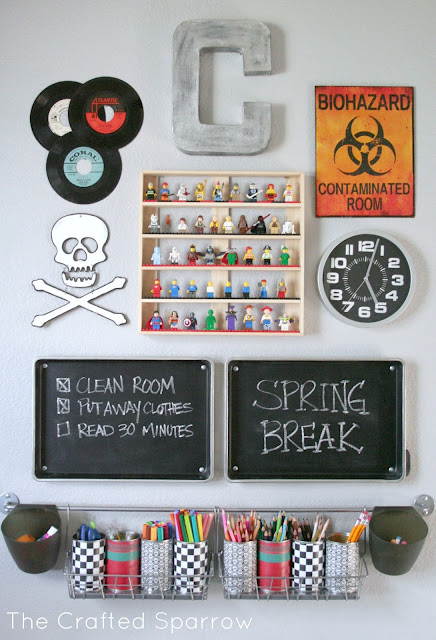
It’s the perfect spot to leave messages for him. Both boys already have played a few games of tic – tac -toe on it too. These chalkboards were the perfect addition to this Art & Homework Station.


It looks awesome Rebecca!! Me and chalkboard spray paint are BFFs!! Pinning now! 🙂
LOVE!! Nicely done! ;*)
Looks incredible!
Great idea 🙂
My kiddos would absolutely freak out if I did a wall like this in their room redo. This is so cool, pinning!!
xo, Tanya
twelveOeight
Ok, this is an amazing idea! I hate the dust that chalkboards create and I feel that the lip of the pan would catch that. LOVE the lego display too. I’d love it if you linked this up to my Show & Share link party: http://www.semihomemademom.com/2013/03/show-share-wednesday-29.html -Kelly @ Semi Homemade Mom
Very cool idea. So creative. I love the skull art.
http://www.ifitsnotbaroquedesignblog.blogspot.com