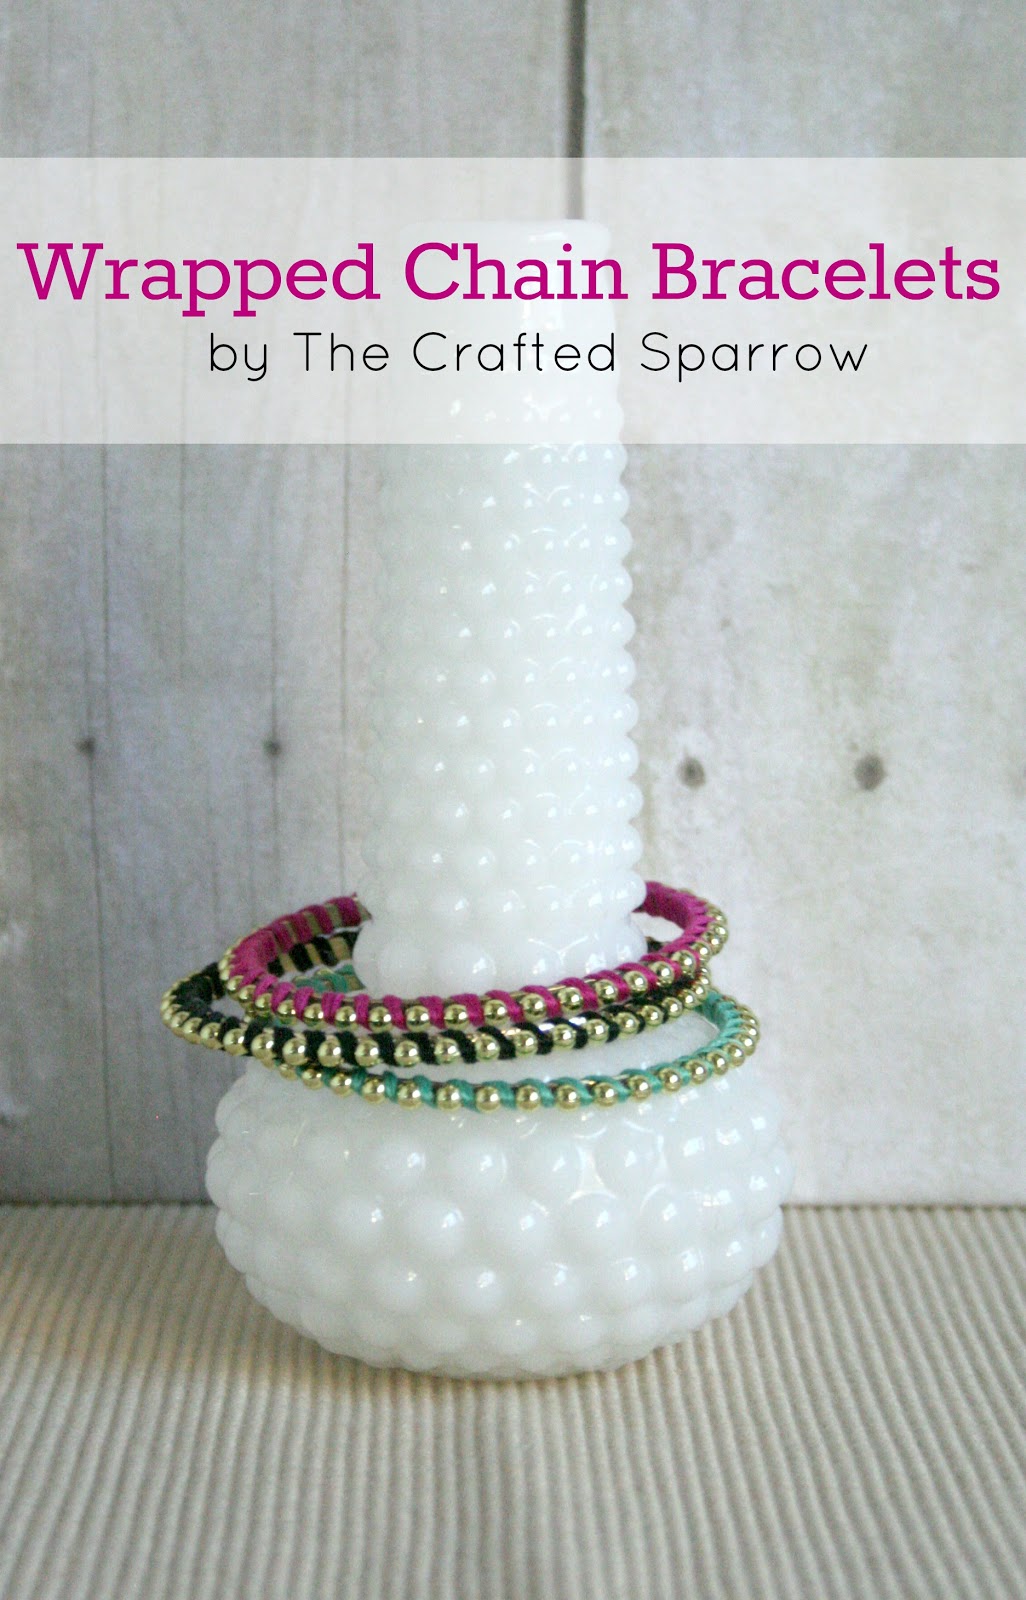
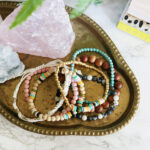
I know you have all seen this style of bracelet by now, they are everywhere! Guess what?! You can make these little pretties at a fraction of the cost, and have a great selection of any color you want! Today I’m sharing with you how to make these very simple, but extremely fun Wrapped Chain Bracelets.
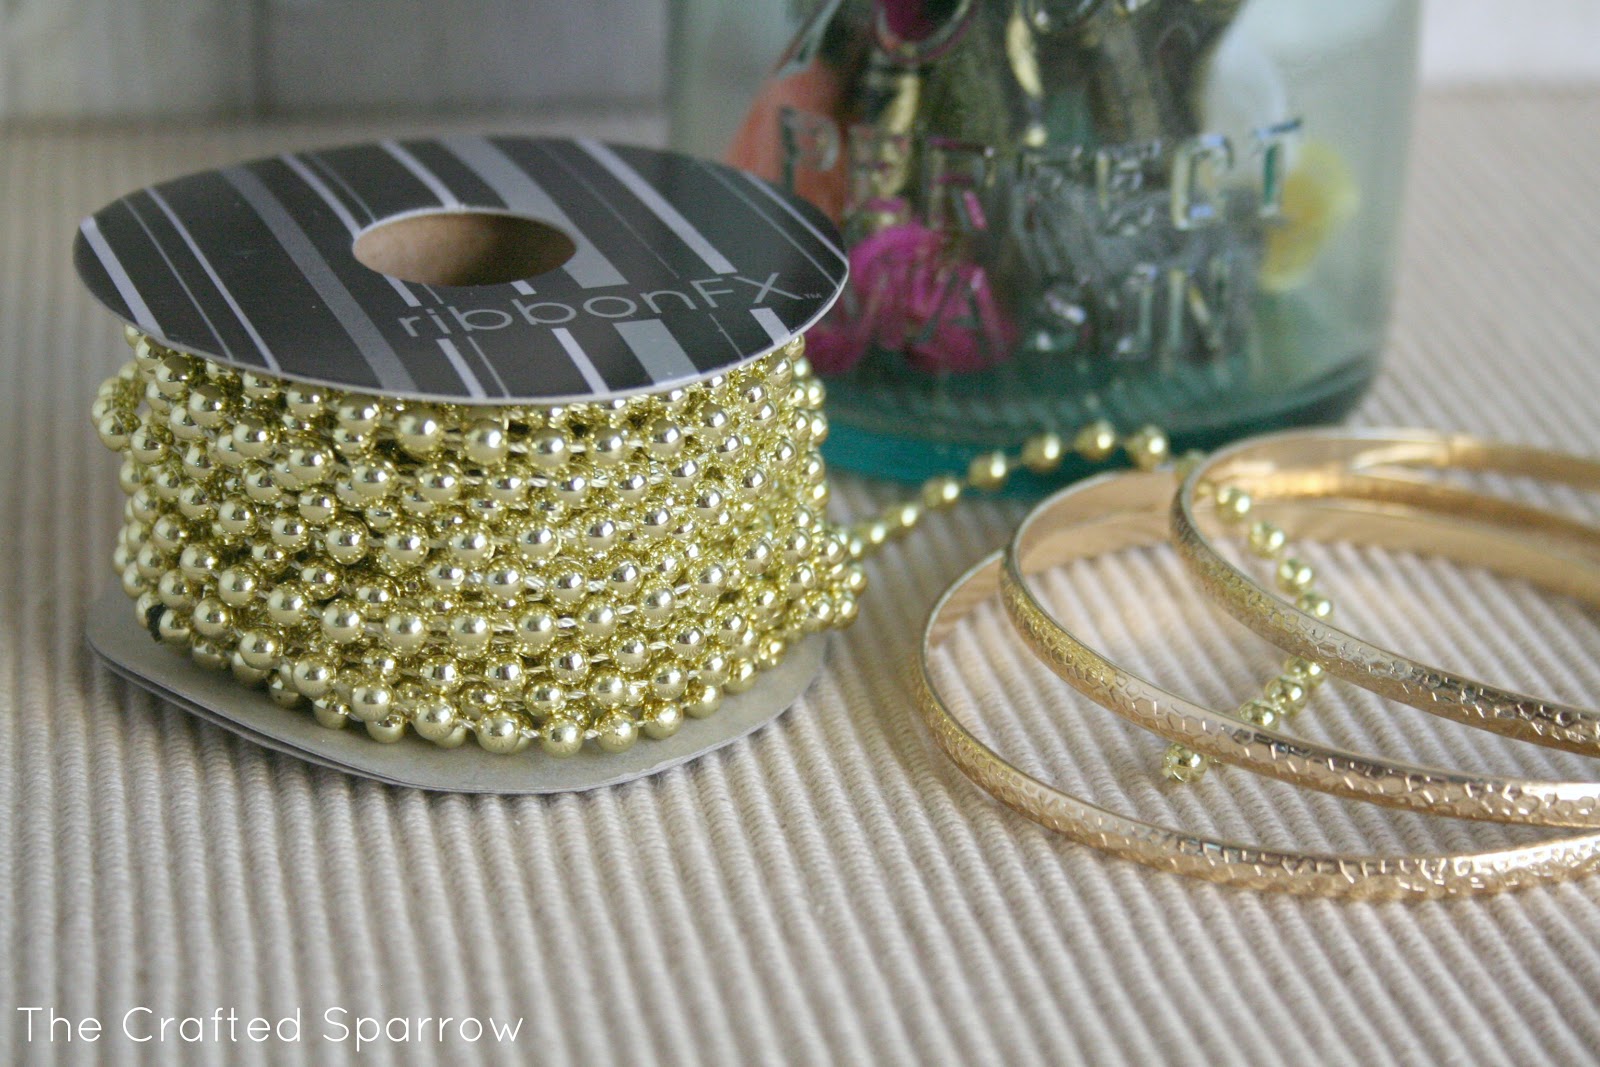
If you have a 99 Cent Only store or a dollar store that carries jewelry…I suggest you go there and stock up on some metal bangle bracelets. My local 99 Cent Only store had bundles of 6 bracelets for…you guessed it – A BUCK! So I grabbed a few. I originally didn’t know what I was going to do with them, but for the price I knew I would do something fun. Then I remembered all the bracelets I’ve seen in stores lately and in all the Arm Parties on Pinterest. So I headed over to Hobby Lobby and went straight to the ribbon and trim section. I found some plastic beaded chain trim, you can also use metal beaded chain if you happen to have some lying around from a past project or maybe a ceiling fan pull chain?! The plastic beaded chain trim was inexpensive, $1.99 for 24ft. And I’m pretty sure it was half off that day! Then I grabbed some embroidery floss in the colors I wanted.
{P.S. Walmart has a great selection of bracelets for PLUS SIZE for less money than Torrid, or Lane Bryant!}


Supply List:
– Cheap Metal Bangle Bracelets
{up-cycle some of your own if you have them}
– Beaded Chain Trim
{you choose the color, gold is awesome right now}
– Embroidery Floss
{a variety of colors}
– Hot Glue Gun
Start by placing a small bead of hot glue on your bracelet, quickly place your bead chain trim on to the bracelet {the glue dries quickly because of the metal bracelet, so work fast}. Once you have gotten it started just keep gluing as you go all the way around the bracelet. When you get to the end you started at just cut your trim and glue the last bead down. Now cut a length of embroidery floss about 40″ long. Start by placing a small bead of hot glue to the inside of the bracelet {try to start where your beaded chain ends met} place the end of your embroidery floss in the glue and smooth carefully in to the glue {I have callused fingers so it doesn’t hurt me, you can use a toothpick}. Now begin wrapping the floss around each section of beaded chain, I went around the bracelet 3 times. When you have done it 3 times you should end in the same spot you started, place another small bead of hot glue on the inside of the bracelet and place the end of floss in it. Again smoothing it out so you don’t have a big chunk of hot glue. You can either put another small dot of glue and smooth it again {no one will see the inside} or place a dot of clear nail polish to hold that end in place.


That’s it! You now have an assortment of cute bracelets that you can mix and match with other pieces of jewelry, creating your own Arm Party. Don’t forget to make some for gifts, your friends will love these!


Linked up at the following parties:
Cherished Bliss, Skip to my Lou, Sumos Sweet Stuff, Craft-O-Maniac, DIY Showoff , Mad in Crafts, Brassy Apple, Tip Junkie, Today’s Creative Blog, Sugar Bee Crafts, Vintage Wanna Be Blog, Home Stories A to Z, The Winthrop Chronicles, The DIY Dreamer, Someday Crafts, Lil Luna, Snap the Conference, Gingersnap Crafts, Sugar and Dots, House of Hepworths, The 36th Avenue, Somewhat Simple, The Shabby Creek Cottage, Live, Laugh, Rowe, Shabby Nest, Naptime Crafters, Whipperberry, Little Inspiration, Thirty Handmade Days, Just us Four, Tatertots & Jello, I Heart Naptime, Be Different Act Normal, Funky Junk Interiors, It’s Overflowing, Too Much Time, Classy Clutter


OMG I love this!! I was doing it a different way that I found on Pinterest but was having a hard time getting the bracelets the right size… this will be perfect and will fit everyone. Thank you soooo much for sharing this!
Beautiful Rebecca!!! Love the colors!!
These are beautiful!
Love these! What a smart way to make them!!
Michelle
Love these! What a smart way to make them!!
Michelle
LOVE IT! First time here….and a new follower! Could I feature you on my blog?
Super cute! I love how they turned out. Seems pretty easy, too!
Visiting from Share It Link Party 🙂
Just stopping by to invite you to My Wednesday Linky party. http://diycraftyprojects.com/2012/10/whatcha-work-up-wednesday-linky-party-6.html
What a great idea for Holiday gifts…especially teen girls who like to give gifts to all their friends!
Very clever! I am looking for some fun crafts to feature on my web site soon…would love for you to submit your project!
Susan @ Oh My! Creative
Great project !
I would love you to come and share it at my Craft, Create & Inspire Linky party
http://polkadotpretties.com/2012/11/craft-create-inspire-linky-party-3/
Hope to see you there:)
Claire@ Polkadot pretties x
Very cool idea! For good prices on the beaded chain, be sure to visit our website!
These are so pretty. I just pinned them. I have a link party called Wednesdays Adorned From Above Blog Hop and would love to have you share this and any other posts with everyone. It runs from Wednesday through midnight Sunday. Here is the link to the party.
http://www.adornedfromabove.com/2013/01/week-in-review-and-wednesdays-adorned.html
Debi @ Adorned From Above
what a great idea! they look so pretty! especially love your styling on the milk glass bud vase. 🙂