
I gave sewing my own Christmas stockings a shot this year, needless to say this project turned out to be WAY easier than I thought it would be and was perfect for this years mantle. Today I’m showing you how to make your own Christmas Stockings.
I had all the fabric on hand, the red polka dot fabric was from my 3 year old past 2 birthday parties as decor, and the white is some flannel I’ve had forever.
Here’s what you’ll need:
* Fabrics
* Scissors
* An old stocking to use as a pattern
* Piece of poster board
* Sewing machine
* Something to trace with ( I prefer white colored pencil )
Okay so to begin take your old stocking and lay it on top of your poster board. Trace the outline of the stocking with your pencil. Now get your handy dandy scissors and cut out the stocking from the poster board. Be sure to cut at least 1/4 – 1/2″ larger than where the outline is. Once you have that cut out lay it out on your fabric and trace it with the pencil, then cut it out.

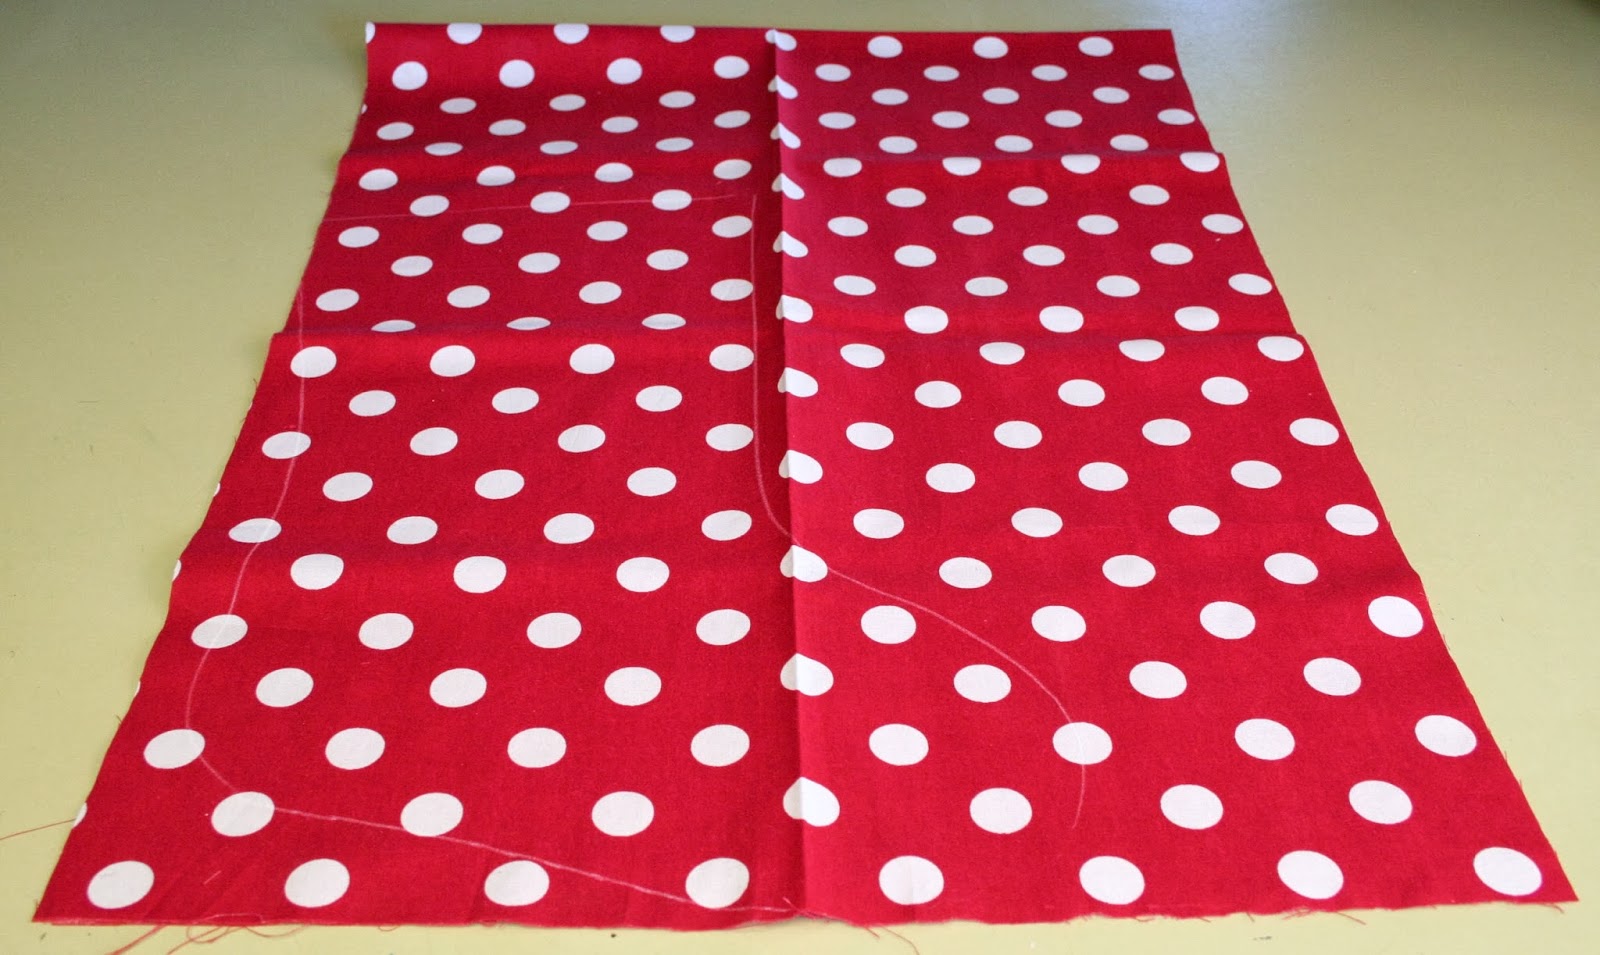

Should look like this compared to your original stocking.

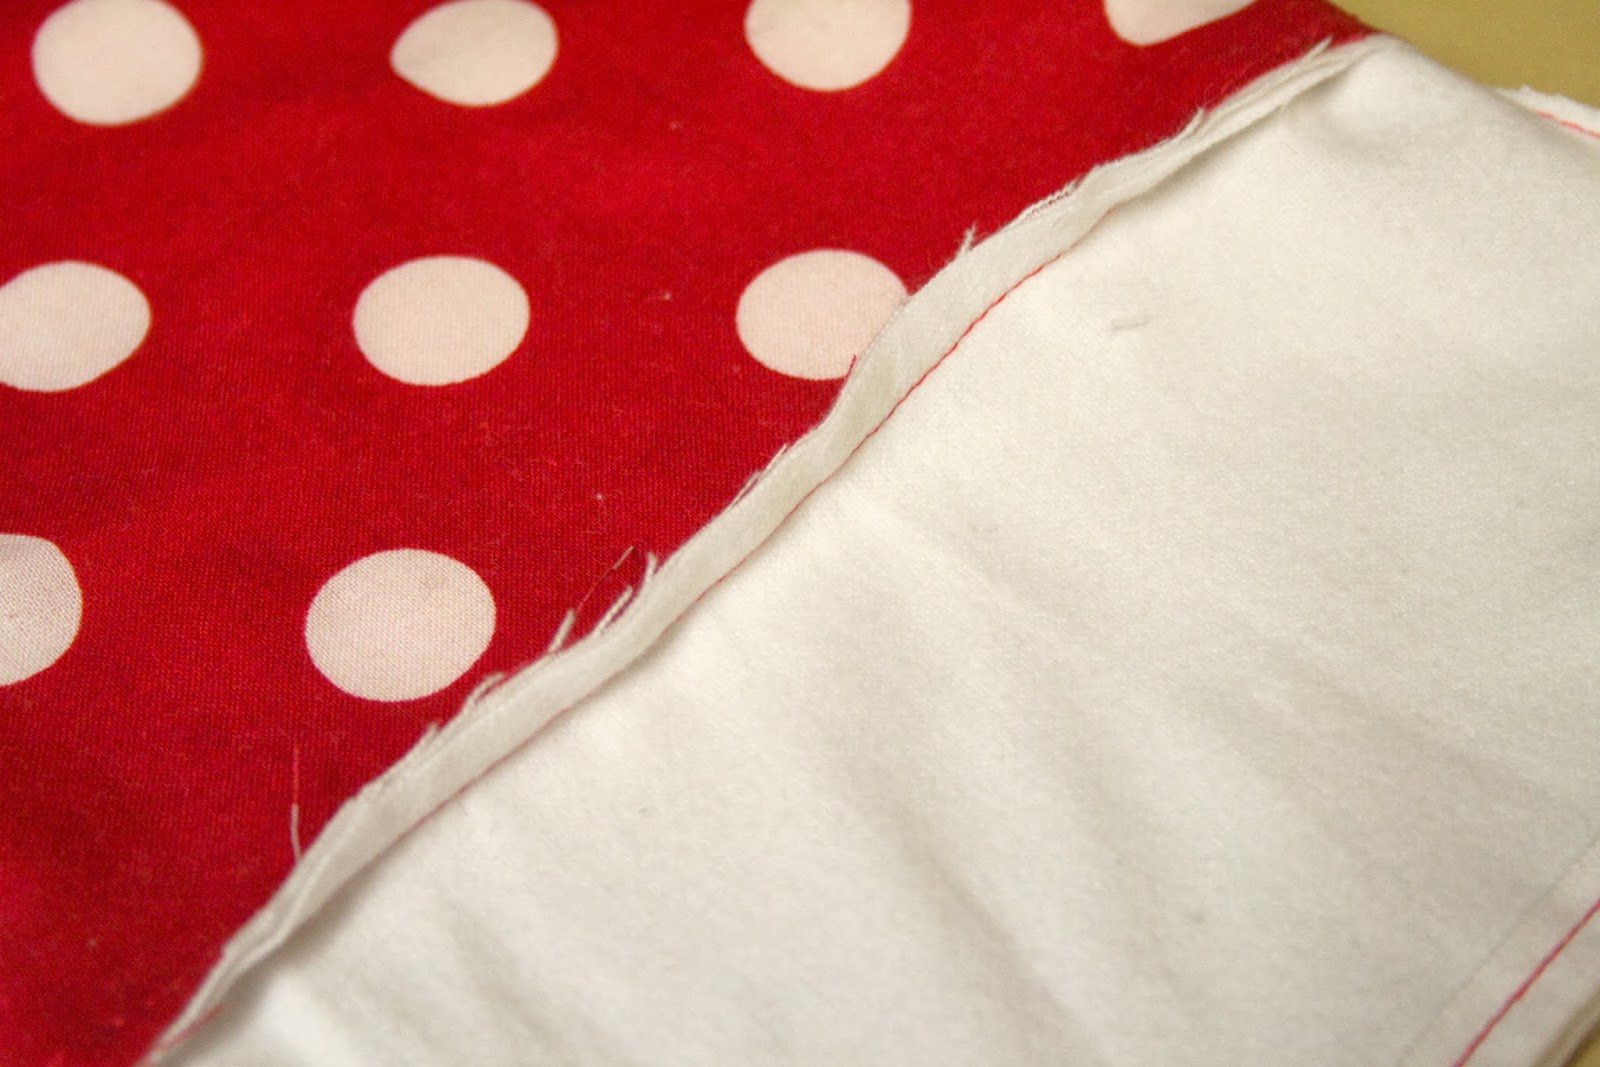
Then repeat the process on a fabric of your choice to be the liner of the stocking. You will need 2 stocking pieces for the outside fabric of your stocking and 2 stocking pieces for the inside lining. I used white flannel which was a nice weight for it. Felt would be perfect alone and wouldn’t need a liner if that’s what your using.

Now lay your outside print fabric on top of the liner piece of fabric matching them up. Then I put 2 of the sets (fabric & liner) on top of each other with the printed fabric face to face on the inside, and the liner on the outside. Now stitch at least a 1/4″ seam all the way around leaving the top unfinished.


Now turn it right side out.

Time for the little cuff, you don’t have to make a cuff if you don’t want. If your not going to make the cuff sew the seams in the previous step before you sew all the way around. For the cuff take whatever fabric you have chosen (I used the same white flannel) and I really just guessed on this one. I looked at my previous stocking and went from them. I created a finished seam on one length of it, the other side stayed raw.
Now this to me it tricky to explain. It’s really not hard though. Take the raw edge of your cuff and the top raw edge of your stocking and match them up from the inside (so that when you flip it over the top of the stocking the finished seem you sewed on the cuff is the right way). Sew together. Now flip it over the top of the stocking and viola!


Now at this point get your iron out and press it nice and flat all over getting all the seams straight.
Then I created a little loop for it to hang and sewed that on. You could use ribbon or the same fabric like I did.
Now I left my stocking plain on the cuff, thought about adding our initials in felt to each one…may still do that. But I also like our pearl initial ornaments that we’ve had since the kids were born. I love how these turned out! So cute!


I love it! Now to try out my brand spankin’ new sewing machine!!
~Lisa @
http://www.organizedchaos-lisa.blogspot.com
SUPER Cute! I should have followed these steps when I made mine. haha, I made them in about 20 minutes. They won’t even get filled this year because we will be out of town. 😀
I really love the colors that you are using. The blue really pops with the red – so cute!
Looks so easy and if I had a sewing machine, I would certainly try it!
too cute!
Love this! I’m hosting MANY christmas themed link parties this month and this would be perfect for my stocking one. Would love for you to come and link up! http://nap-timecreations.blogspot.com/2011/12/2-stockings-my-paper-piecing-stocking.html
Thanks everyone! Glad you like them! 🙂
Thanks for making this so easy! I actually think I might be able to do it! I also really love your colors! And yes, I think painting the stocking hangers is a good idea. I have the same issue with mine. I have to paint them this year too.
Kim
http://www.todayismysome-day.blogspot.com
Your stockings are adorable! I love the fabric you chose- so cute!!
Fun color scheme. The polka dots are the perfect touch.
I LOVE your mantle – gorgeous! I am using the same color scheme this year! http://thehomesihavemade.blogspot.com/2011/12/o-christmas-trees.html
I truly appreciate this post. I’ve been looking all over for this! Thank goodness I found it on Bing. You’ve made my day! Thx again
Steadicam Smoothee for iPhone 4