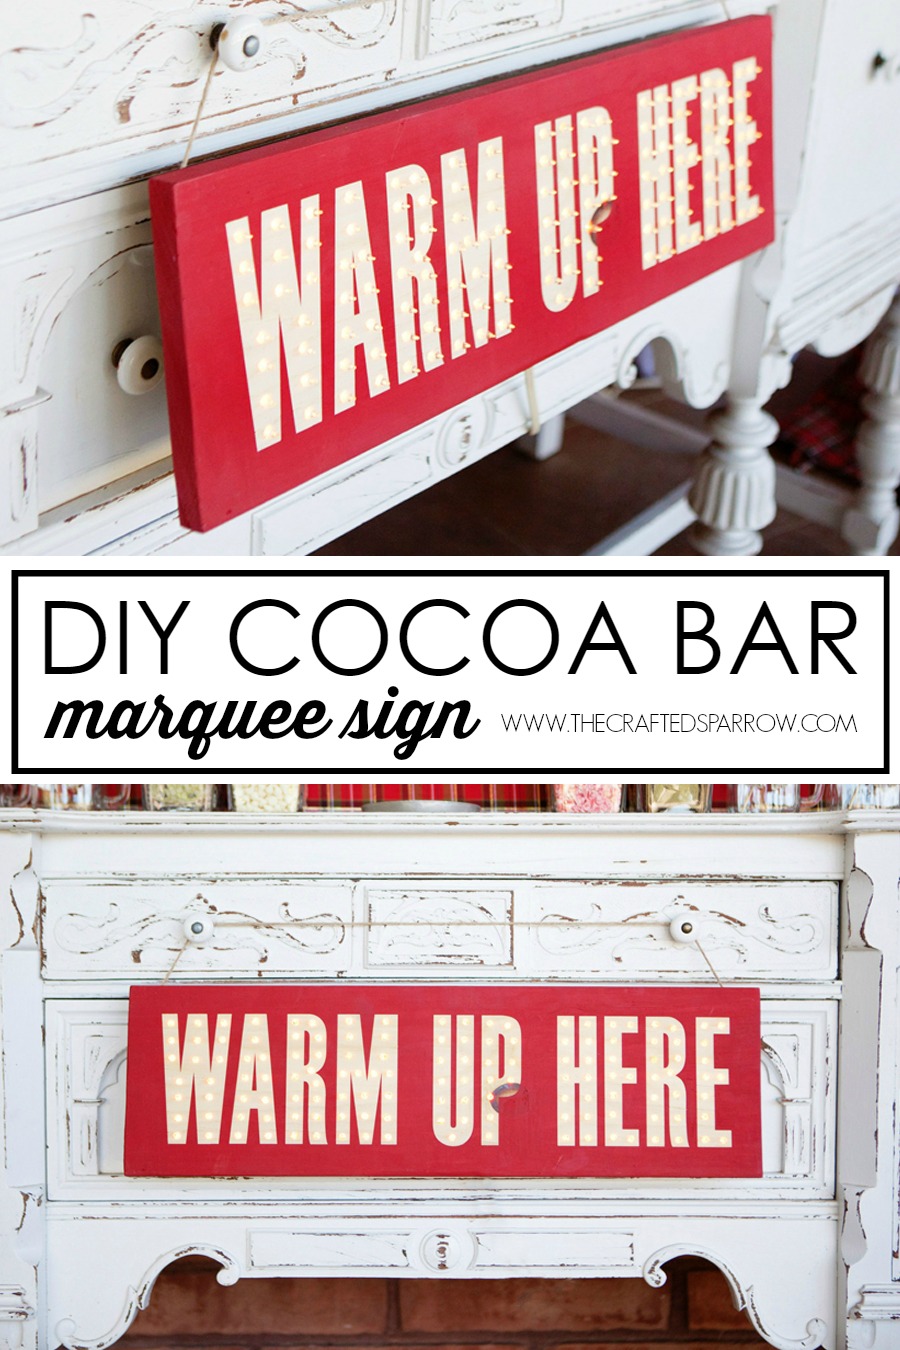
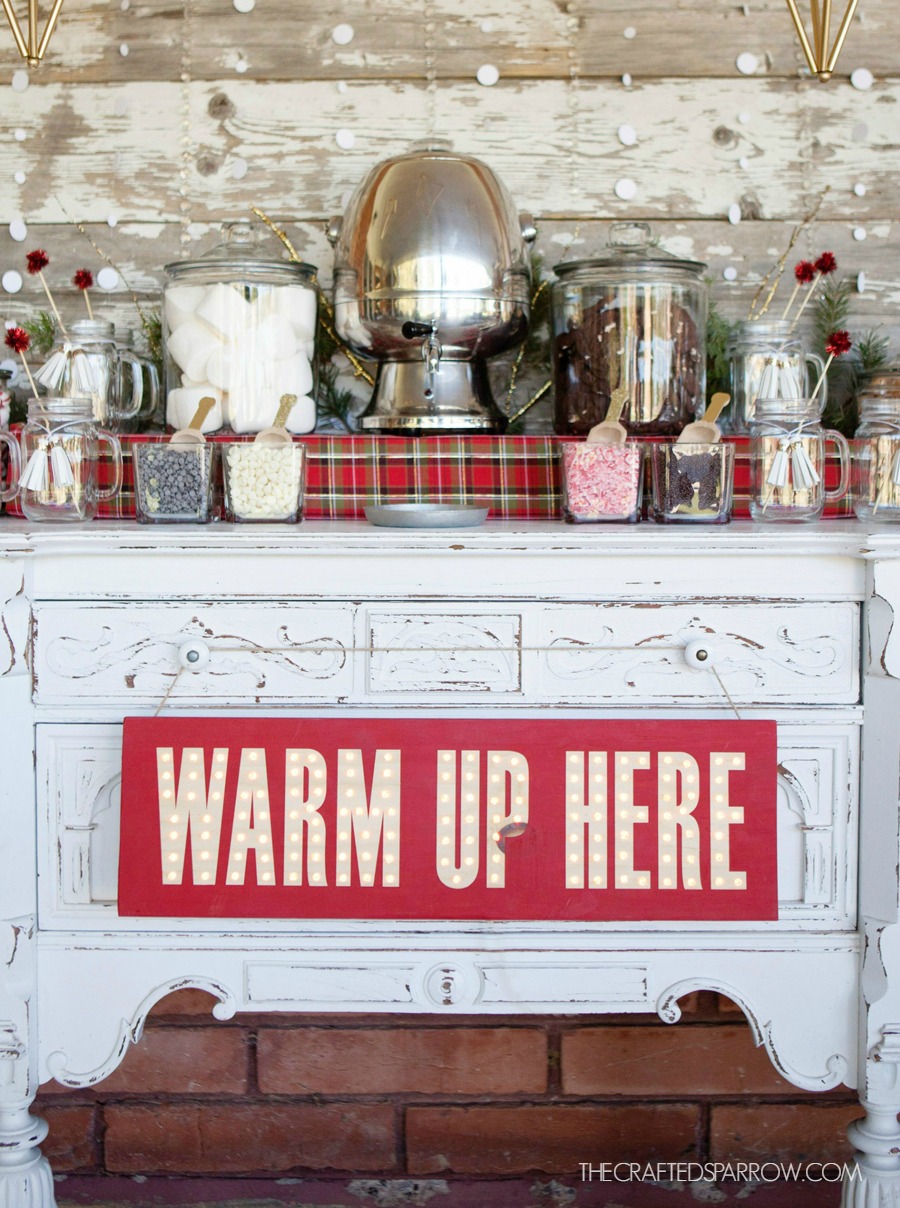
 Last week I shared a sneak peek of the amazing Merry & Bright Holiday Party I hosted with some of my favorite local blogging friends. As I mentioned in that post I got to style the Cocoa Bar with the sweet Sunny from Dandelion Square. I will be showing you the full reveal of it later this week, but first I wanted to show you this fun DIY Cocoa Bar Marquee Sign I created to welcome guests to “Warm Up Here”.
Supplies:
pine board cut to 8 x 24″
Cricut vinyl
red acrylic paint
foam brush
Christmas lights, the standard mini lights will do unless you prefer the larger round bulbs
drill
drill bit – same size as the glass bulb on the small Christmas lights
wood spade drill bit – same size as the largest part of the Christmas lights
glue gun
electric sander or sandpaper
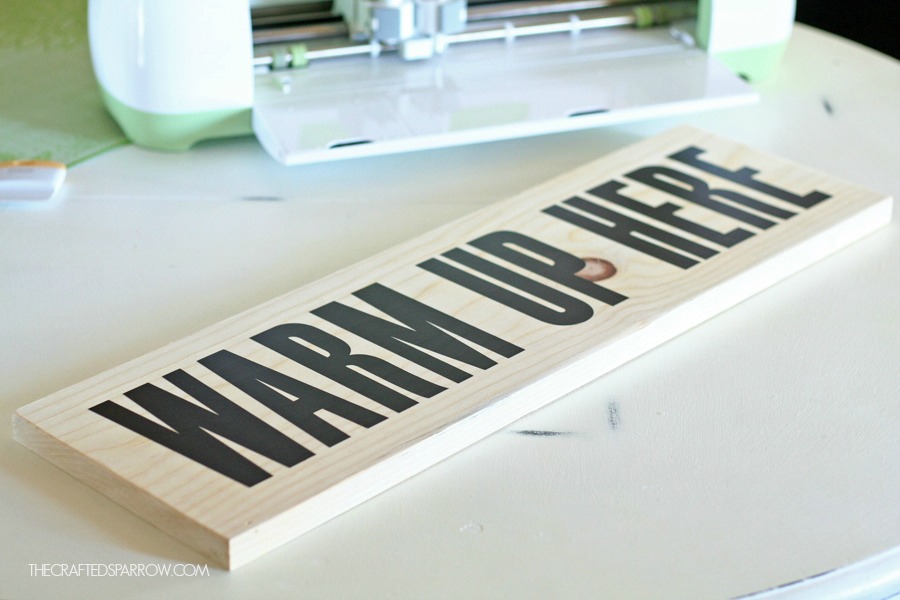
I started by making a simple vinyl stencil in Cricut Design Space. For this sign I used one of my favorite fonts Bebas Nue. Stretch it to fit your pine board how you like, then cut the vinyl stencil.
Weed your vinyl, this time leave the letters and throw out the rest.
Apply the stencil with transfer tape, being sure to center it and use a small squeegee to remove any air bubbles before painting.
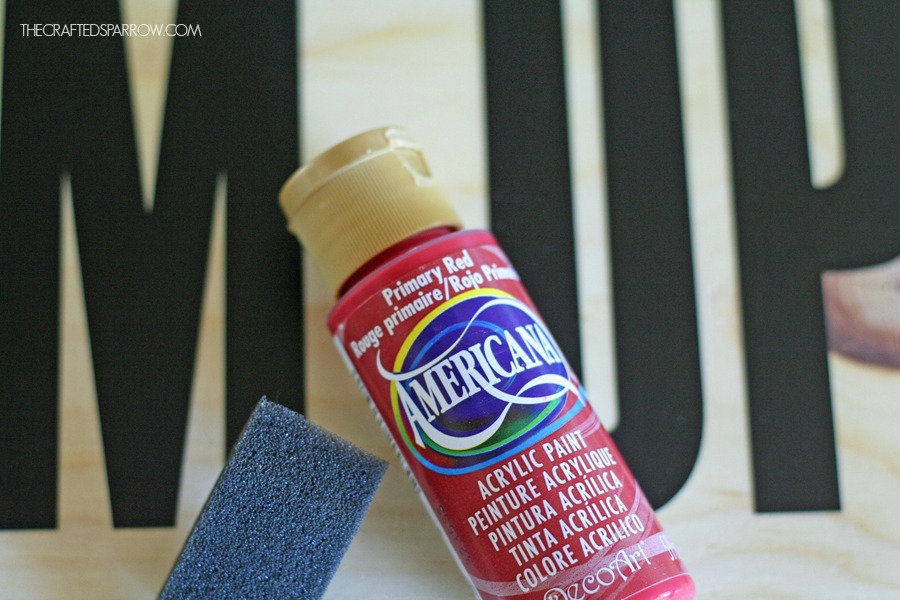
 I picked a classic red acrylic paint from DecoArt and used a foam brush to paint 3 solid coats on my board.
Be sure to remove your vinyl stencil before the last coat is completely dry, if you don’t you risk having your crisp edges peel up with the vinyl.
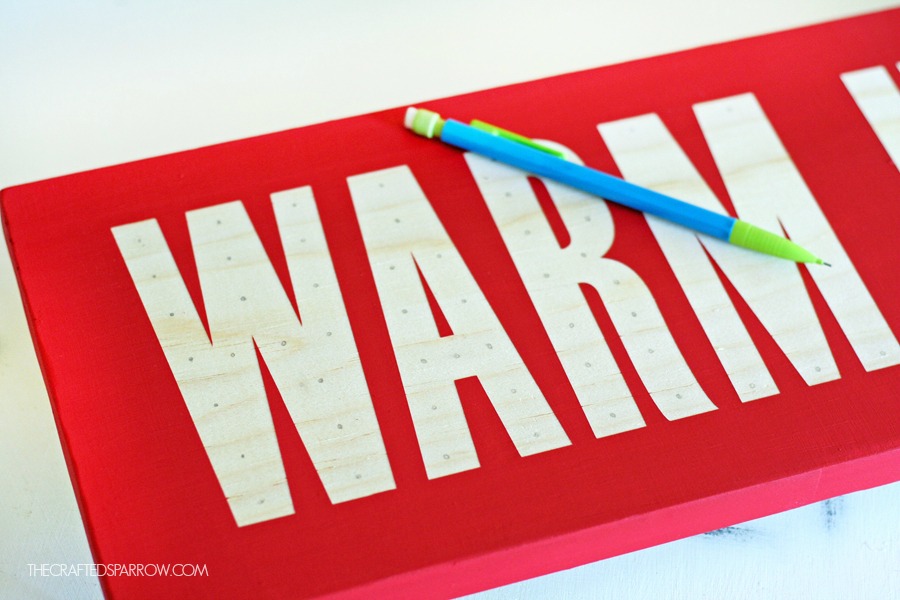
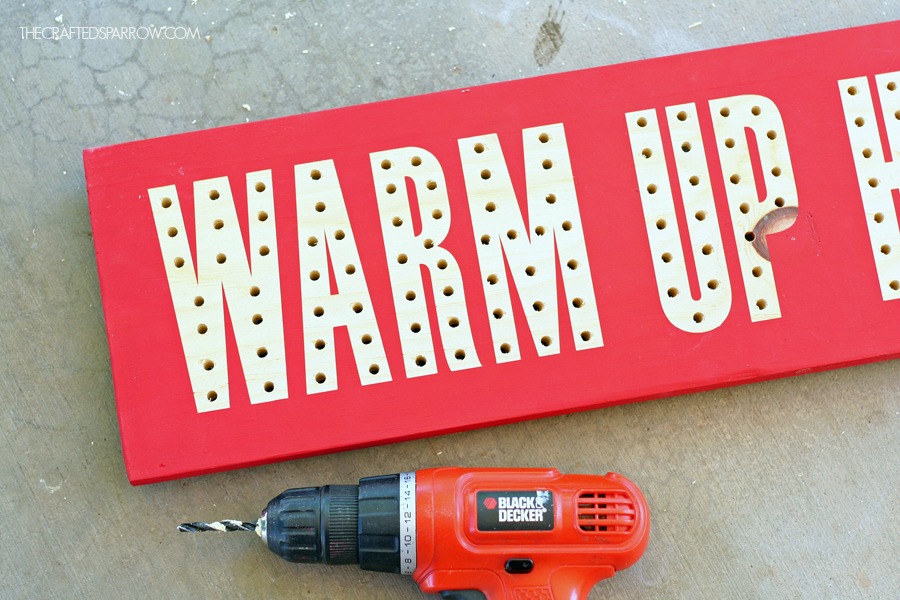
 Use a pencil to plan where your Christmas lights will go. You can use a ruler, or just guess like I did.
 Using your regular drill bit that is the same size as your glass bulbs on the Christmas light strand, drill through the front of your sign. You will need to drill all the way through to the back, being sure to drill on your pencil marks so everything stays even.
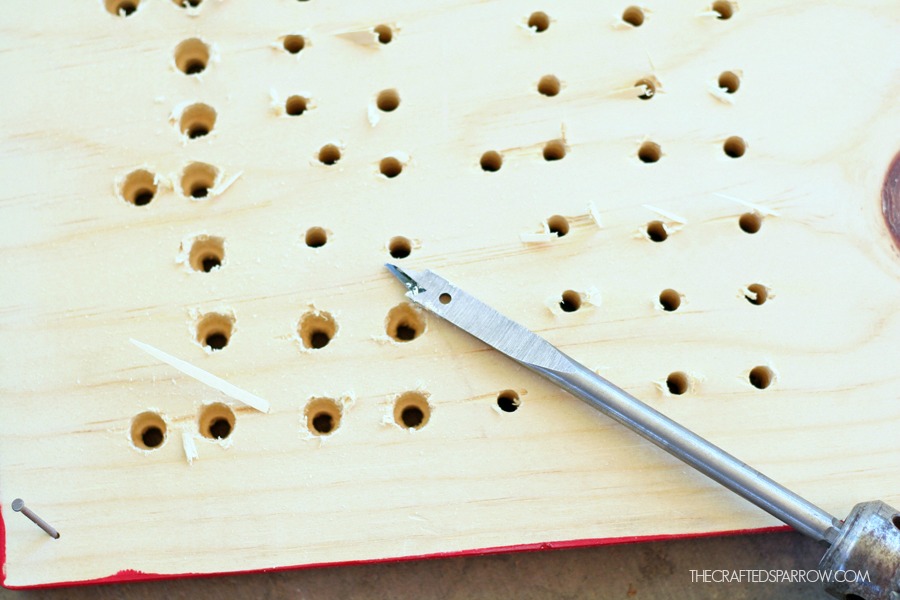
 Flip your sign over so it’s face down. You may want to put an old towel or cloth under it to protect the paint.
Then using your wood spade drill bit that is the same size as the largest part of the Christmas light strand (this is the plastic socket each bulb goes into) drill from the back to create the little pocket for your bulbs to nicely set inside of. I found it best to lay my sign face down on the patio cement, this allowed my drill bit to not go all the way through to the front. If you don’t do that you will have to worry about not going all the way through each time you drill.
Once all the holes have their little pockets drilled use a sander or piece of sandpaper to smooth everything on the back.
 Insert all the bulbs into your board. Secure each bulb in place with hot glue to the back of the sign. I just placed a small amount on the top inside of each pocket when I put the bulb in, the glue should only adhere to the plastic sockets of the strand.
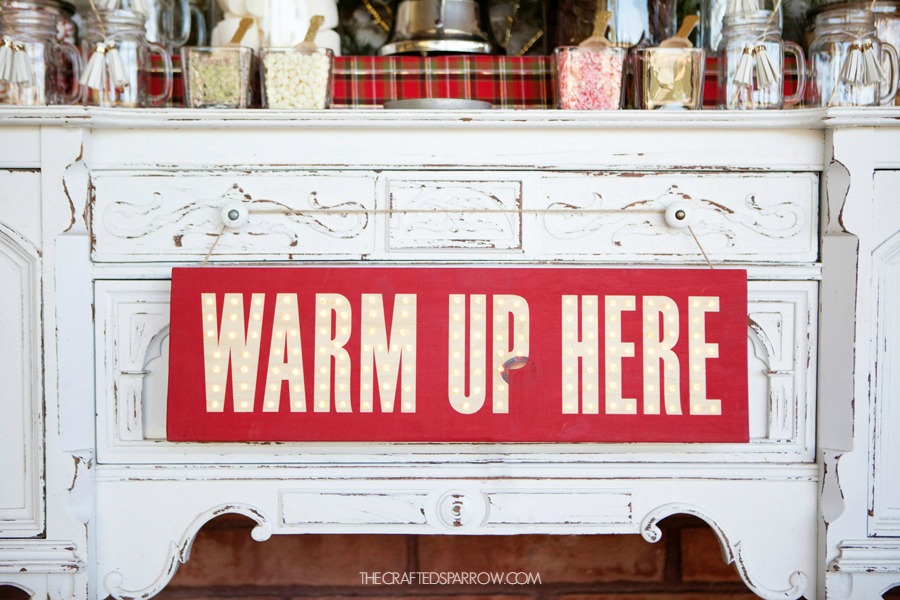
Use jute twine or some saw tooth hangers to hang your sign.
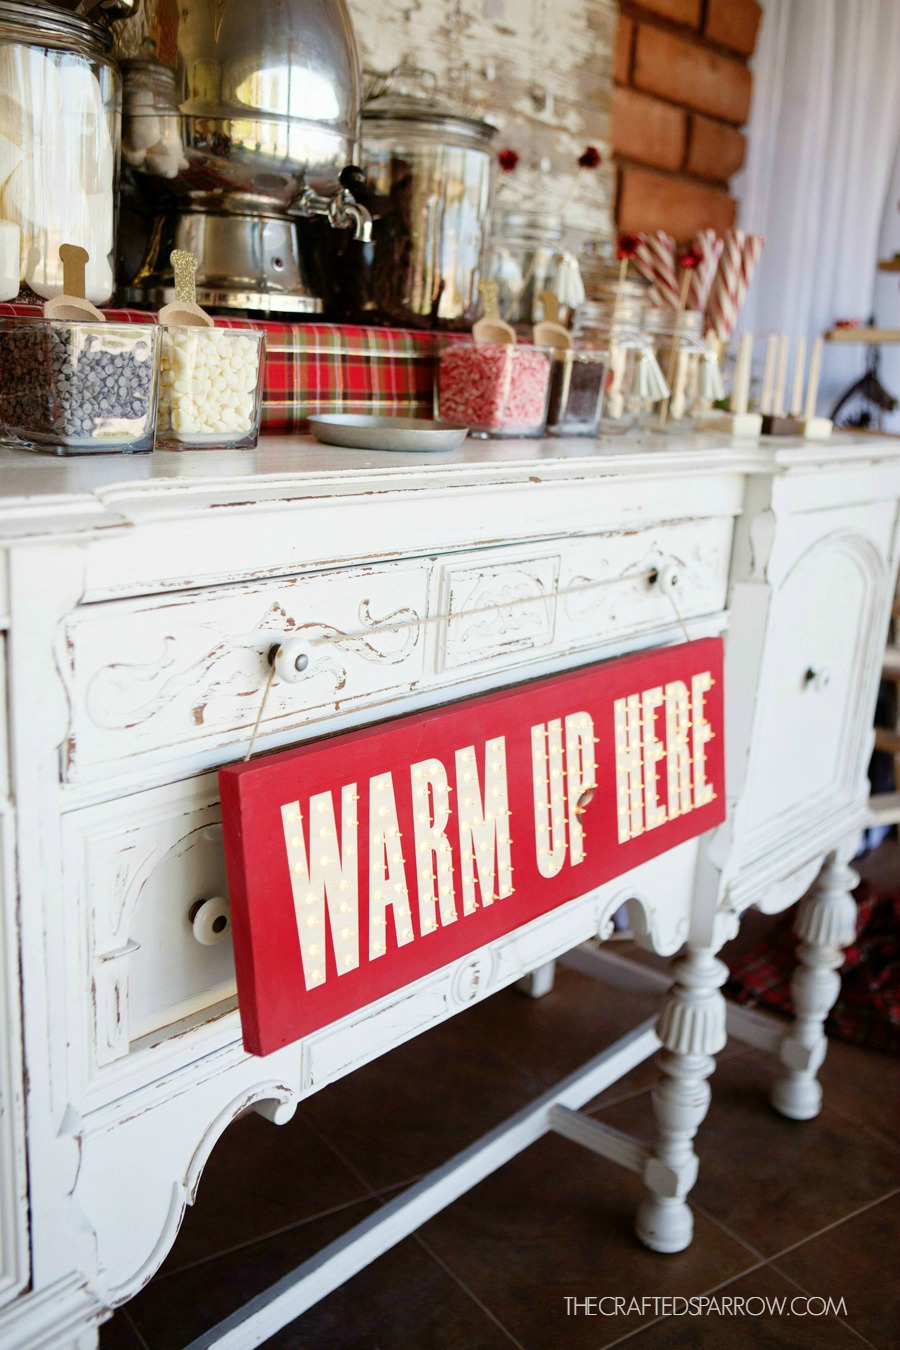 The lights are a little hard to see in these photos, but I love how this sign turned out. Trust me, it’s pretty dreamy – especially at night. Plus I learned how to use a new drill bit, that’s totally a bonus.
I can’t wait to show you more from this gorgeous party, so stay tuned. A huge thank you to Rebecca Cooper from Simple As That again for all the gorgeous photos.
 This post may contain an affiliate link.


Super cute!! A marquee sign was on my must make list this year, I have to get on it! Thanks for the inspiration
Thanks girl. This one was fun to make since I learned how to use a new tool, I’m obsessed with marquee signs! Have fun making yours!
Looks fantastic!!!
Thank you Janelle! Have a great week.
Love this!! What lights did you use? Just a strand of battery powered christmas lights?
Hi Courtney, Thank you so much. I used a regular strand of plug-in lights, but yes you could use battery operated lights for sure. 🙂