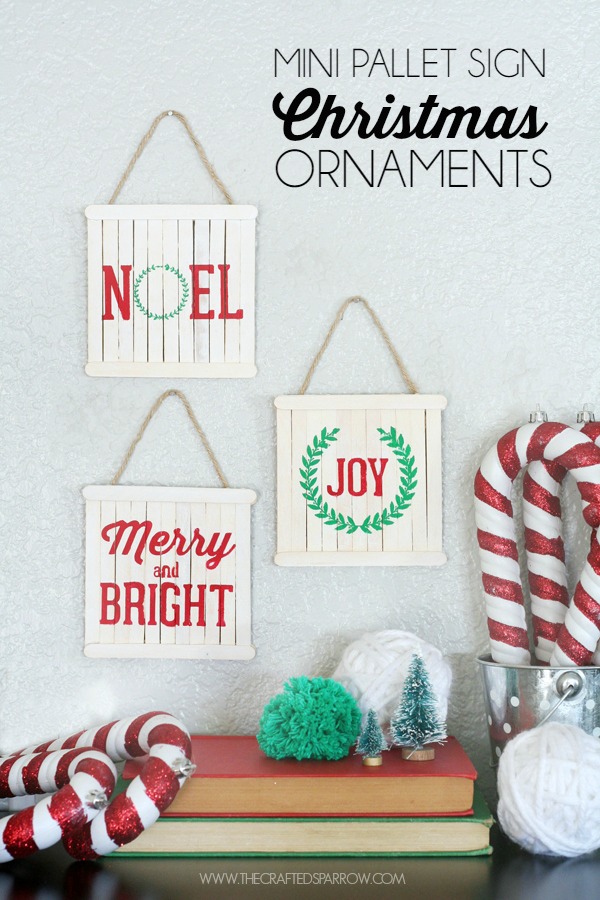
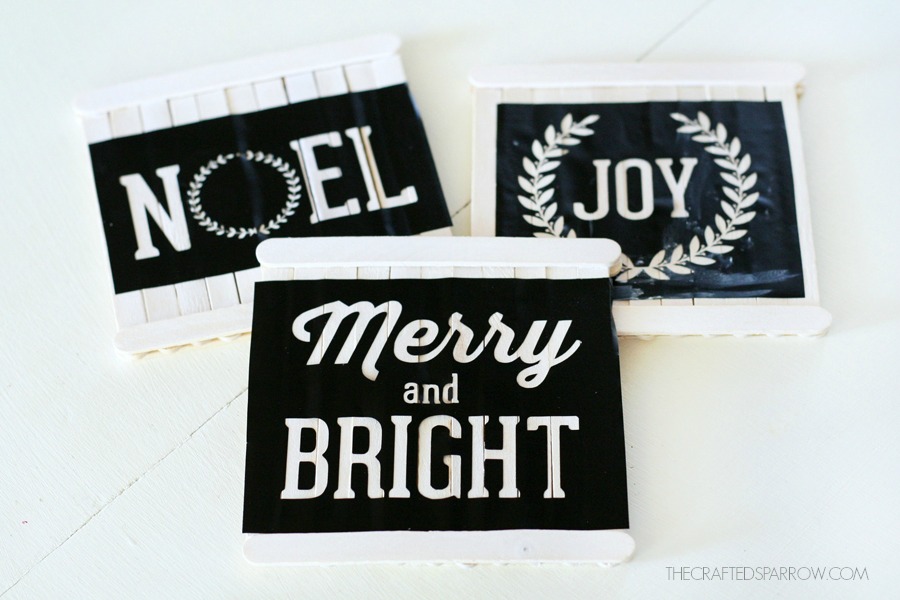
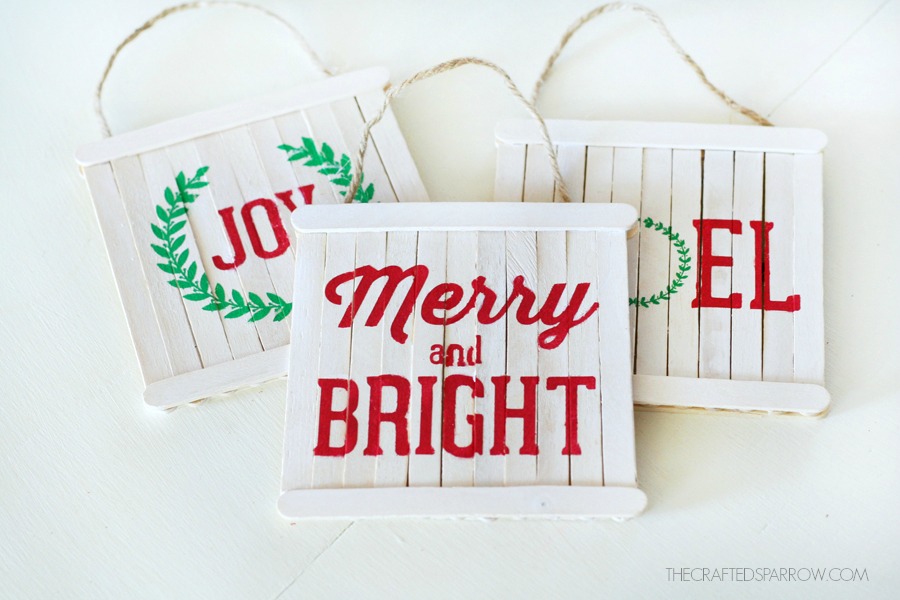
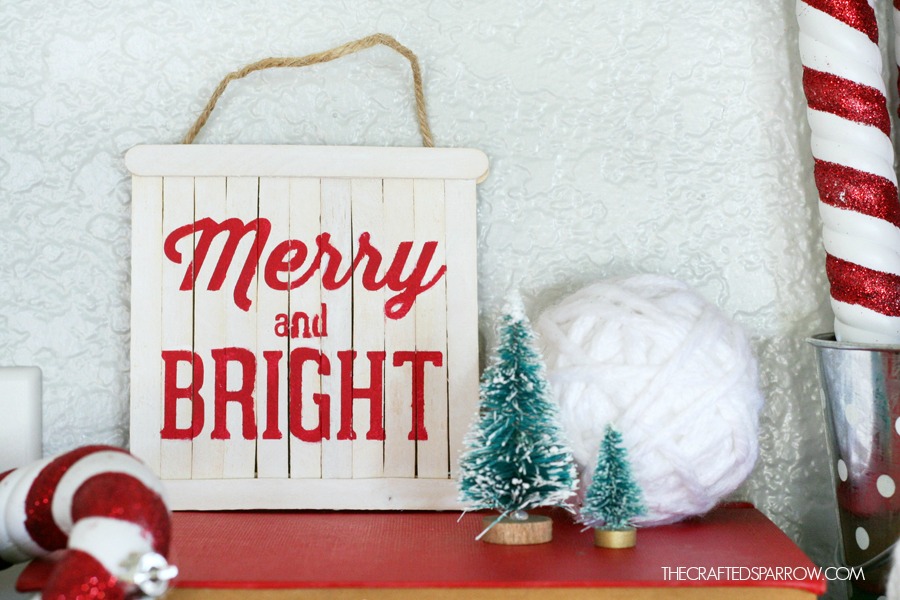
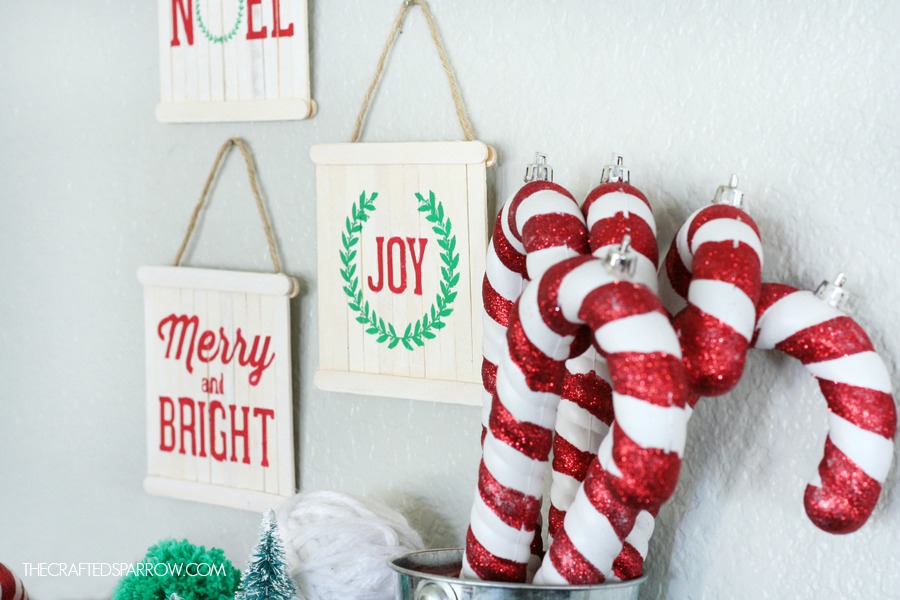
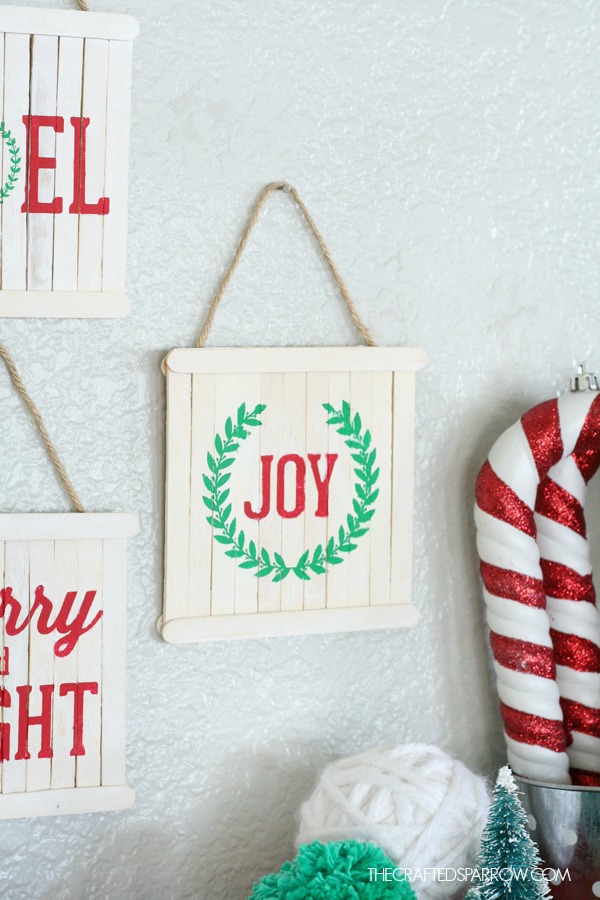
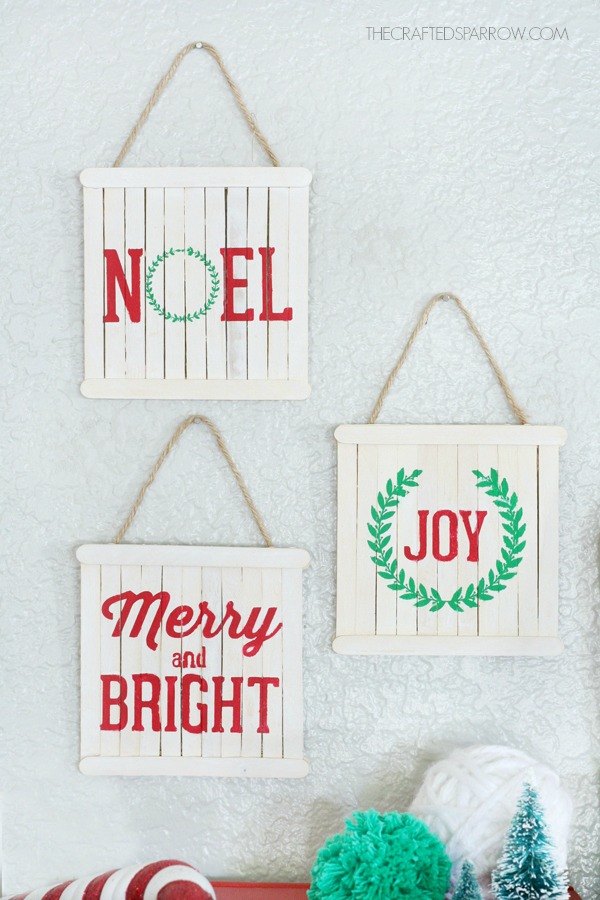
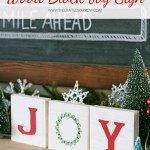
 It’s slowly turning into holiday central over here, I just love this time of the year. Creating custom decor each year is one of my very favorite things to do. Not only is it custom and one of a kind, it’s budget friendly to do. Ornaments are such a great place to start, these fun Mini Pallet Ornaments will be filling my tree this year with my store bought ornaments.
Supplies:
– popsicle sticks
– Cricut Explore Cutting Machine
– vinyl
– glue gun
– white acrylic paint
– red acrylic paint
– green acrylic paint
– 1″ foam paint brush
– small round pouncer foam brush
– jute twine
To see how I built the mini pallets from popsicle sticks go HERE.

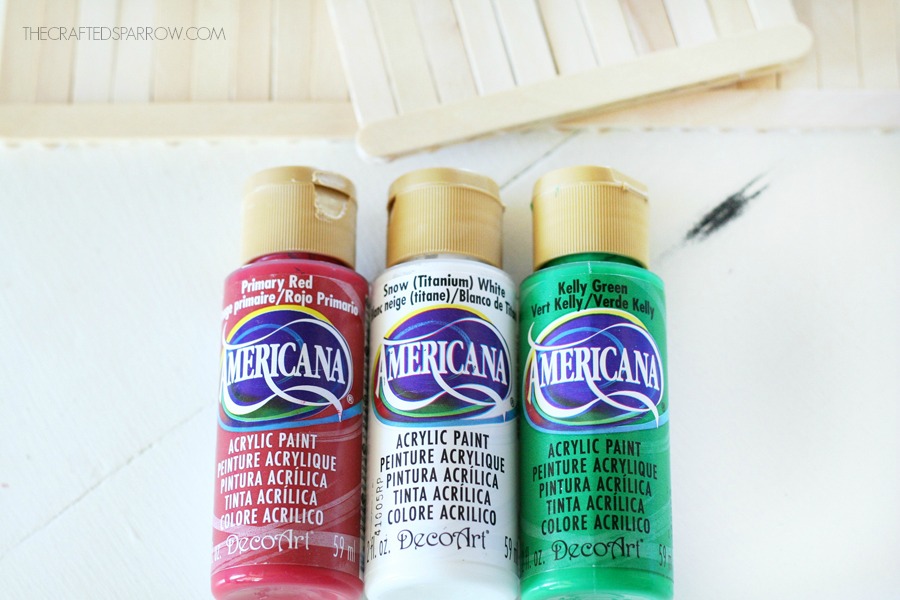 Once I had my mini pallets built I created a white wash using 1/8 cup water and about 1/2 tablespoon of white acrylic paint, this is not an exact science at all. Feel free to do your white wash as dark or light as you like.
Paint each mini pallet with the 1″ foam brush and white wash mixture, set aside and let dry.
While those were drying I created my images in my editing software then uploaded my custom images to Cricut Design Space and turned it in to a cuttable image. I sized them to fit my mini pallets.
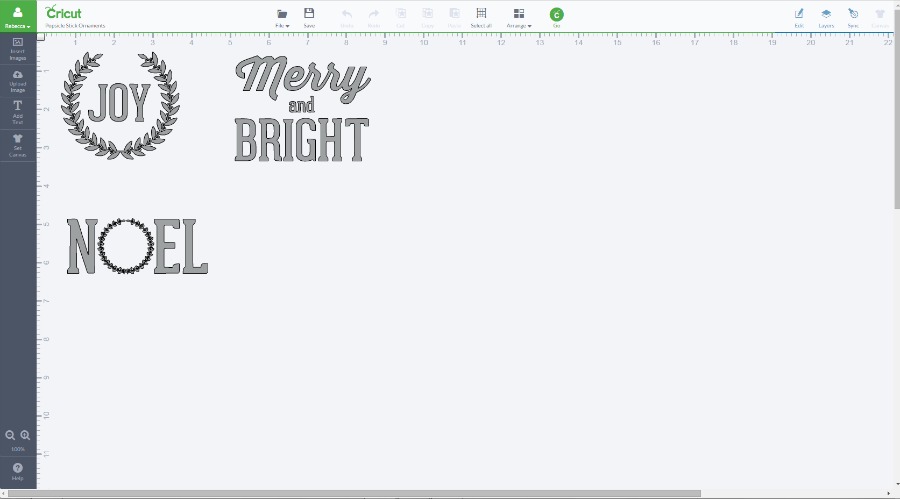 Cut the designs out on vinyl.
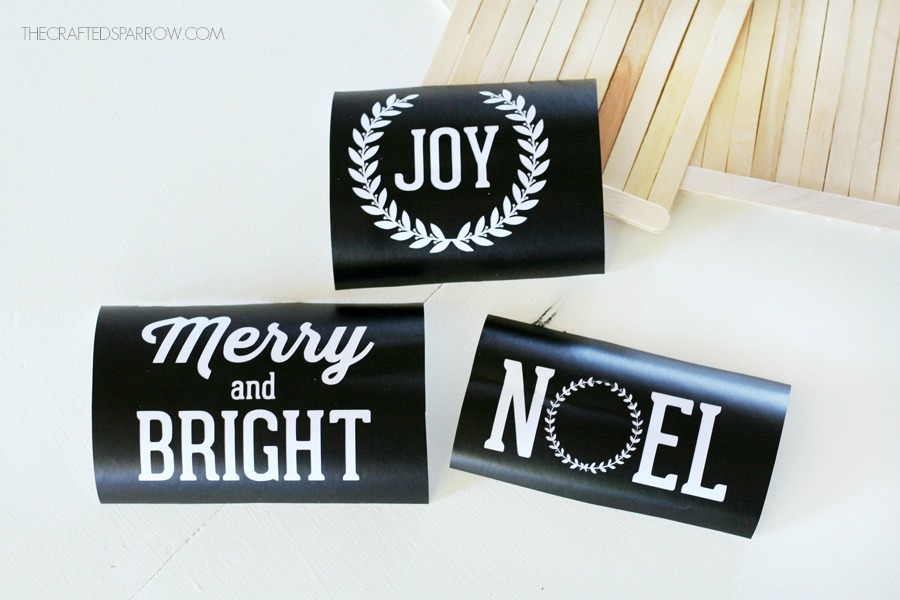 Apply the vinyl to your mini pallets and use your mini round foam pouncer brush to paint over the stencil. Paint carefully and in light layers of paint since the pallets are uneven, some bleeding may occur.
If bleeding does occur you can use a sharp xacto knife to scrape away the paint bleed marks, or use a fine paint brush to touch up the white wash.
 Remove the vinyl, add some jute twine for hanging and you have some pretty darn cute ornaments.
 For even more DIY Christmas ornament ideas be sure to check out some of my other projects:

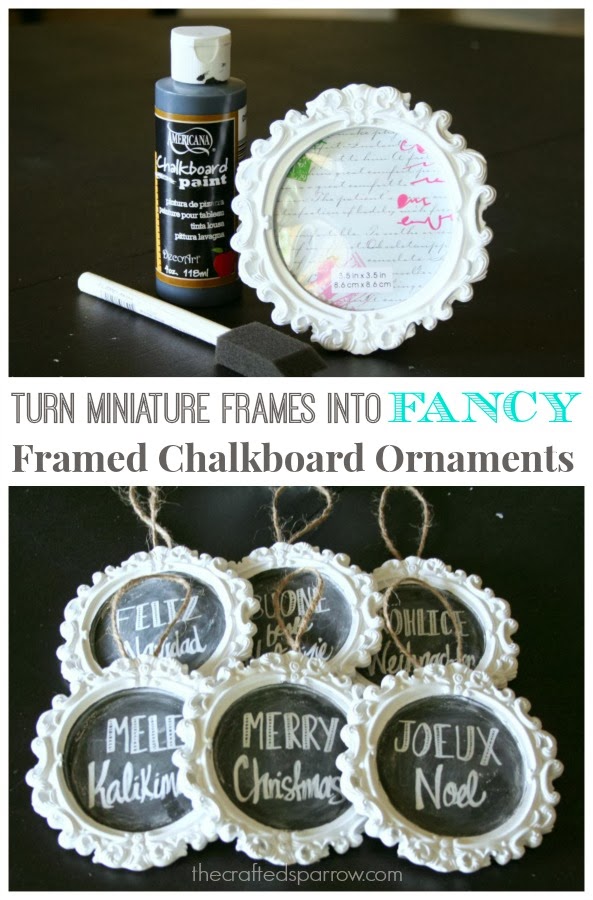
Fancy Framed Chalkboard Ornaments


Love! You are so creative!!! I can’t wait to make these with my daughter. Can you please tell me what don’t you used for “merry” I. The Merry & Bright one? Thanks!
Font! 🙂 that you used for “merry”. Thanks!
Hi Courtney, it’s one of my favorite fonts. You can find it in picmonkey.com even, it’s called thirsty script. 🙂
These are ADORABLE! Love them so much. Your crafts and photography are always stunning!
Thanks Jamielyn! That really means so much coming from you! Have a really great week.
Rebecca these are my favorite! I’m thinking wood scraps for me – pinned for next year.
These are so cute! Can you tell me what cartridge you used for the vinyl?
Thanks!
Hi, thanks so much. I didn’t use a cartridge. These are all images I created myself and uploaded into Cricut Design Space and turned into cuttable files, one of the awesome benefits of having a Cricut Explore.
The ornaments are super cute, I just need to ask you a question about the stencils – if they’re cut out, how come those little parts in B and O letters stay in their places??
I just don’t get it 🙂
Thanks so much, they stay in place since they were cut out of sticky vinyl. So when you use the transfer tape to transfer the stencil to the wood it stays in it’s spot. It’s the best. 🙂
Does that mean that you can only use each stencil one time? Or can you lift it back up with contact paper after it dries?
Hi Beth! Yes, you can only each stencil once. Vinyl doesn’t typically re-stick well once peel up. Merry Christmas.
So cute! What FONT did you use for “MERRY” in the “MERRY & bright” one? Thanks!
Love these fun little Pallet Sign Ornaments! They are so fun and festive! Thanks for sharing! PINNED!
Thanks Michelle! Have a great weekend. 🙂
Do you by chance want to share the svg for these? I would love to make them this year!
Hi Jessica, I currently don’t have it available but if you let me get through this weekend I will update the post and add the images. 🙂 Have a great weekend.
Love these! 🙂 How did you attach the jute hanger to the back?
Hi Chelsea, Thanks. I just hot glued them to the back! 🙂