Supplies:
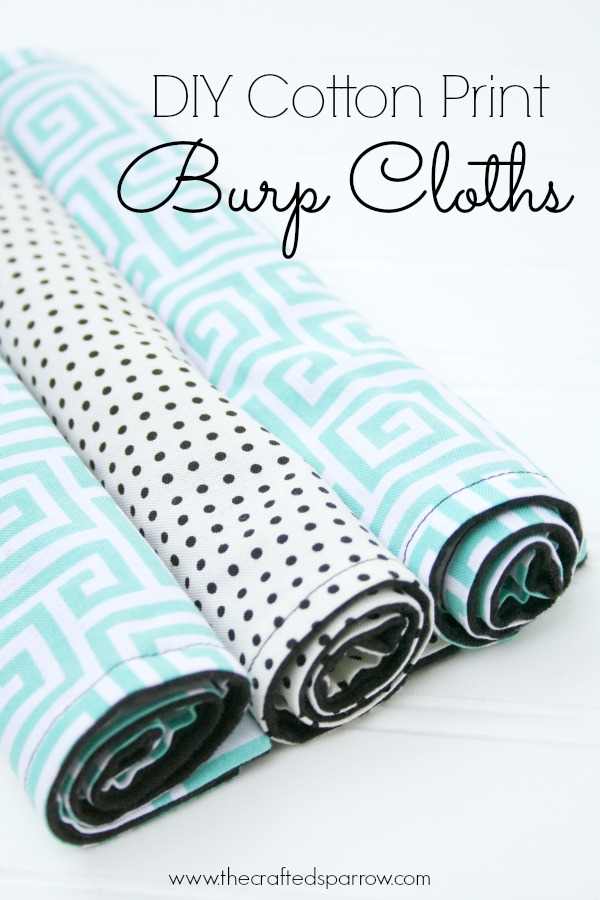
Cotton print fabric {cut each piece to 9.5 x 22″}
Solid color flannel {cut each piece to 9.5 x 22″}
Sewing machine
Rotary cutter or fabric scissors
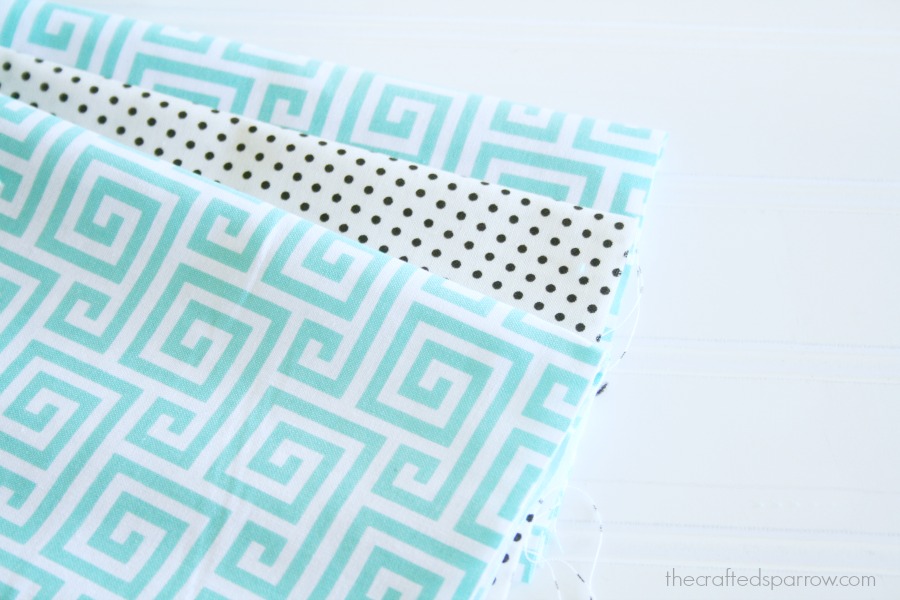
One of my favorite parts of making these burp cloths is choosing the fabric. I heart fabric in a big way, all the prints – all the colors! When choosing fabric I like to pick modern and current patterns/colors that coordinate well together. Just because we are mom’s doesn’t mean we need to have frumpy and boring baby gear.
Step 1: Pre-wash your fabric, I will admit to the whole world right now…I almost never do this! Insert gasp here! I know, I know. Please don’t follow my example, pre-wash yours!
Step 2: Once fabric is pre-washed, ironed, and cut you will need to take one piece of cotton print and one piece of your flannel fabric. Place them right sides together and pin. Another thing I don’t do is pin, sorry but for these I’ve sewn so many and can’t stand the pins. You can pin though.

Step 3: I usually have a 1/4″ seam allowance. You will sew one short end, and the two long sides together. Leaving one short end open. Once those three sides are sewn turn your fabric inside out.
Step 4: Lay flat on your ironing board, or fancy ironing towel like me {I don’t iron anything besides fabric} and iron the whole thing. Be sure to pull your sides so everything is nice and even before ironing it.

Step 5: You will now need to iron the end you didn’t sew, fold your raw edges inside so they are even. I usually fold in about 1/2″ of fabric.
Step 6: Now you will sew a top stitch around the outside edges of your burp cloth. Start at your open end. Again I usually have a 1/4″ seam allowance with the top stitch. If you really want to make it fancy you can use a double needle, but you will have to google that for yourself.
Last step for me is to sew on my fancy little labels, these are left over from my days of selling these cute little burp cloths. Now I just use them to make them look more professional.

You can order cute tags on etsy if your interested. These happen to be an old logo of mine.


When I give these as gifts I love to bundle them up with ribbon and a sweet little tag that has washing instructions. These burp cloths can be washed in cold water, stain removal spray as needed, and tumble dry normal. No need for ironing, they hold up so well. They are super absorbent, and best part is they are so compact and the perfect size for diaper bags.


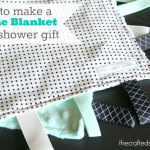
I recently posted the tutorial for this Taggie Blanket which happens to be my second favorite DIY baby gift. My youngest son loved his and wouldn’t go anywhere or sleep without it. Any new mom would love to get this with matching burp cloths.

I hope you will stop by and visit both Melanie & Lisa to see all the other posts in the series. If you want some other DIY gift ideas you can check out my post of 40+ DIY Baby Shower Gift Ideas. Tons of cuteness!


Love the color combo of these burp cloths! Such a great gift idea, thanks for being part of N2N! You’re the best.
My 3rd baby is due in April and I think I NEED to whip up some of these! Great idea~
These are gorgeous! I’m constantly making burp cloths, but have never done a cotton with a flannel! Great idea!!
These are adorable…I sooo would have loved these when my little man was a baby! Those tags are awesome!
These are such a good idea and I love the fabric! 🙂
Where did you buy the fabric.i feel like I will never find that cute if fabric in my local Joann’s…did you buy it online?
I found these fabrics at Hobby Lobby. I think they still have them even though I got them a while ago. 🙂
Do you need interfacing?
Hi Winnie. Love your name, that’s my Grandma’s name and I don’t hear it too often. And to answer your question, no you don’t need interfacing. The flannel is actually pretty absorbent and does a great job cleaning up spit up messes. 🙂 Have a super day.
Thanks for the easy instructions!!