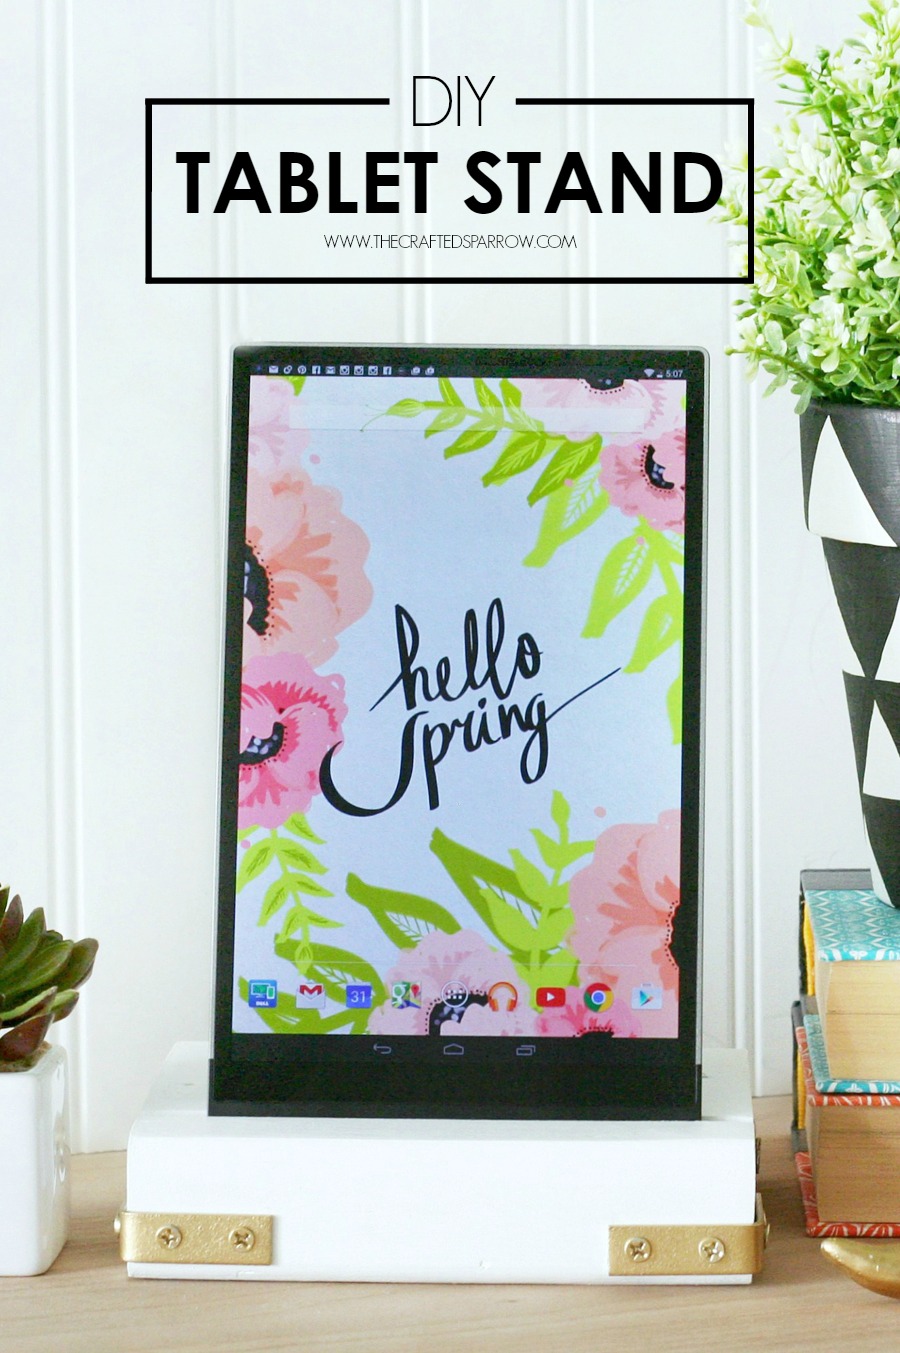
 On any given day, you can find either my boys, me or the hubby on a tablet. Whether it’s searching Pinterest for inspiration or a recipe, checking social media or watching a movie we use them a lot. I thought I would be nice to have a pretty stand for my tablet instead of relying on a case as a stand, sometimes they just don’t make the cut when you’re trying to watch a movie. This DIY Tablet Stand is so easy to make, you’re going to love it.
Supplies:
Pine 2 x 6″ board
Table or miter saw
Electric sander / sandpaper
Paint or stain
Paint brush
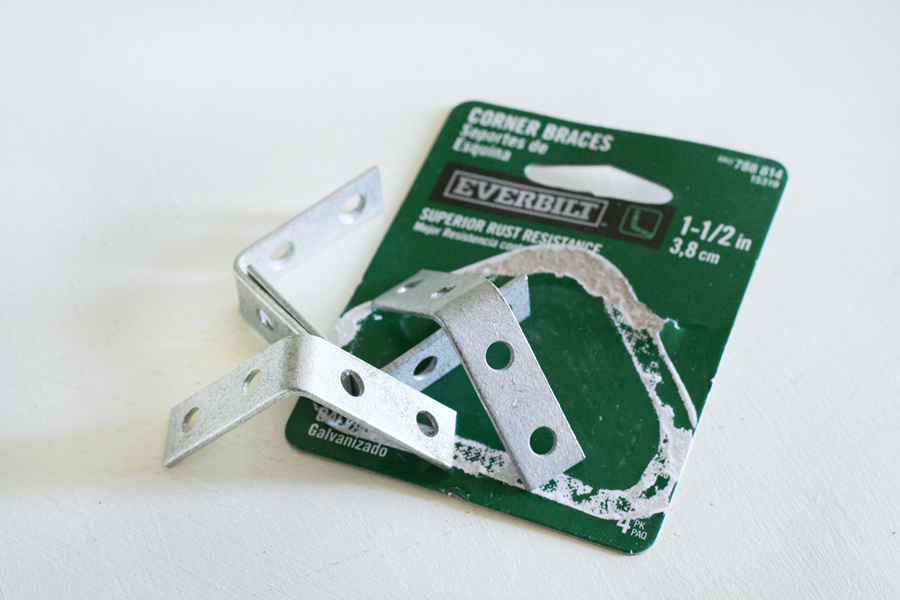
1 – 1/2″ Corner braces
1/2″ Wood screws
Rustoleum gold spray paint
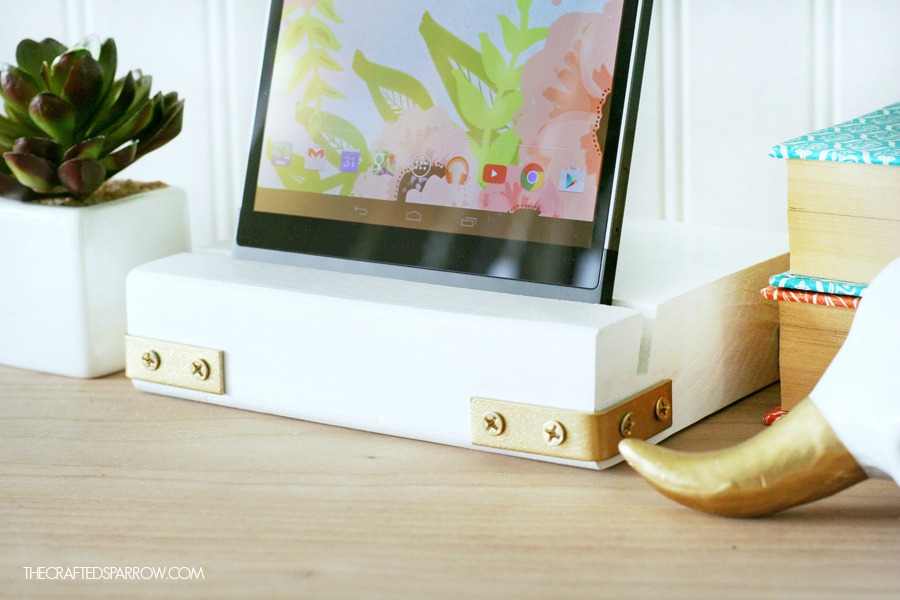
I wanted this DIY Tablet Stand to have a simple design, but with just a touch of something special. So it needed some gold hardware. I could have bought brass corner braces, but I like to save money and I went with galvanized instead. A little bit of my favorite Rustoleum Metallics gold spray paint and they were perfect.
Tip: To paint screws, poke them into the top of a piece of cardboard. Spray, let dry.
I did have to purchase separate 1/2″ wood screws since the original screws were too long and would run into each other when I drilled them on to the corners of my tablet stand.
 A huge thank you to my brother for helping me with his saw skills, I’m terrified of them and he always loves to help me out.
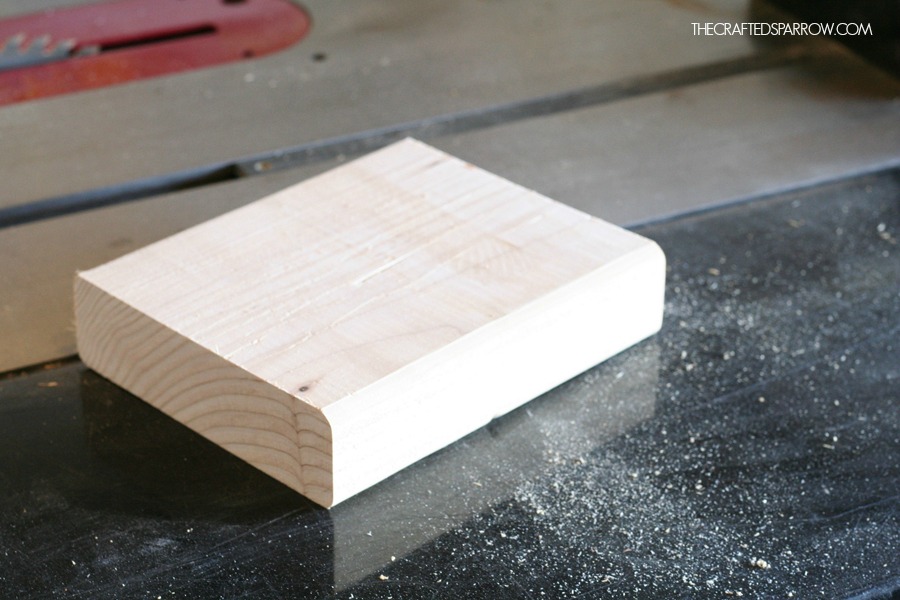
Start by cross-cutting your 2 x 6″ pine board to 6″ wide with your table saw or miter saw.
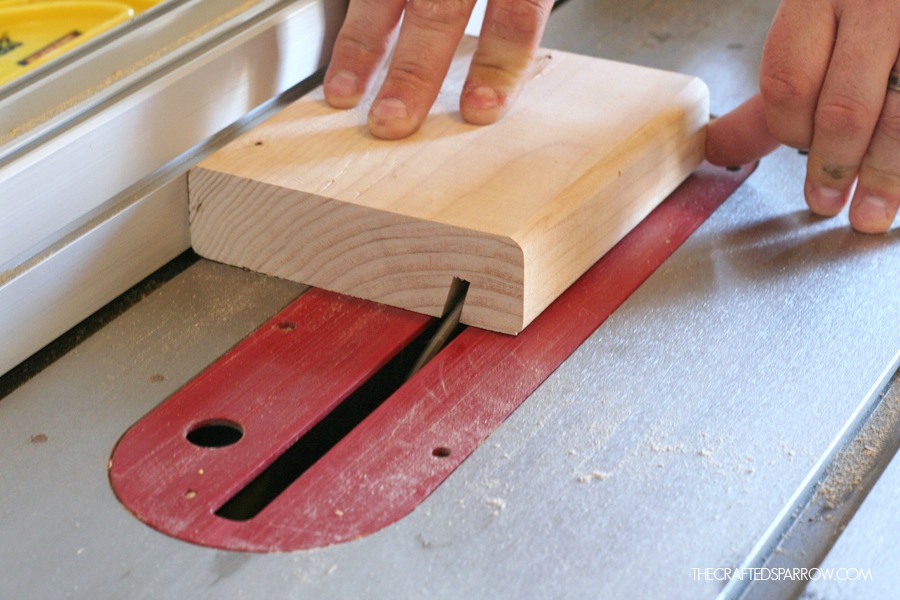
 Turn your blade to a 15-degree angle with a 3/4″ rise.
Lay your wood top side down to cut the angled slot where your tablet will sit.
For the first pass cut at 4″ in with your fence. Then a second cut with an additional 1/8″ cut. Finally for the third cut with an additional 1/8″ cut. Your final cut should be an angled 1.25 x 6″ cut. Your total cut may be different than mine, you will need to measure your tablet before you begin. I have the new Dell Venue 8-7840 and it happens to be the World’s thinnest tablet. Be sure to check out the newest Intel Tablets.
Give your entire block a good sanding with either your electric sander or a sanding block to smooth everything out.
 Next I used my favorite BB Frosch Chalk Paint Powder to give my DIY Tablet Stand a fresh coat of white paint. I mixed it with some DecoArt acrylic paint I had on hand. I just had to cut down the powder recipe for the 2oz of paint. Typically it’s 2 TB of powder per 8oz of flat paint. Even though it didn’t nearly take anywhere close to using 2oz of paint I just mixed the whole thing and figured I’d use the rest on another project. So I ended up mixing 2oz of paint with 1-1/2 tsp of powder and approximately 1-1/4 tsp of water. Mix your powder and water first making a donut glaze consistently, then add paint and mix well.
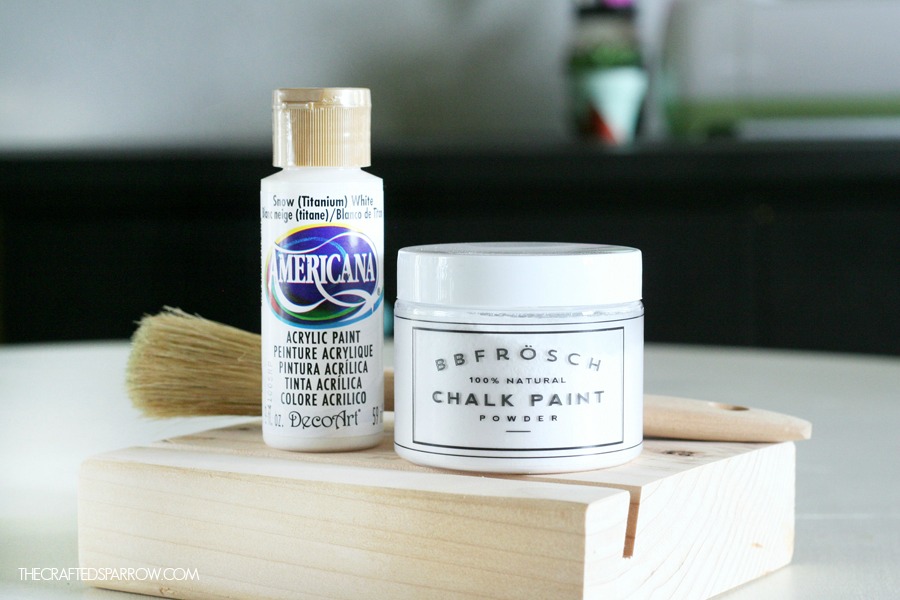 Paint 2-3 coats of paint. Let dry and give it a quick light sanding to even out the finish.
Optional: You can choose to seal your stand after painting, I chose to use a clear wax. Otherwise, you can leave it alone. You can also stain your stand. A fun reclaimed wood finish with the galvanized corner braces would be perfect too.
Once everything is dry, mark where your gold corner braces will go.
Drill your corner braces in place with the short gold painted wood screws.
 See how great it looks with my new Dell Venue 8-7840?! It’s so pretty.

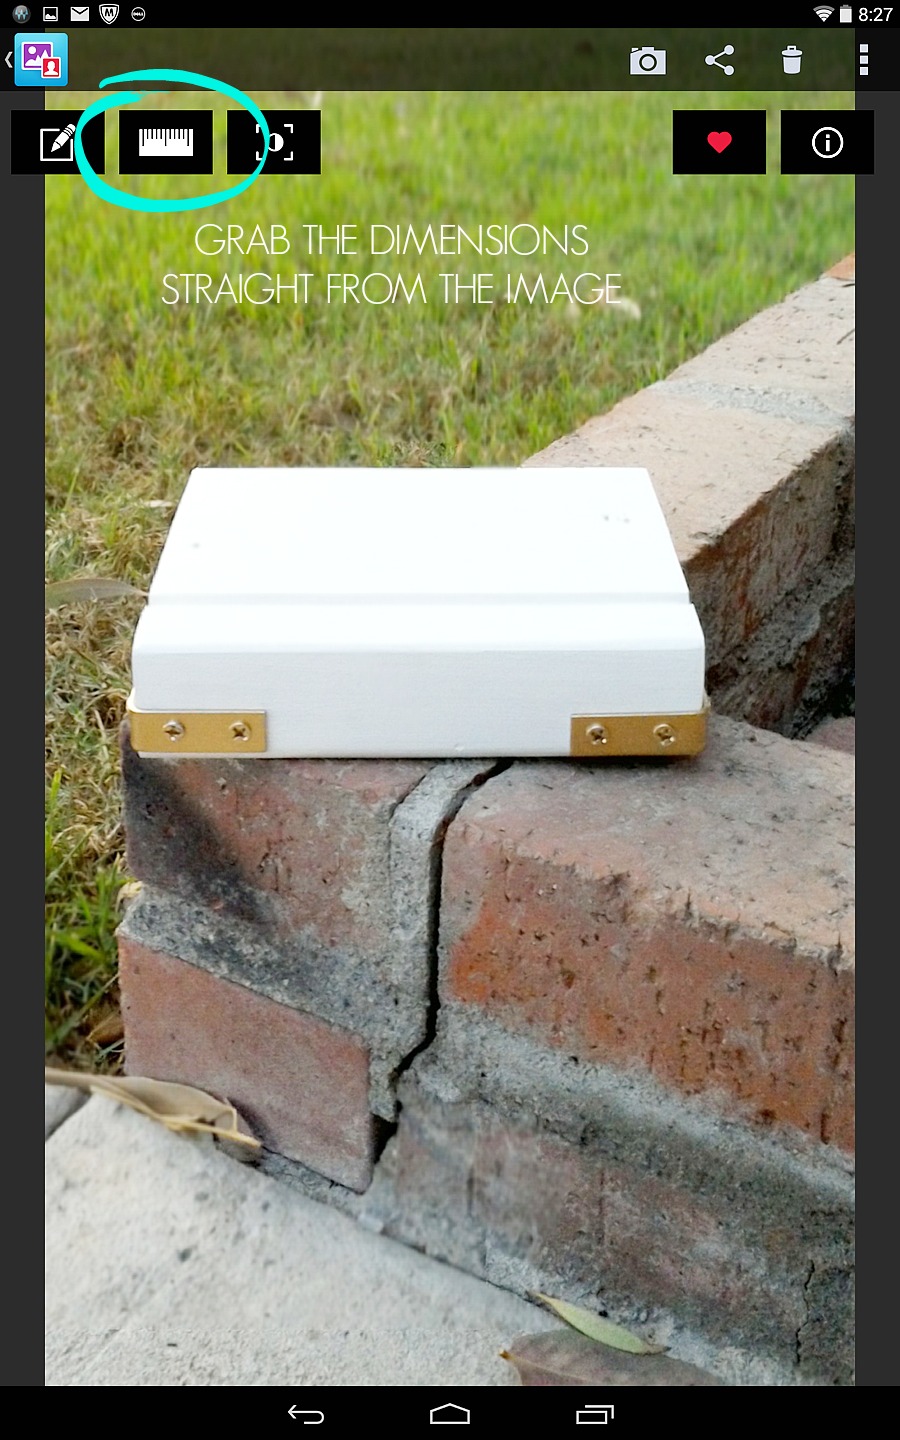
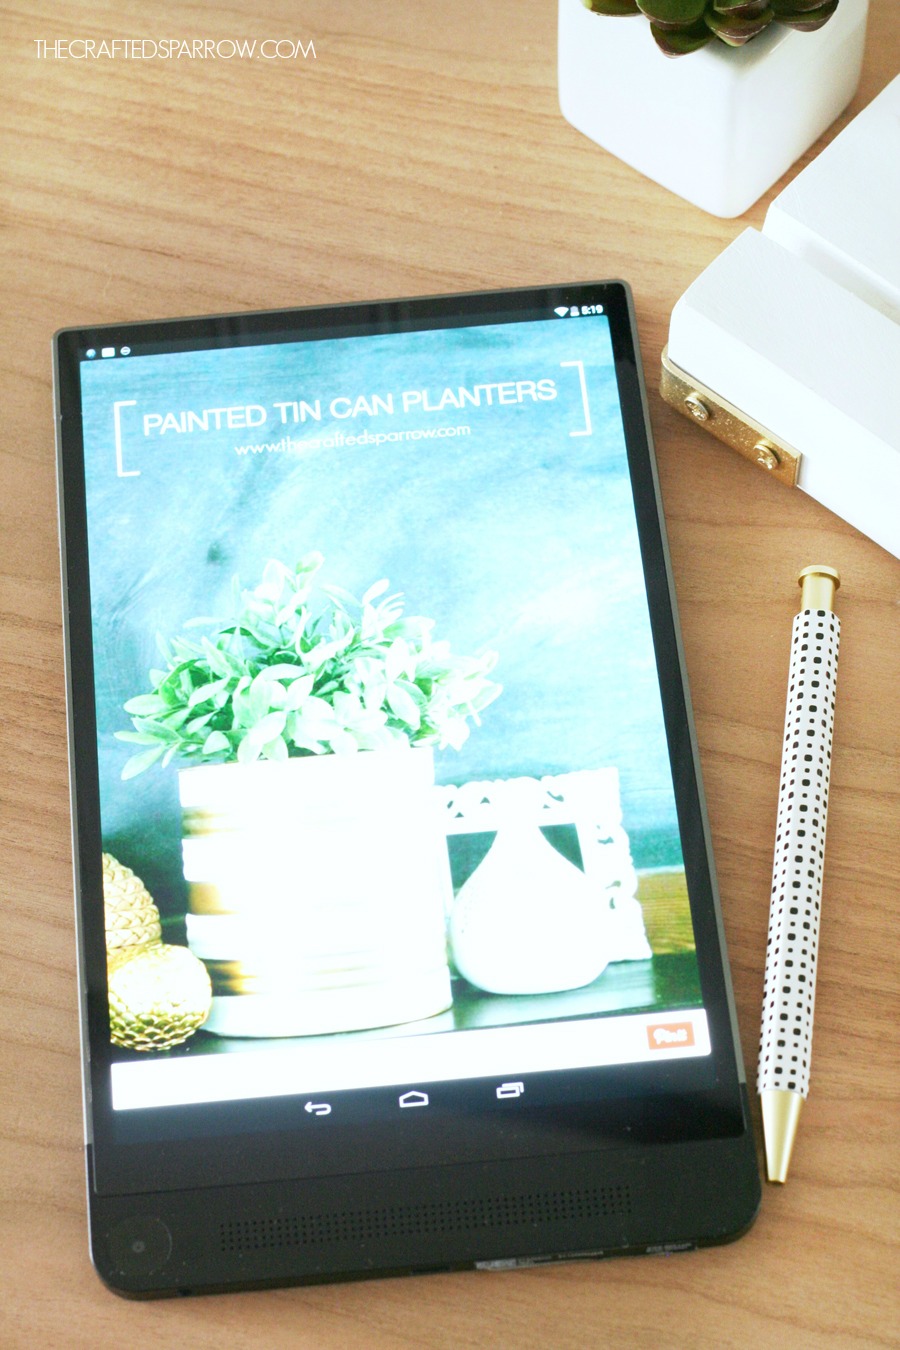 Can I just brag about this Dell Venue Intel RealSense tablet for a second, I’m in love with it. Not only is it the World’s thinnest tablet and so light, it has the ability to change the focus after the photo is taken. It can edit the depth of a photo – thereby changing it’s color. Plus you can measure an object straight from within the photo using the ruler icon. It also has an amazing long-lasting battery life, which is super nice since my boys are constantly playing games on my tablets. This tablet is a must buy, I’d buy it again in a heartbeat.
 #spon: I’m required to disclose a relationship between our site and Intel. This could include the Intel Corporation providing us w/content, product, access or other forms of payment.


[…] DIY Tablet Stand […]